Azure Batch service is one of great choice to run your program in parallel.
In this article, I will explain how to use container as your batch program.
Why container?
The service is nothing special but uses bunch of VMs as compute pool and run your program in parallel. This means that these VM should have all required components to run your application.
You can register "applications" to share the components between VMs, but it still require some pre-work.
If you have too much dependencies or version conflict between VM OS components and your program, container is the best solution to simplify the issue, as container includes everything you need and deployed as a whole.
Azure Batch with Container
If you are a programmer or prefer coding to GUI, refer to official doc: container workloads where you can find detail explanation with sample python/C# code.
I will use Azure Portal (GUI) instead as some IT folks prefer GUI, including me.
Azure resources
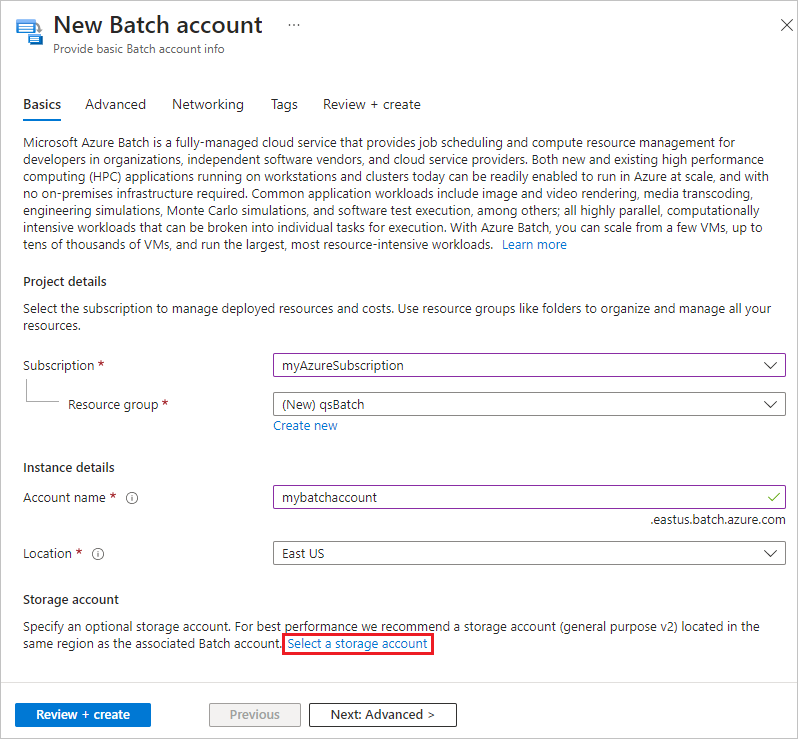
I provisioned following resources for the scenario.
- Azure Batch Account
- Azure Storage Account
- Azure Container Registry (ACR)

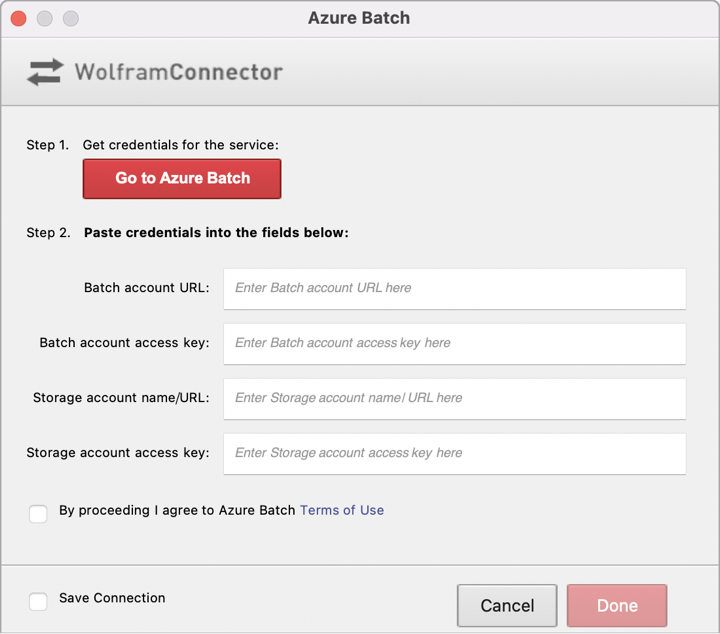
Obtain ACR key
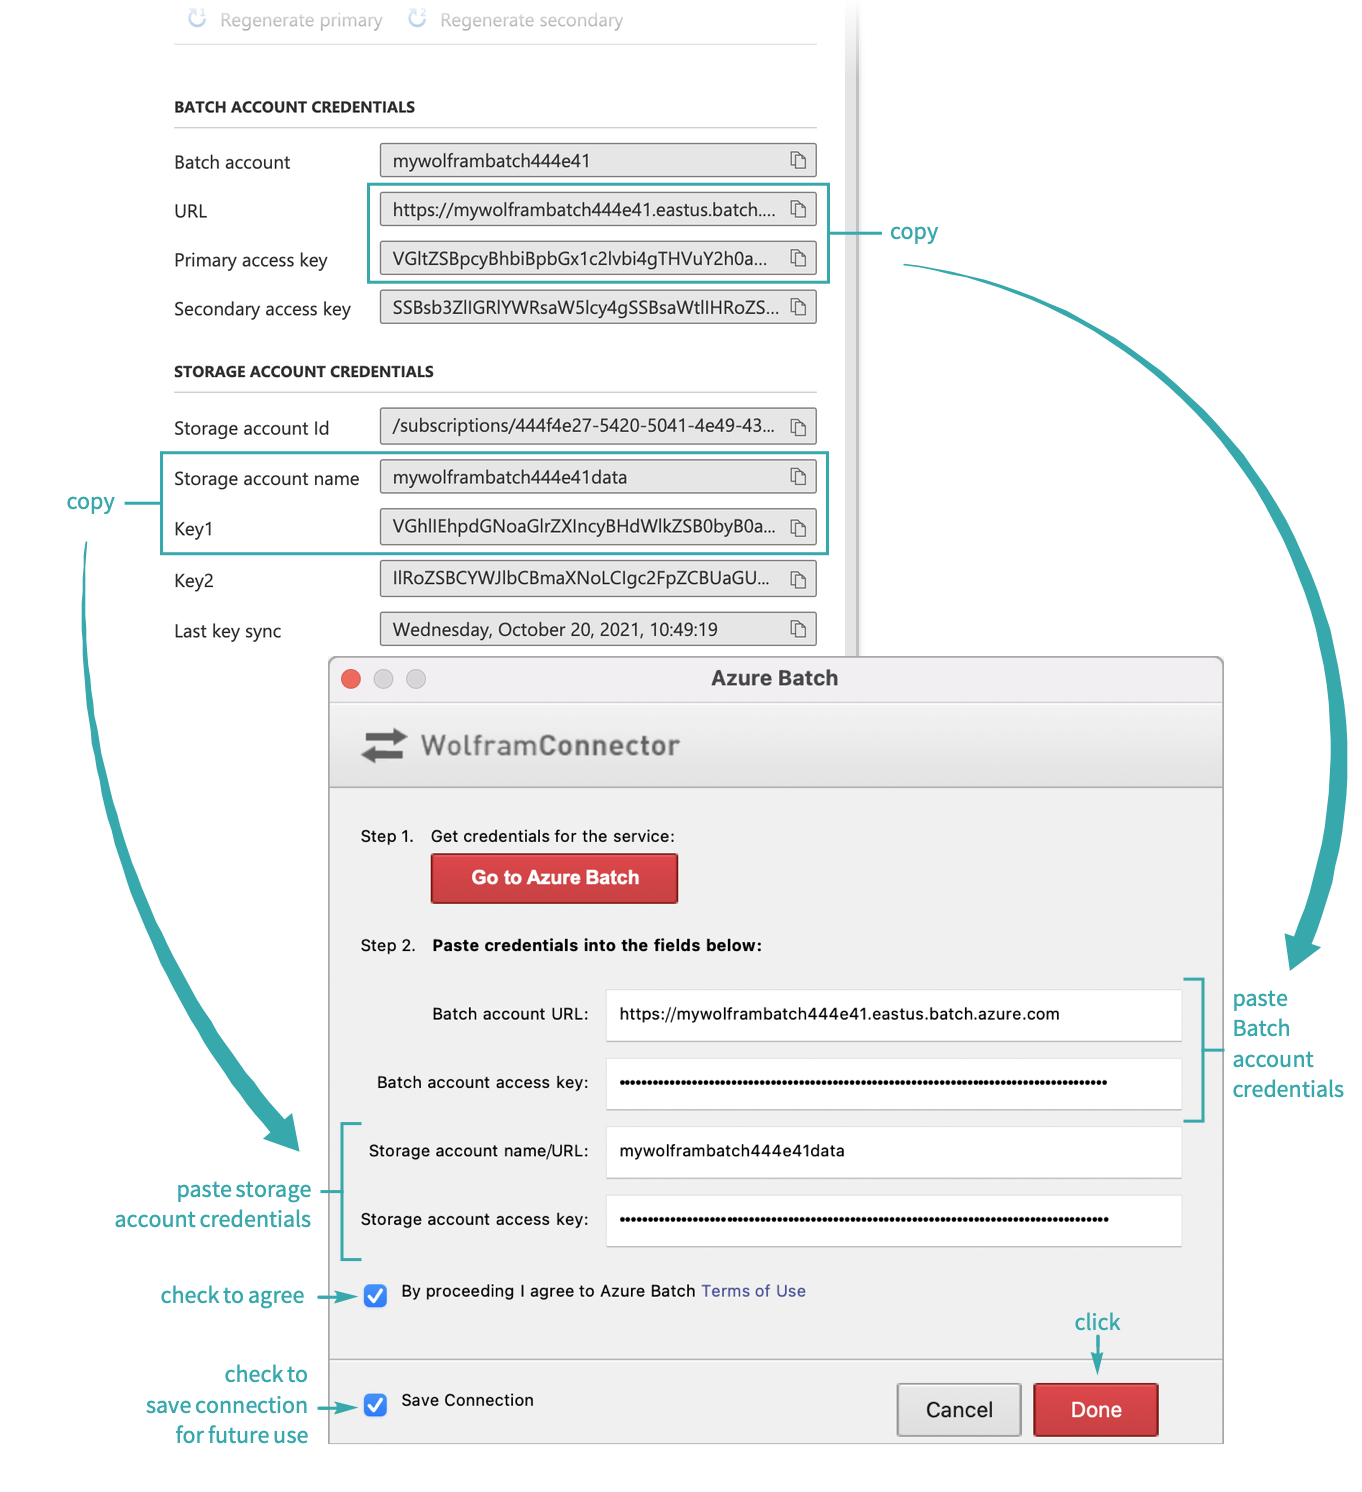
I need credential information for ACR when configuring Azure Batch pool.
1. Go to ACR | Access keys and enable "Admin user".

2. Copy Login server, username and password for following steps.
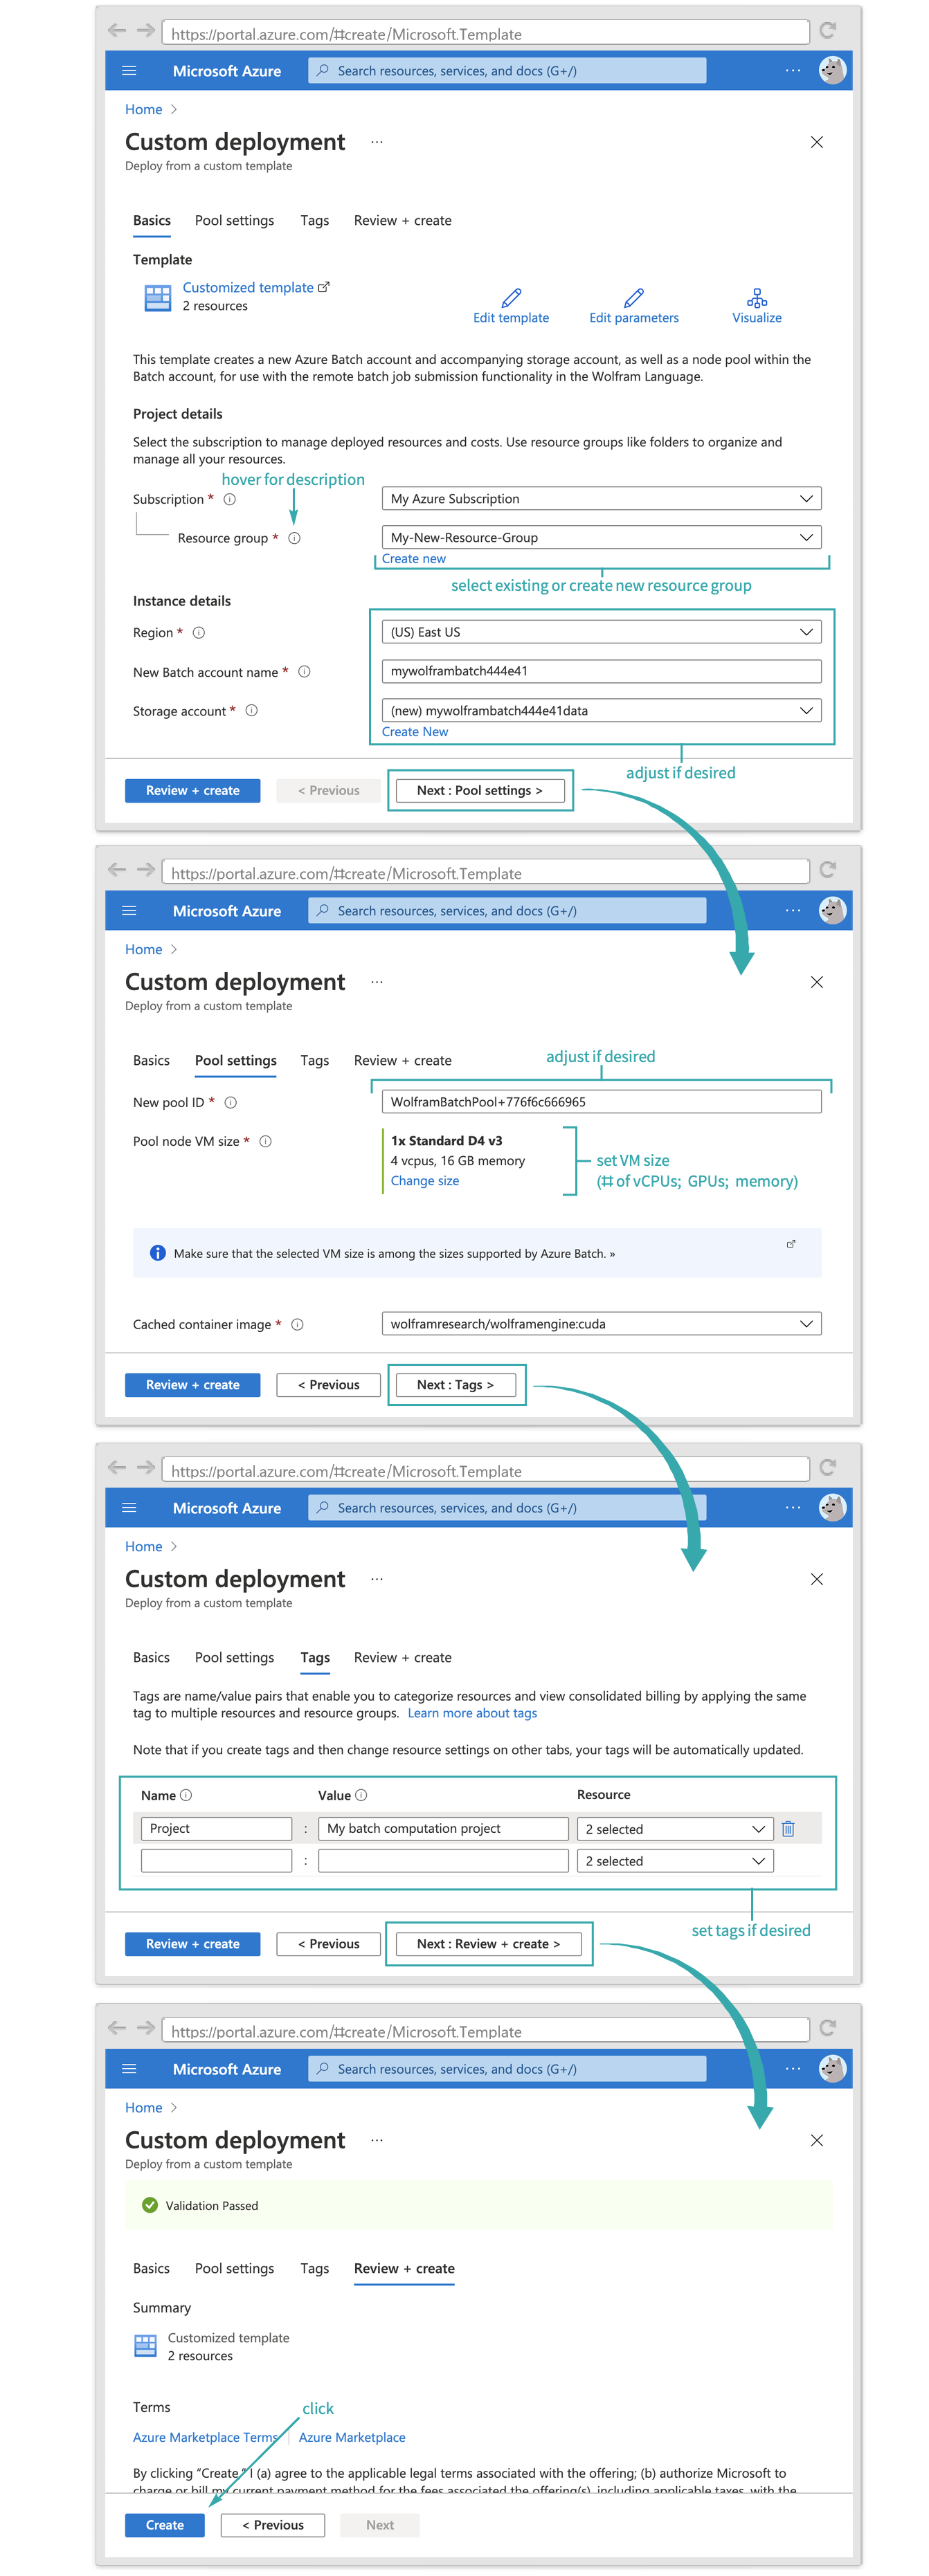
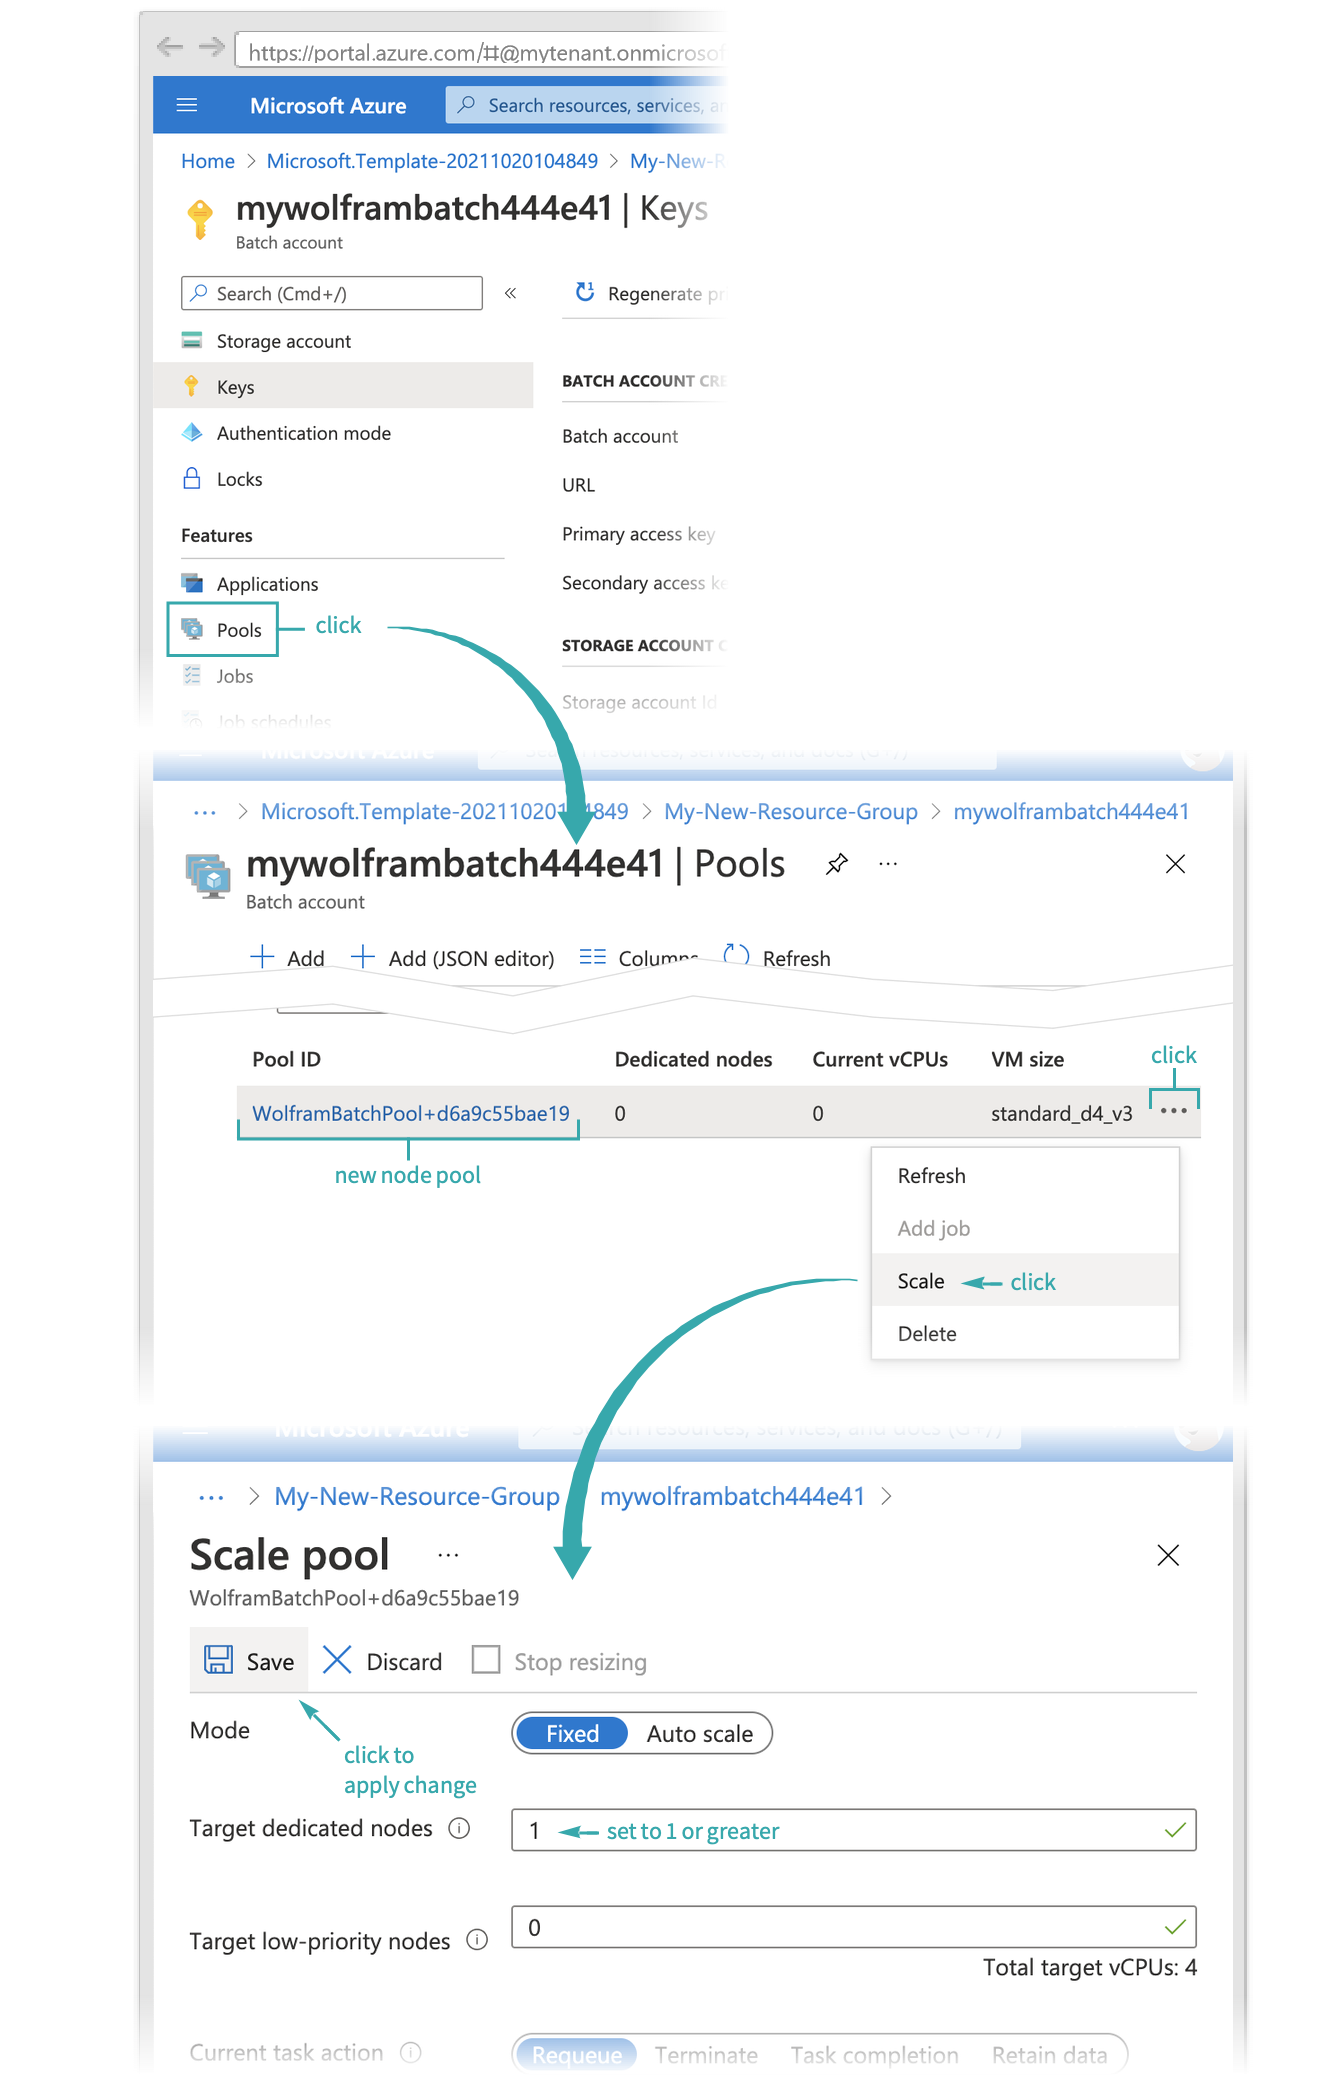
Create pool
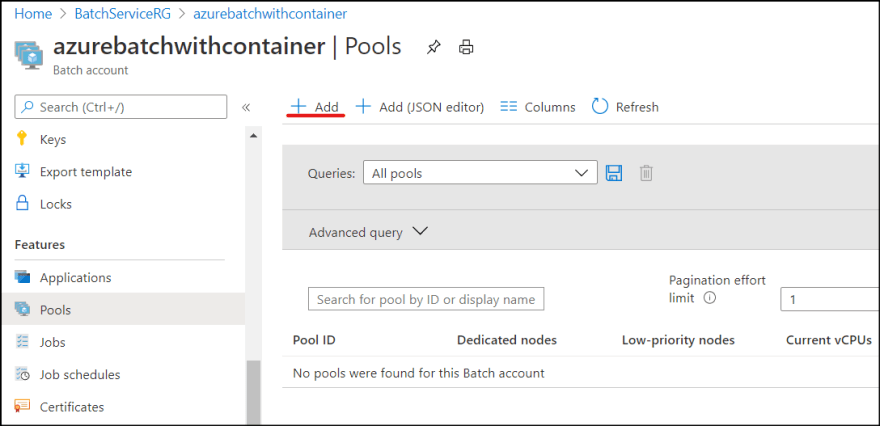
Next, create Azure Batch computer pool with container support.
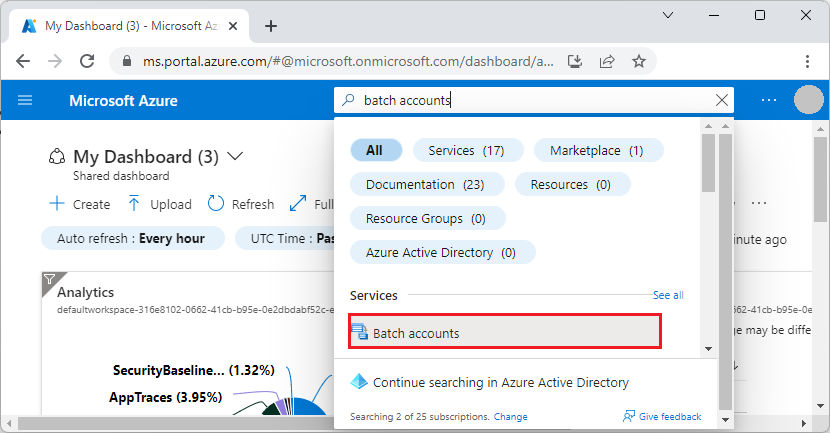
1. Go to Azure Batch service account | Pools and click "Add".
2. Start creating pool. You can use different image as long as it supports container. See here for more detail.
I configured with following settings.
- Pool ID: You can set whatever you want
- Image Type: Market place
- Publisher: microsoft-azure-batch
- Offer: ubuntu-server-container
- SKU: 16-04-lts
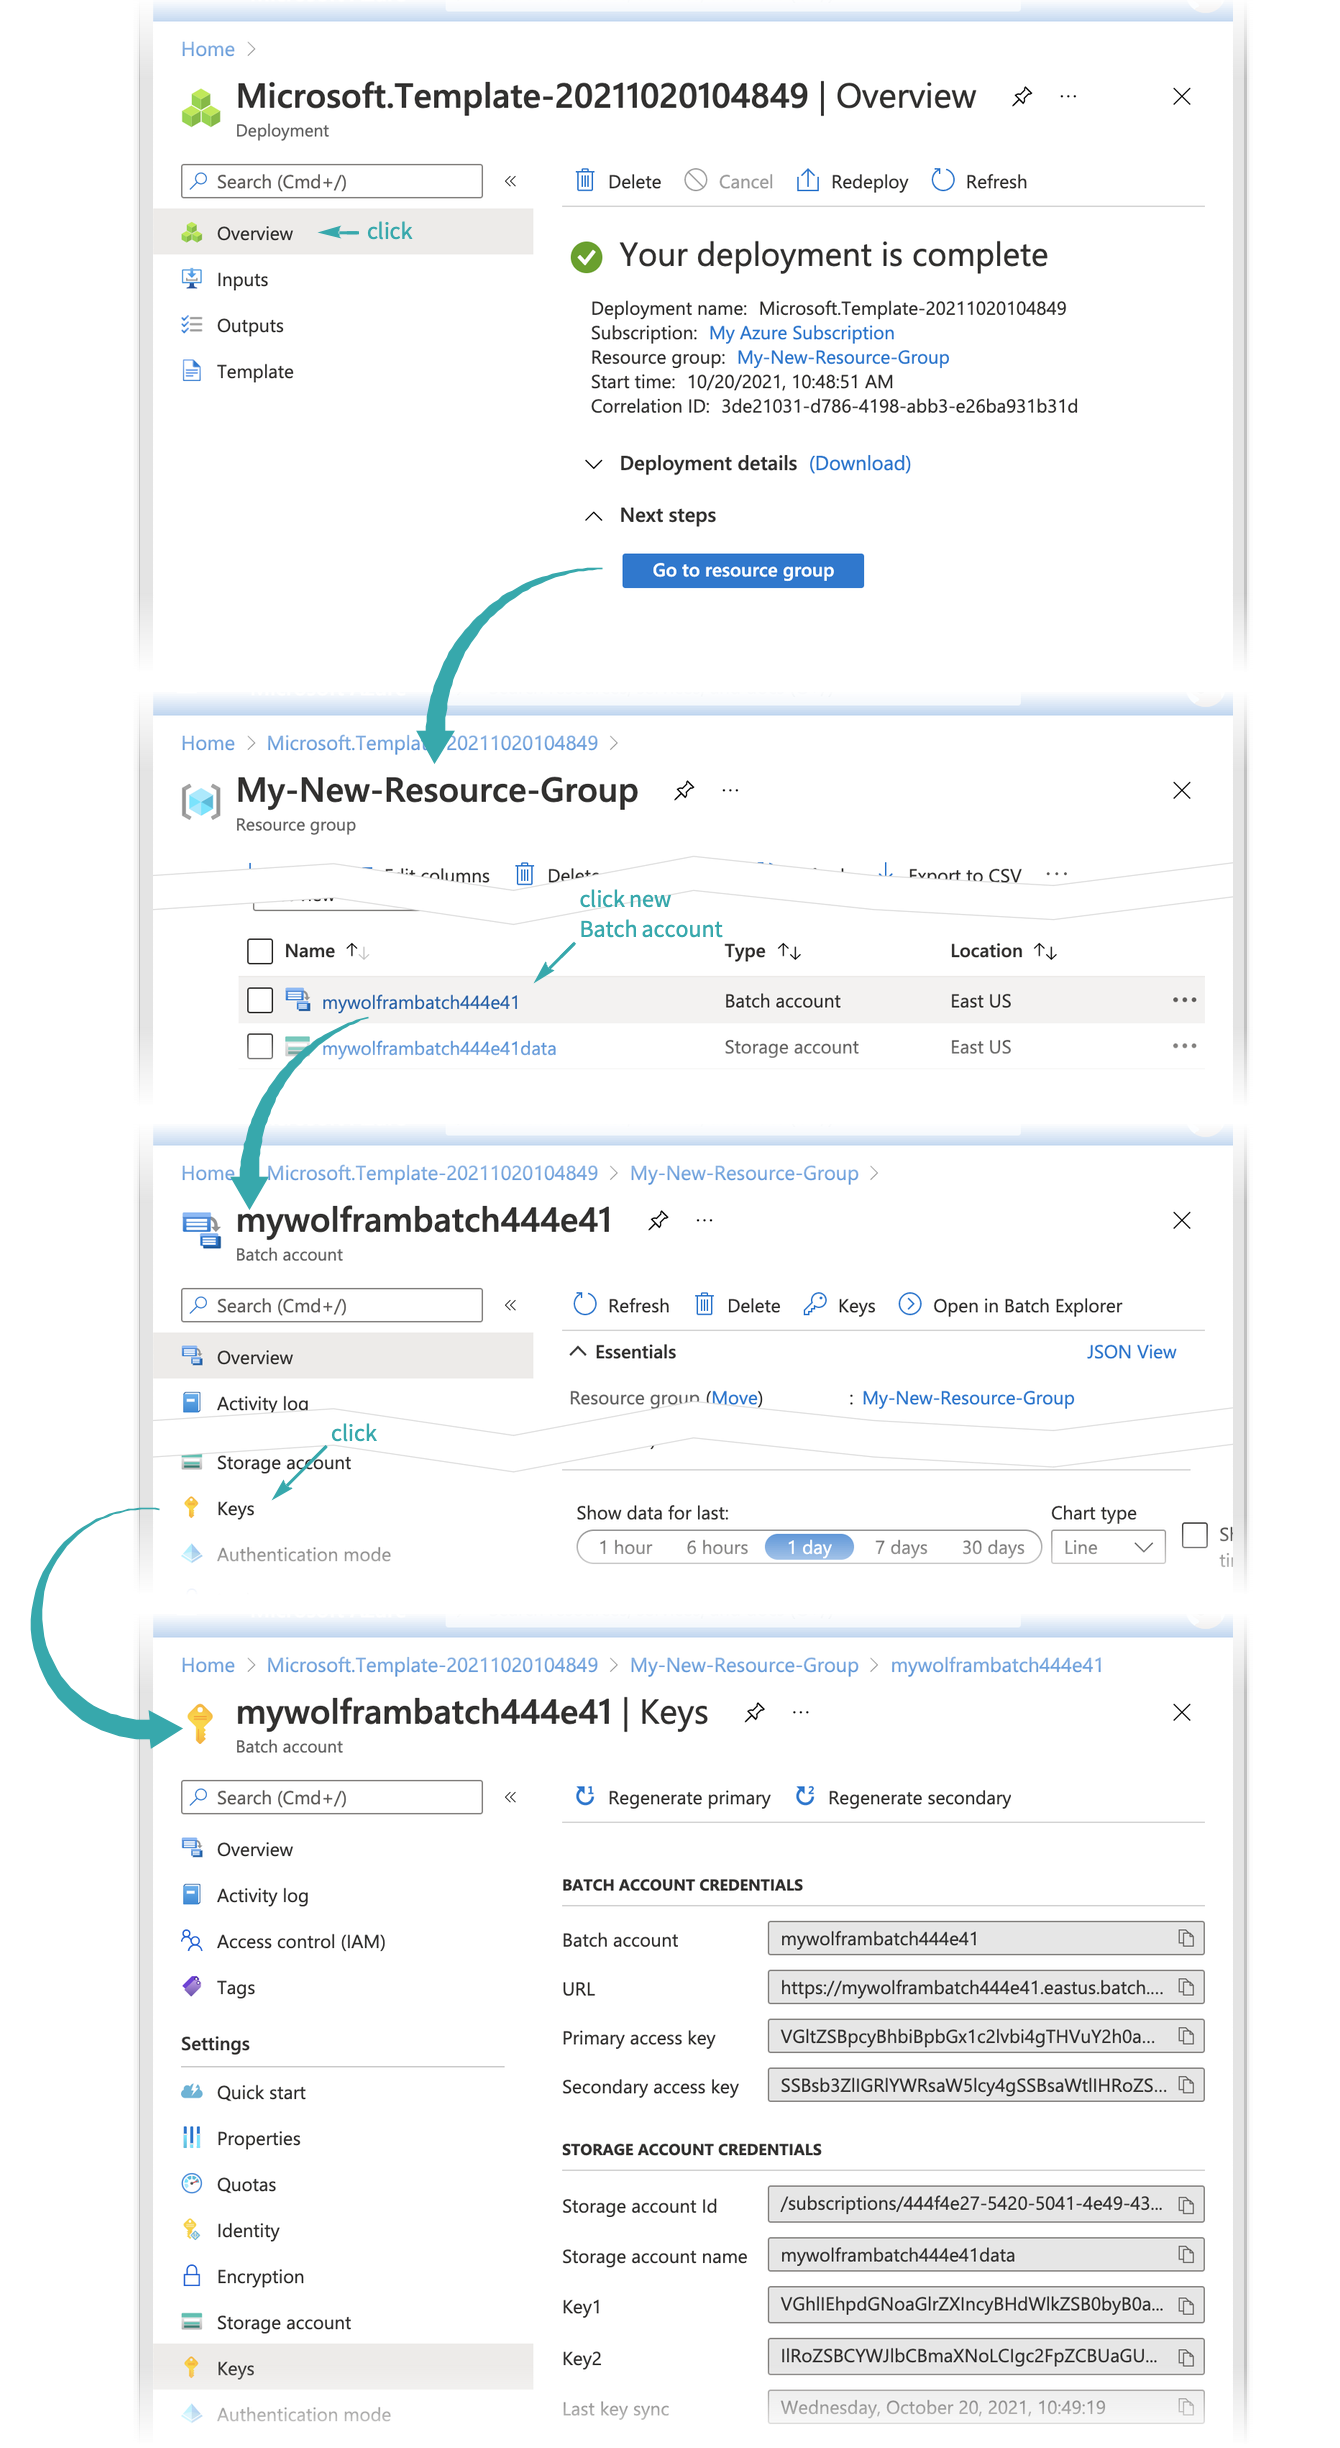
3. At "Container configuration, select Custom and click "Container registries".

4. Click "Add" and enter registry information obtained above and click "OK".
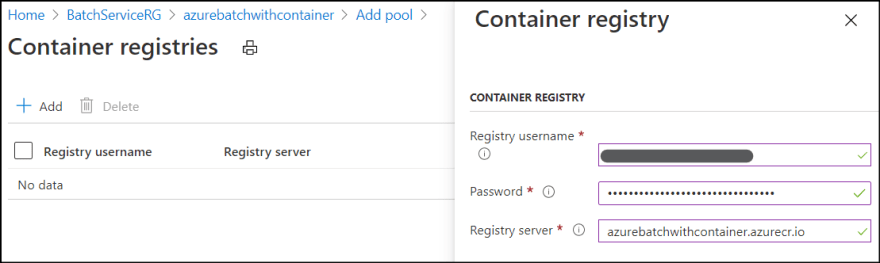
5. Select added registry and click "Select".
6. I keep "Container image names" blank for now as I don't have any image yet.
7. Select VM size and Scale to fit your needs. I selected the smallest VM with 2 low-priority nodes.

Register image
Let's add a sample program and push to ACR. You can create any docker image as you want. As I am C# developer, I created C# console app which simply print "Hello" with first argument.
Program.cs
using System;

namespace samplebatch
{
    class Program
    {
        static void Main(string[] args)
        {
            Console.WriteLine($"Hello {args[0]}");
        }
    }
}
Dockerfile
FROM mcr.microsoft.com/dotnet/core/runtime:3.1-buster-slim AS base
WORKDIR /app

FROM mcr.microsoft.com/dotnet/core/sdk:3.1-buster AS build
WORKDIR /src
COPY ["samplebatch/samplebatch.csproj", "samplebatch/"]
RUN dotnet restore "samplebatch/samplebatch.csproj"
COPY . .
WORKDIR "/src/samplebatch"
RUN dotnet build "samplebatch.csproj" -c Release -o /app/build

FROM build AS publish
RUN dotnet publish "samplebatch.csproj" -c Release -o /app/publish

FROM base AS final
WORKDIR /app
COPY --from=publish /app/publish .
#ENTRYPOINT ["dotnet", "samplebatch.dll"]
As I don't need the container to auto run the program, I commented out ENTRYPOINT.
I run the container locally and it worked as expected.

Upload the image to ACR. I tagged it "v1".

Create job and task
Finally, create Azure Batch job and task(s).
1. Go back to Azure Batch account | Jobs and click "Add".

2. Create job.
- Job ID: any name you want
- Pool: select created pool which supports container

3. Select created job, then click "Add" in Tasks.

4. Give any name for Task ID.
5. Enter "dotnet samplebatch.dll ken" to command line. This command will be executed inside the docker container.
6. Enter full name for image name. In my case, it is "azurebatchwithcontainer.azurecr.io/samplebatch:v1".
7. Add "--rm --workdir /app" to "Container run options".
8. Click Submit.
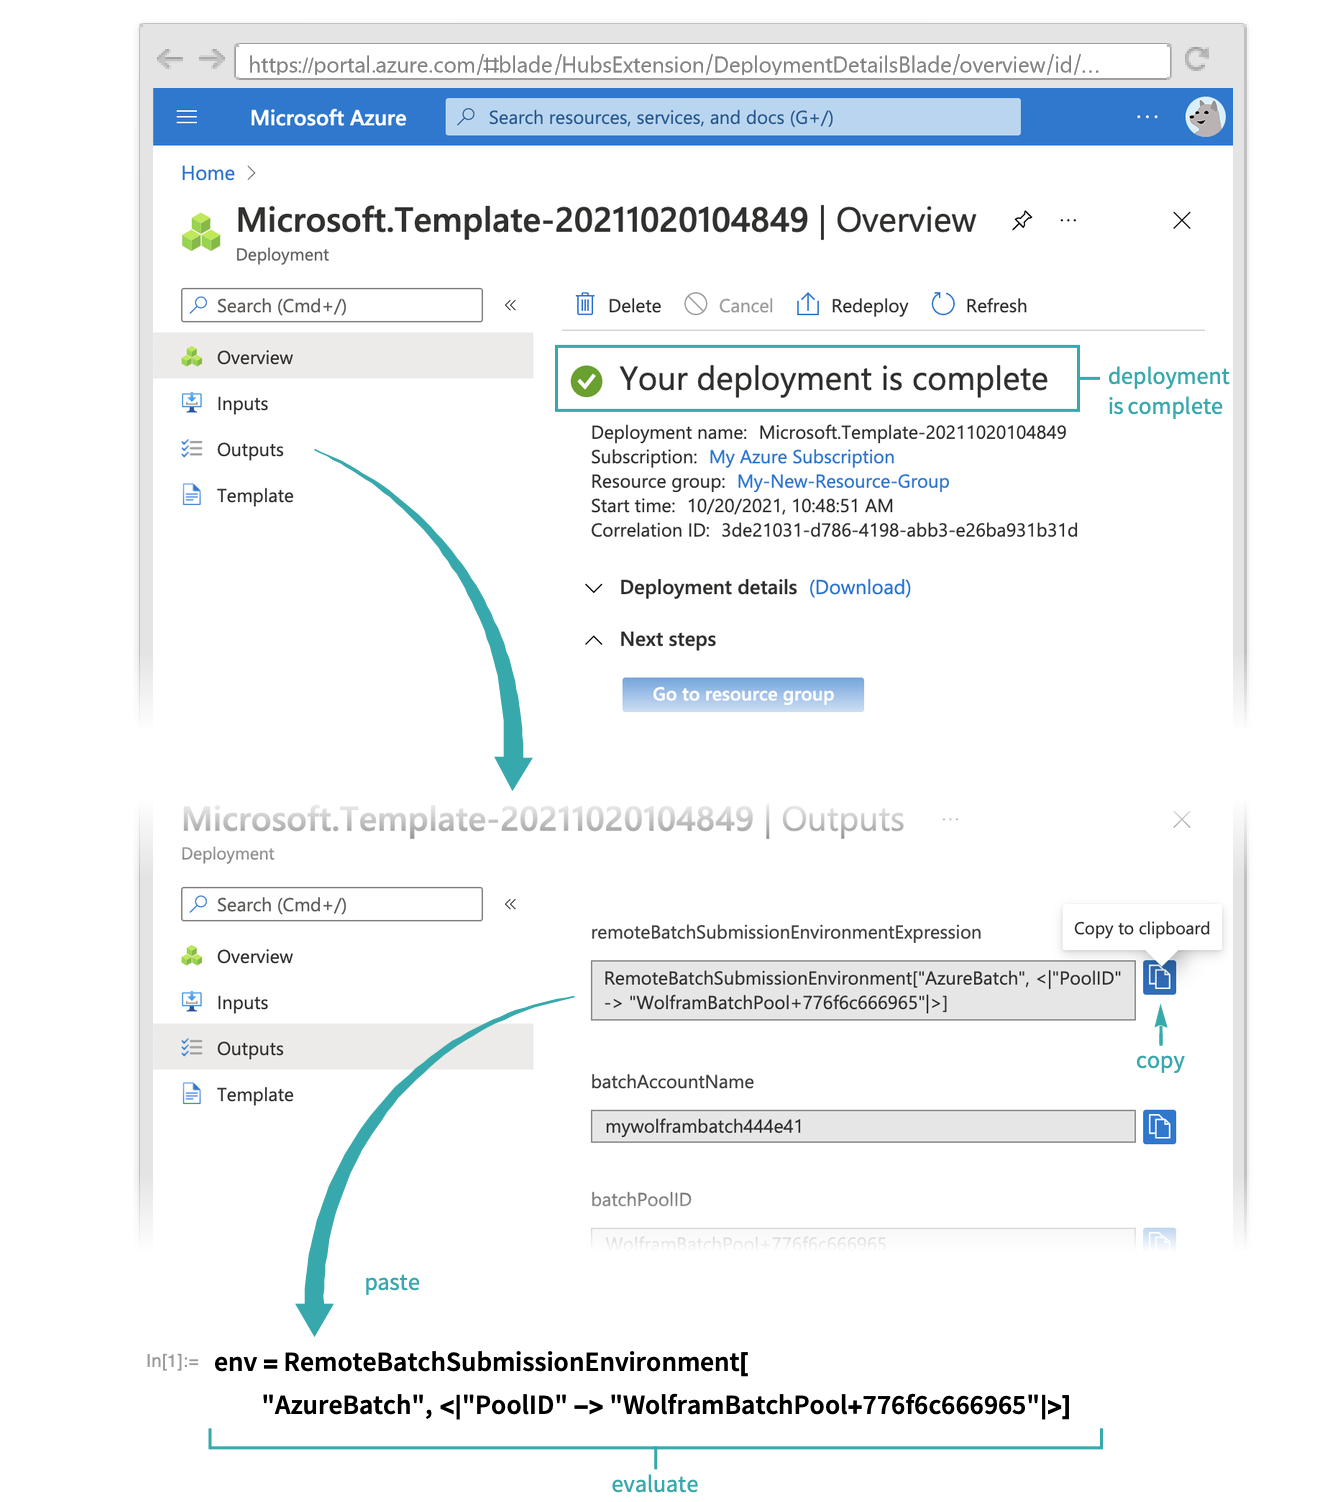
Confirm the result
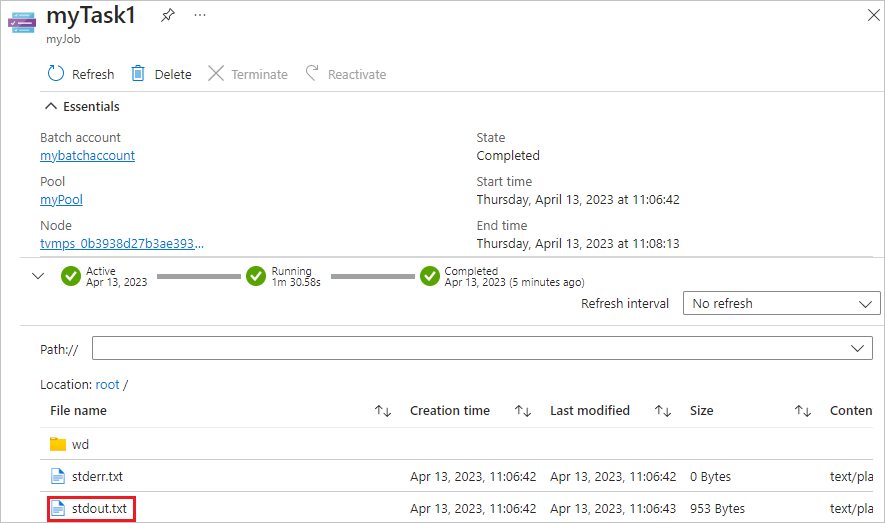
Wait until the task state becomes "Completed", then I can confirm the result.
1. Make sure the state becomes "Completed".

2. Open the task and open "stdout.txt".

3. Confirm the result.

What's important
There are several places I stuck when I tried this.
- image name needs to be full name including server name and tag.
- command line is executed inside the docker image.
- if working directory is not root, use --workdir option.
- When update code, use different tag, otherwise the pool won't download the new one as it reuses cache if name is same.
You can still use "ENTRYPOINT" and just specify argument if you want, so just play with it to figure out.
Additional information
In addition to what I explained here, you can use other Azure Batch features.
- Resource files
- Environment Settings
- Saved output files, etc.
The main difference is that you need to use container support pool and specify **Container settings" when creating task.
Access Resource files
When I assign resources files into a task, these files are stored in Node, not in the container. But when Azure Batch service instantiate the container instance, it maps all folder in the node to the container.
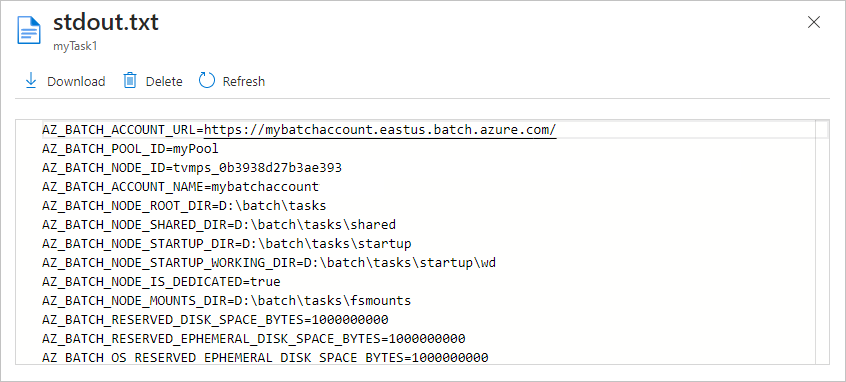
You can find environment variables by following tutorial here and the wd folder path is stored in AZ_BATCH_TASK_WORKING_DIR environment variable.
For example, I can read all text files from the directory.
var batch_working_dir = Environment.GetEnvironmentVariable("AZ_BATCH_TASK_WORKING_DIR");
// Read text file
foreach (string file in Directory.EnumerateFiles(batch_working_dir, "*.txt", SearchOption.AllDirectories))
{
    string contents = File.ReadAllText(file);
    Console.WriteLine(contents);
}
Same apply for other files and outputs.
Summary
If you struggle with pre-task and environment setup for Azure Batch, try container to simplify it!