Thursday, 23 May 2024

Deploy Azure Cloud Services (extended support) using the Azure portal


Deploy Azure Cloud Services (extended support) using the Azure portal


Before you begin

Review the deployment prerequisites for Cloud Services (extended support) and create the associated resources.

Deploy a Cloud Services (extended support)

  1. Sign in to the Azure portal.

  2. Using the search bar located at the top of the Azure portal, search for and select Cloud Services (extended support).

    Image shows the all resources blade in the Azure portal.

  3. In the Cloud Services (extended support) pane select Create.

    Image shows purchasing a cloud service from the marketplace.

  4. The Cloud Services (extended support) creation window will open to the Basics tab.

    • Select a Subscription.
    • Choose a resource group or create a new one.
    • Enter the desired name for your Cloud Service (extended support) deployment.
      • The DNS name of the cloud service is separate and specified by the DNS name label of the public IP address and can be modified in the public IP section in the configuration tab.
    • Select the region to deploy to.

    Image shows the Cloud Services (extended support) home blade.

  5. Add your cloud service configuration, package and definition files. You can add existing files from blob storage or upload these from your local machine. If uploading from your local machine, these will be then be stored in a storage account.

    Image shows the upload section of the basics tab during creation.

  6. Once all fields have been completed, move to and complete the Configuration tab.

    • Select a virtual network to associate with the Cloud Service or create a new one.
      • Cloud Service (extended support) deployments must be in a virtual network. The virtual network must also be referenced in the Service Configuration (.cscfg) file under the NetworkConfiguration section.
    • Select an existing public IP address to associate with the Cloud Service or create a new one.
      • If you have IP Input Endpoints defined in your Service Definition (.csdef) file, a public IP address will need to be created for your Cloud Service.
      • Cloud Services (extended support) only supports the Basic IP address SKU.
      • If your Service Configuration (.cscfg) contains a reserved IP address, the allocation type for the public IP must be set tp Static.
      • Optionally, assign a DNS name for your cloud service endpoint by updating the DNS label property of the Public IP address that is associated with the cloud service.
    • (Optional) Start Cloud Service. Choose start or not start the service immediately after creation.
    • Select a Key Vault
      • Key Vault is required when you specify one or more certificates in your Service Configuration (.cscfg) file. When you select a key vault we will try to find the selected certificates from your Service Configuration (.cscfg) file based on their thumbprints. If any certificates are missing from your key vault you can upload them now and click Refresh.

Image shows the configuration blade in the Azure portal when creating a Cloud Services (extended support).

  1. Once all fields have been completed, move to the Review and Create tab to validate your deployment configuration and create your Cloud Service (extended support).

How to use Azure DevOps to publish Cloud Services (extended support)


How to use Azure DevOps to publish Cloud Services (extended support)


Azure Cloud Services (extended support) is a new ARM-based deployment model for Azure Cloud Services. Cloud Services (extended support) has the primary benefit of providing regional resiliency along with feature parity with Azure Cloud Services deployed using Azure Service Manager. It also offers some ARM capabilities such as role-based access and control (RBAC), tags, policies, and supports deployment templates.

For classic Cloud Services, the Azure DevOps built-in pipeline task AzureCloudPowerShellDeployment@1 can help manage the CI/CD progress easily. But the task for Cloud Services (extended support) isn't ready yet.

Main points for publishing Cloud Services (extended support)

  1. Define some variables for the storage account to prepare for the ARM template deployment.
  2. Use the VSBuild@1 - Visual Studio build v1 task to build the cloud service project and output the cloud service package file or configuration file.
  3. Use the built-in AzureFileCopy@5 - Azure file copy v5 task to upload a build directory to the blob storage.
  4. Use the storage reference including the access key to generate a SAS token by AzurePowerShell@5 - Azure PowerShell v5 task, and output the token to a variable that will be used in the next task.
  5. Use the output of the previous task and the value for the AzureResourceManagerTemplateDeployment@3 - ARM template deployment v3 task.

Screenshot of recently run pipelines.

Steps to publish Cloud Services (extended support)

  1. Create a starter pipeline and prepare to upload to the storage account. These variables can help with the following further operations.

    • stg_account <the name of storage account>
    • stg_key <access key of storage account>
    • stg_container <container name of storage account>
    • stg_prefix $[format('{0:yyyyMMddHHmm}', pipeline.startTime)]
    • stg_url https://$(stg_account).blob.core.windows.net/$(stg_container)
    • cscfg_name <the name of the configuration file>
    • cspkg_name <the name of the package file>
    • url_cscfg $(stg_url)/$(stg_prefix)/$(cscfg_name)
    • url_cspkg $(stg_url)/$(stg_prefix)/$(cspkg_name)

    Screenshot of variables.

  2. Use the Visual Studio build task to build your task based on your cloud service project solution file and output it to a local path on the agent. For more information, see MSBuild.

    Screenshot of a cloud service project solution file example.

    Here's the YAML file to build a project:

    yml
    # Build your project under your repository.
    # 1. Restore the NuGet dependency.
    
    - task: NuGetCommand@2
      inputs:
        command: 'restore'
        restoreSolution: '**/*.sln'
        feedsToUse: 'select'
        vstsFeed: xxx
    
    # 2. Use MS build to output the cloud service project configuration and package to the temporary location of the local agent.
    
    - task: VSBuild@1
      inputs:
        solution: '**\*.sln'
        msbuildArgs: '/t:Publish /p:DeployOnBuild=true /p:AutomatedBuild=True /p:configuration=release /p:TargetProfile=Cloud /p:PublishDir=%SYSTEM_DEFAULTWORKINGDIRECTORY%/Debug/publish'
    
    # 3. Copy the configuration and package files to the local path on the agent where any artifacts locate.
    
    - task: CopyFiles@2
      inputs:
        SourceFolder: 'Debug/publish'
        Contents: '**'
        TargetFolder: '$(Build.ArtifactStagingDirectory)'
    
    # 4. Copy the definition file to the local path on the agent where any artifacts locate.
    
    - task: CopyFiles@2
      inputs:
        SourceFolder: 'Project'
        Contents: '*.csdef'
        TargetFolder: '$(Build.ArtifactStagingDirectory)'
    
  3. Use the pipeline task AzureFileCopy@4 - Azure file copy v4 task to upload the configuration, definition, and package files of the cloud service. The task supports authentication based on Microsoft Entra ID. Authentication can be done using a service principal and managed identity. You can assign the permission Contributor and Storage Blob Data Contributor to allow the access of service connections.

    Find the service principle in the project settings:

    Screenshot of a service connection type example.

    Screenshot of role assignments.

    The YAML version of File Copy:

    yml
    # Upload the cloud service via Azure File Copy
    - task: AzureFileCopy@5
      inputs:
        SourcePath: '$(Build.ArtifactsStagingDirectory) /*'        # you can set $(Build.ArtifactsStagingDirectory) as Build part for output of the MSBuild.
        azureSubscription: xxx                                     # the name of service connector
        Destination: 'AzureBlob'
        storage: $(stg_account)                                    # variable stg_account
        ContainerName: $(stg_container)                            # variable stg_container
        BlobPrefix: $(stg_prefix)                                  # variable stg prefix is $[format('{0:yyyyMMddHHmm}', pipeline.startTime)]
        AdditionalArgumentsForBlobCopy: '--recursive'              # recursively copy the files in this directory
    

    After copying the file, you'll see the copied cloud service package in the storage.

    Screenshot of a cloud service package that's copied in the storage.

  4. Use the Azure PowerShell pipeline task to generate a temporary SAS token for five minutes.

    yml
    # Generate temp SAS token for 5 mins
    - task: AzurePowerShell@5                                                     # please make sure the Azure PowerShell contains the module of Az and AzureRm.
      name: GenerateSasToken
      inputs:
        azureSubscription: xxx                                                    # the name of service connector
        ScriptType: 'InlineScript'
        Inline: |
          $account_name = ${env:STG_ACCOUNT}
          $account_key = ${env:STG_KEY}
          $context = New-AzStorageContext -StorageAccountName $account_name -StorageAccountKey $account_key
          $sas = New-AzStorageAccountSASToken -Service Blob -ResourceType Service,Container,Object -Permission "rl" -ExpiryTime (Get-Date).AddMinutes(5) -Context $context
          $cspkg = ${env:URL_CSPKG} + $sas
          $cscfg = ${env:URL_CSCFG} + $sas
          Write-Host ("##vso[task.setvariable variable=cspkg]$cspkg")             # output $cspkg in PowerShell to global variable cspkg
          Write-Host ("##vso[task.setvariable variable=cscfg]$cscfg")             # output $cscfg in PowerShell to global variable cscfg
        azurePowerShellVersion: 'LatestVersion'
    
  5. Use the ARM template pipeline task to deploy the Cloud Services (extended support) deployment. To get the sample template, see 101-cses-multirole-rdp.

    yml
    #Azure Resource Manager template deployment
    - task: AzureResourceManagerTemplateDeployment@3                               
      inputs:
        deploymentScope: 'Resource Group'                                           # resource group level deployment
        azureResourceManagerConnection: xxx                                         # the name of service connector
        subscriptionId: xxx                                                         # subscription id of the service connector
        action: 'Create Or Update Resource Group'
        resourceGroupName: 'rg-002'                                                                               
        location: 'Australia Central'
        templateLocation: 'Linked artifact'
        csmFile: 'Template/CSES.template.json'
        csmParametersFile: 'Template/CSES.parameter.json'
        overrideParameters: '-packageSasUri $(cspkg) -configurationSasUri $(cscfg) -cloudServiceName cses4test002 -deploymentLabel deploy$(stg_prefix)' # overwrite some parameters of template.
        deploymentMode: 'Incremental'
    
  6. After the deployment is complete, you should see the following task results and the cloud service with the tag. You can change the code and configuration to update the current deployment.

    Screenshot of a task result example.

In the Azure portal, you can find the deployment results in the cloud service resource group.

Screenshot of a deployment result example.

The deployment label should be the same as the timestamp you defined.

Screenshot of a deployment label example.

Create and deploy to Cloud Services (extended support) in Visual Studio

Create and deploy to Cloud Services (extended support) in Visual Studio

Starting with Visual Studio 2019 version 16.9, you can work with cloud services by using Azure Resource Manager, which greatly simplifies and modernizes maintenance and management of Azure resources. This is enabled by a new Azure service referred to as Cloud Services (extended support). You can publish an existing cloud service to Cloud Services (extended support). For information on this Azure service, see Cloud Services (extended support) documentation.

Publish to Cloud Services (extended support)

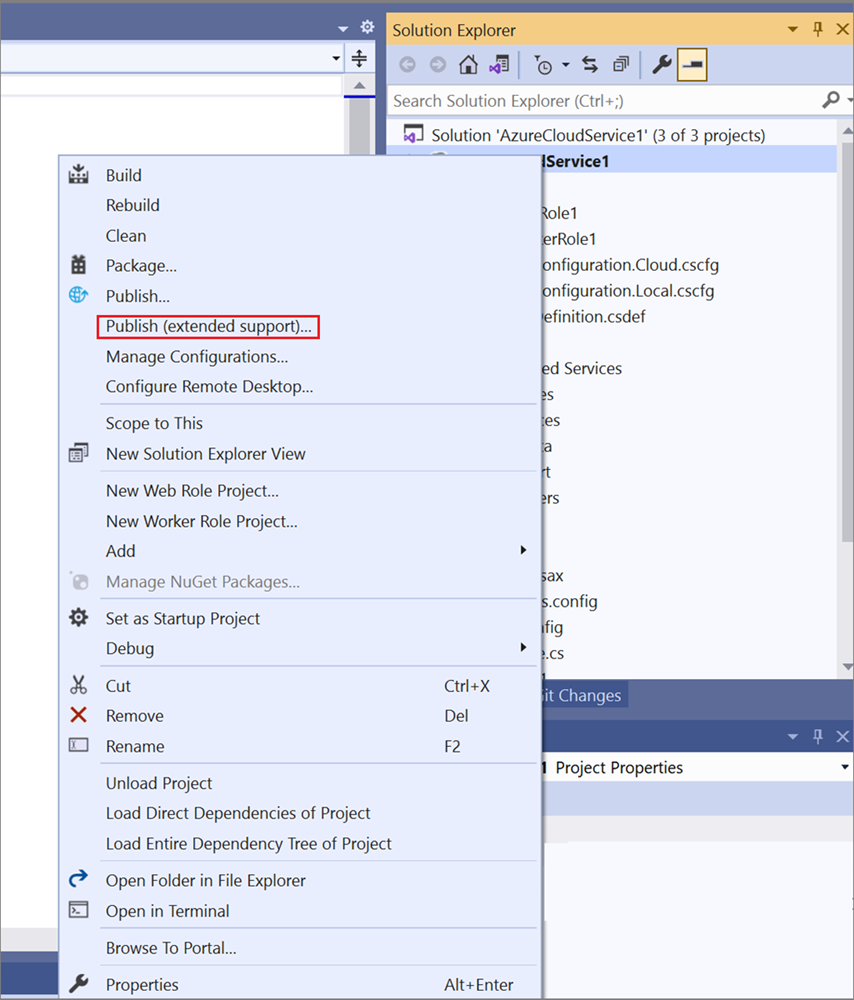
When you publish your existing Azure Cloud Service project to Cloud Services (extended support), you still retain the capability to publish to a classic Azure Cloud Service. In Visual Studio 2019 version 16.9 and later, classic cloud service projects have a special version of the Publish command, Publish (extended support). This command appears on the shortcut menu in Solution Explorer.

There are some differences when you publish to Cloud Services (extended support). For example, you are not asked if you are publishing to Staging or Production, because these deployment slots are not part of the extended support publishing model. Instead, with Cloud Services (extended support), you can set up multiple deployments, and swap deployments in the Azure portal. Although the Visual Studio tooling allows for setting this in 16.9, the swap feature will not be enabled until a later release of Cloud Services (extended support) and might result in a failure at deployment time during the Preview.

Before publishing a classic Azure Cloud Service to Cloud Services (extended support), check the storage accounts your project uses and make sure they are Storage V1 or Storage V2 accounts. The classic storage account types will fail with an error message at deploy time. Be sure to check the storage account used by diagnostics. To check the diagnostics storage account, see Set up diagnostics for Azure Cloud Services and virtual machines. If your service uses a classic storage account, you can upgrade it; see Upgrade to a general-purpose v2 storage account. For general information on the types of storage accounts, see Storage account overview.

 Note

If you are targeting .NET 4.8 with Visual Studio 2022, be sure to open the ServiceConfiguration.Cloud.cscfg file and check the value of the osFamily attribute on the ServiceConfiguration element when publishing Cloud Services (extended support). For a .NET 4.8 project, use the value osFamily="7".

To publish a classic Azure Cloud Service project to Cloud Services (extended support)

  1. Right-click on the project node in your Azure Cloud Service (classic) project and choose Publish (extended support).... The Publish wizard opens at the first screen.

    Choose Publish (extended support) from the menu

    The Publish wizard appears.

    Sign-in page

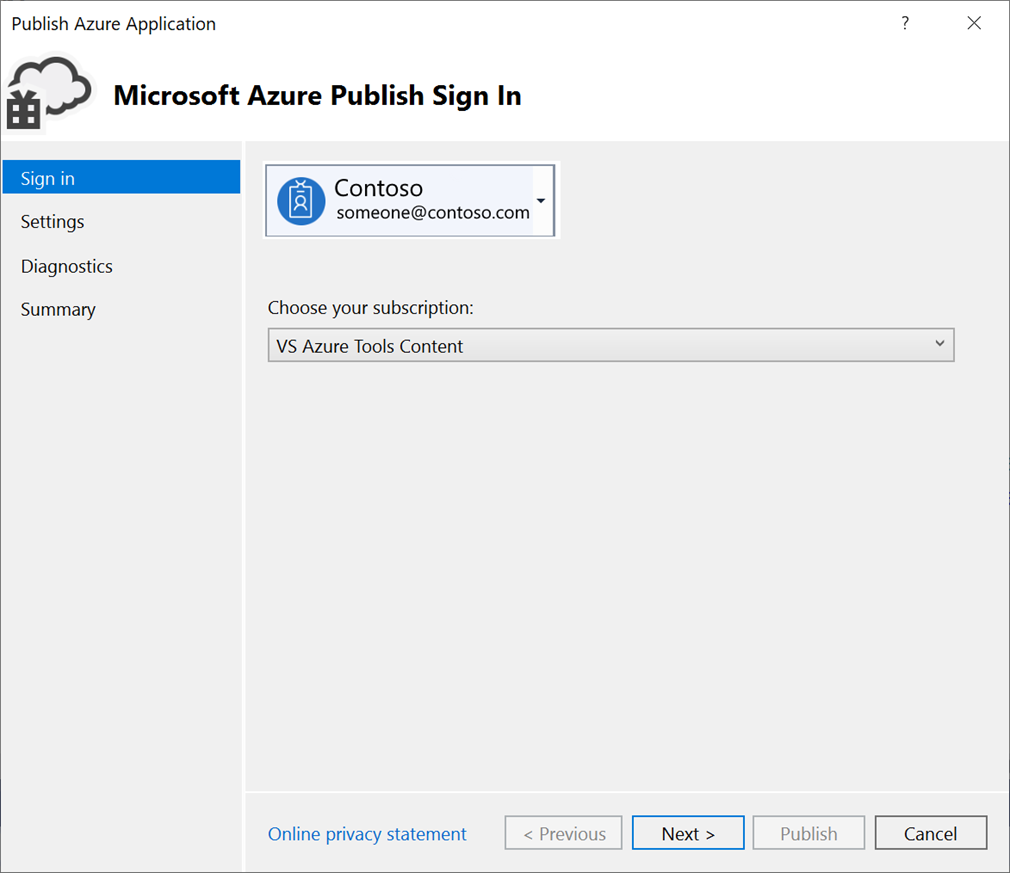
  2. Account - Select an account or select Add an account in the account dropdown list.

  3. Choose your subscription - Choose the subscription to use for your deployment.

  4. Choose Next to move to the Settings page.

    Common Settings

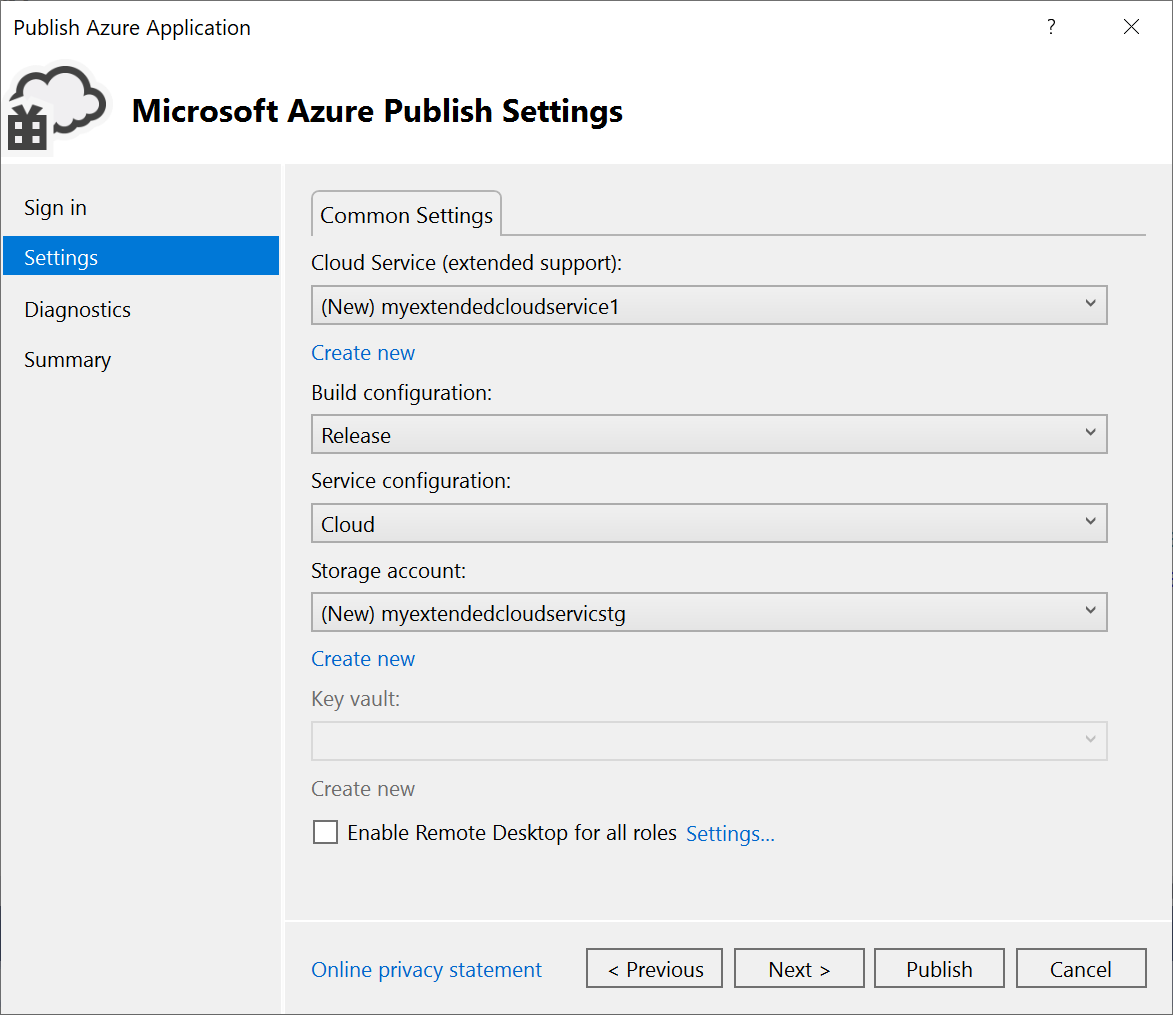
  5. Cloud Service (extended support) - Using the dropdown list, either select an existing cloud service (extended support), or select Create new, and create one. The datacenter displays in parentheses for each cloud service (extended support). It is recommended that the datacenter location for the cloud service (extended support) be the same as the datacenter location for the storage account.

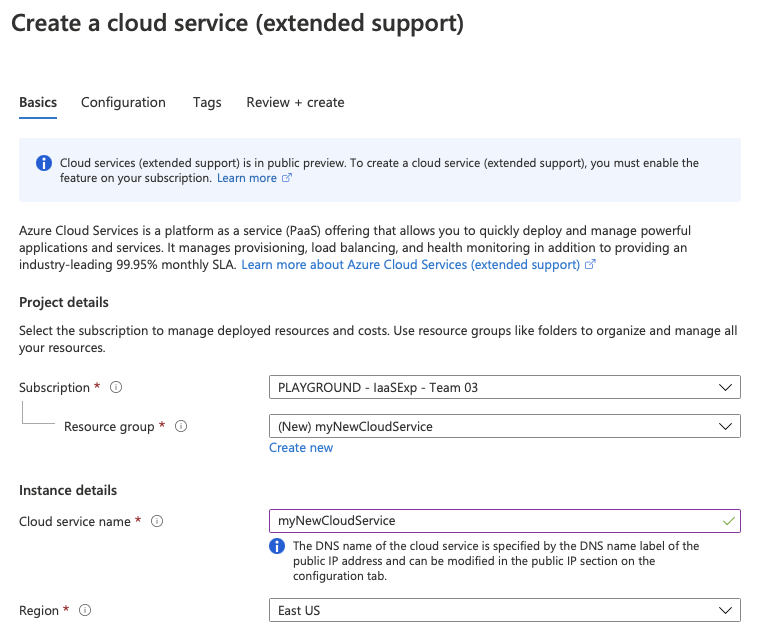
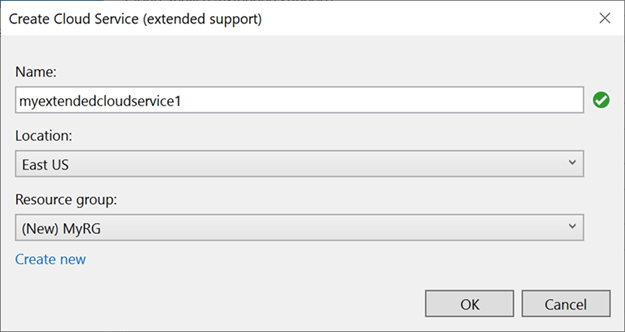
    If you choose to create a new service, you'll see the Create Cloud Service (extended support) dialog. Specify the location and resource group you want to use for the cloud service (extended support).

    Create a cloud service (extended support)

  6. Build configuration - Select either Debug or Release.

  7. Service configuration - Select either Cloud or Local.

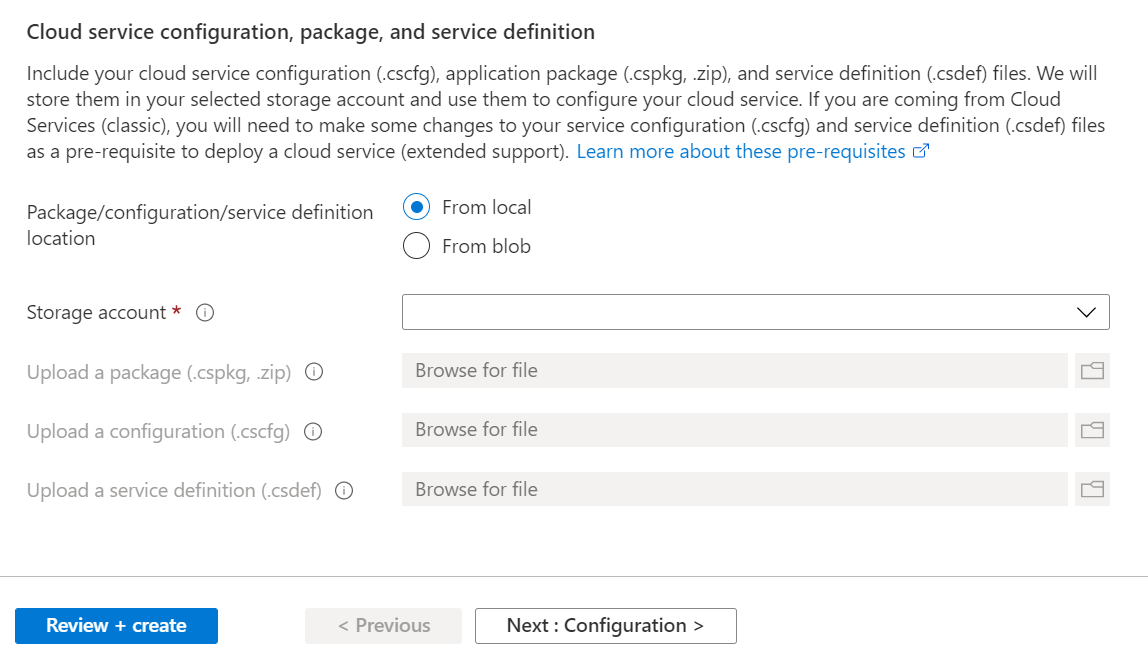
  8. Storage account - Select the storage account to use for this deployment, or Create new to create a storage account. The region displays in parentheses for each storage account. It is recommended that the datacenter location for the storage account is the same as the datacenter location for the cloud service (Common Settings).

    The Azure Storage account stores the package for the application deployment.

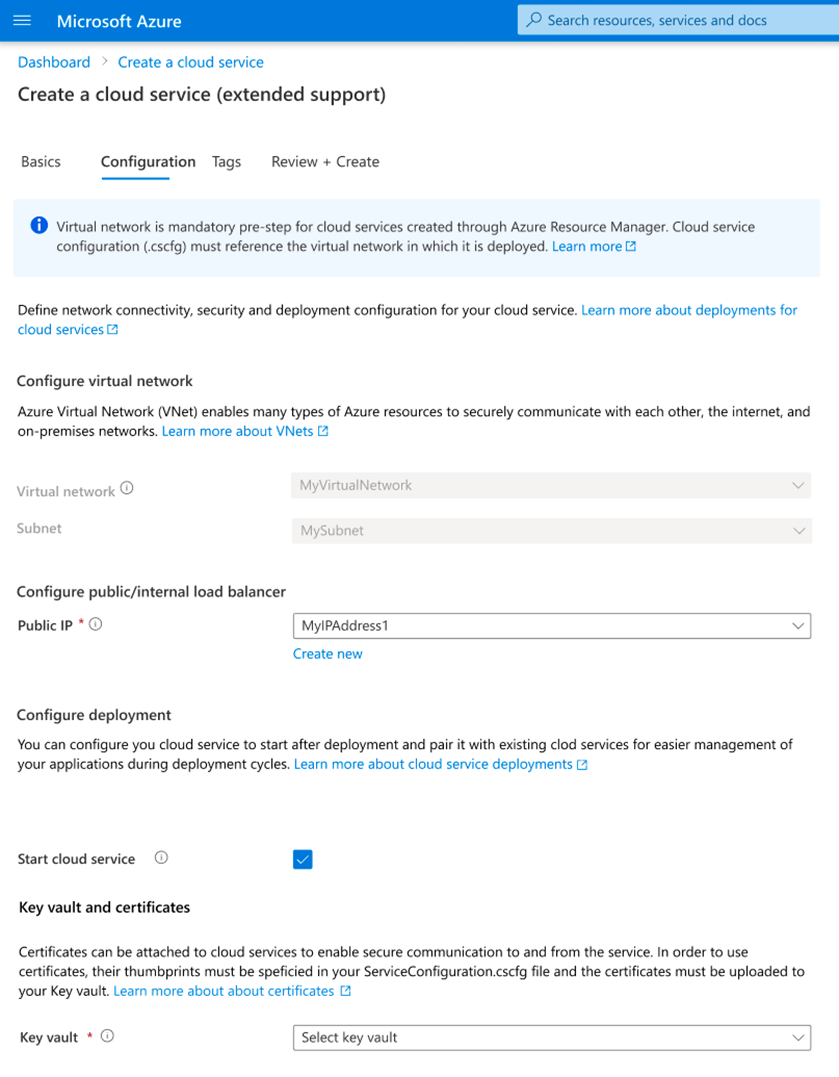
  9. Key Vault - Specify the key vault that contains the secrets for this cloud service (extended support). This is enabled if remote desktop is enabled, or if certificates are added to the configuration.

  10. Enable Remote Desktop for all roles - Select this option if you want to be able to remotely connect to the service. You'll be asked to specify credentials.

    Remote desktop settings

  11. Choose Next to move to the Diagnostics settings page.

    Diagnostics settings

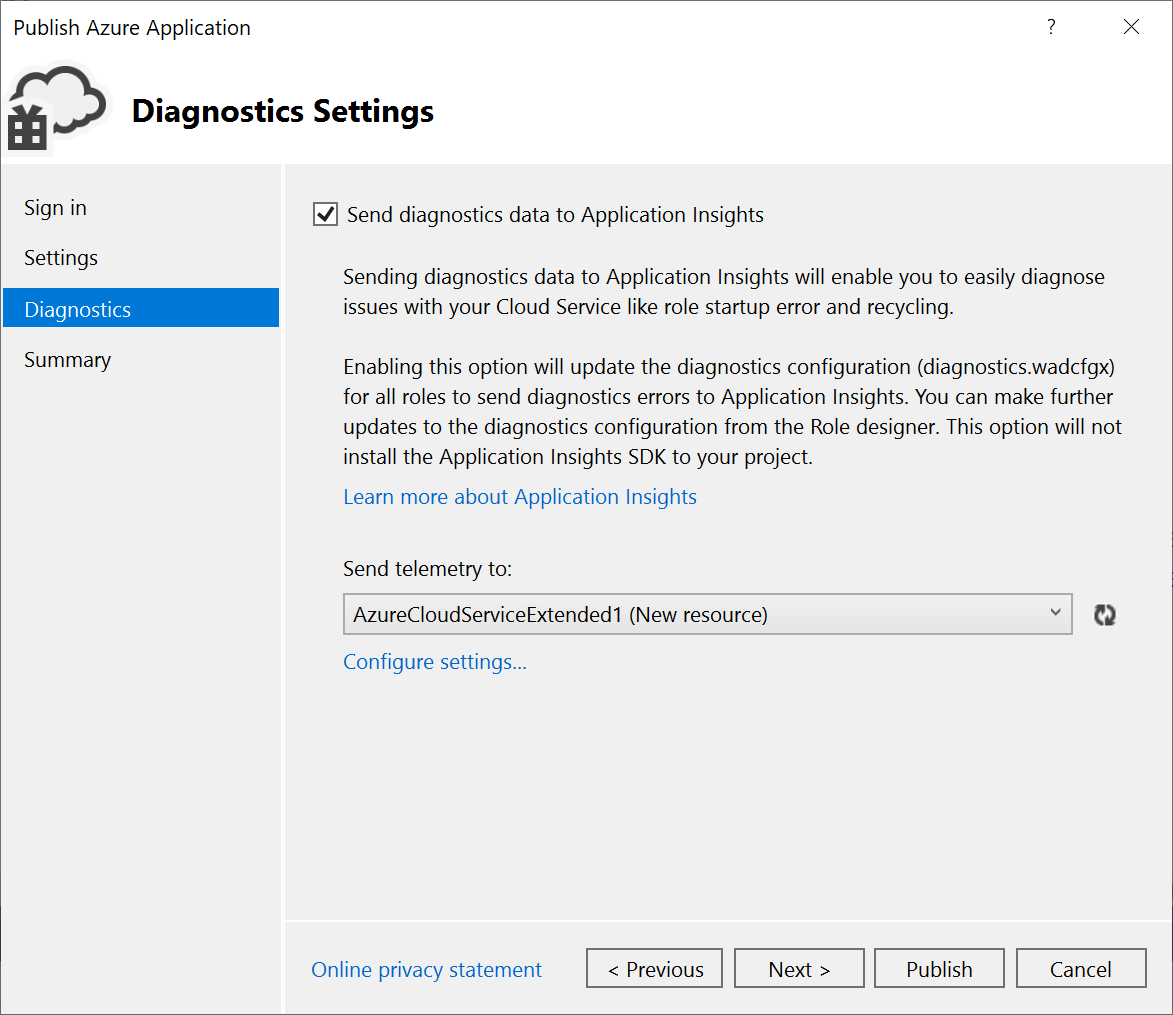
    Diagnostics enables you to troubleshoot an Azure cloud service (extended support). For information about diagnostics, see Configuring Diagnostics for Azure Cloud Services and Virtual Machines. For information about Application Insights, see What is Application Insights?.

  12. Choose Next to move to the Summary page.

    Summary

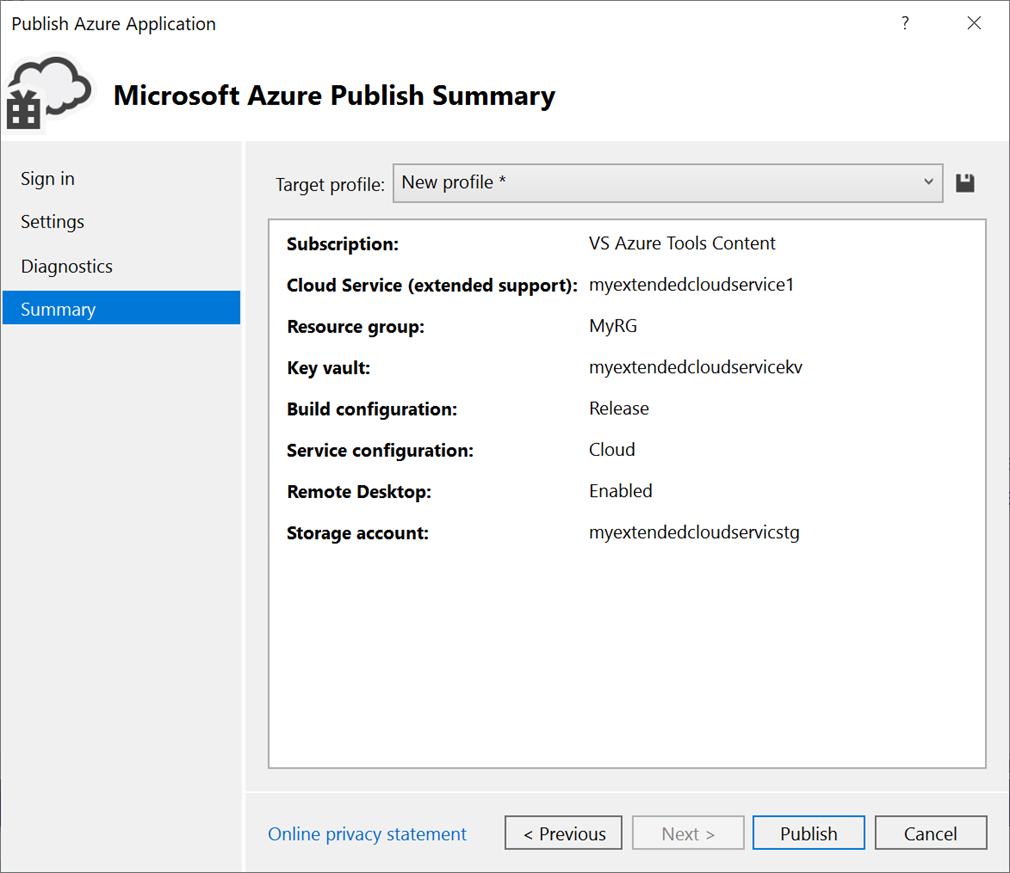
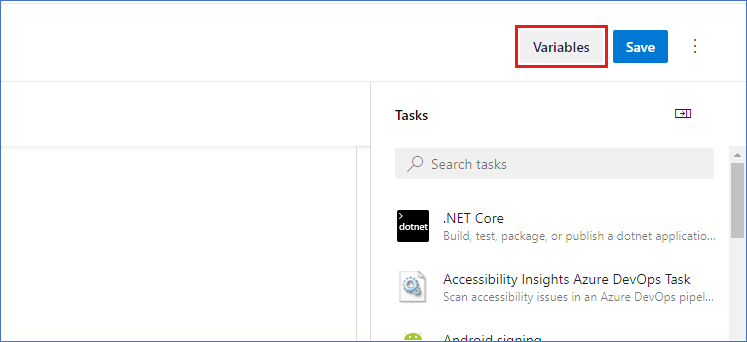
  13. Target profile - You can choose to create a publishing profile from the settings that you have chosen. For example, you might create one profile for a test environment and another for production. To save this profile, choose the Save icon. The wizard creates the profile and saves it in the Visual Studio project. To modify the profile name, open the Target profile list, and then choose Manage....

     Note

    The publishing profile appears in Solution Explorer in Visual Studio, and the profile settings are written to a file with an .azurePubxml extension. Settings are saved as attributes of XML tags.

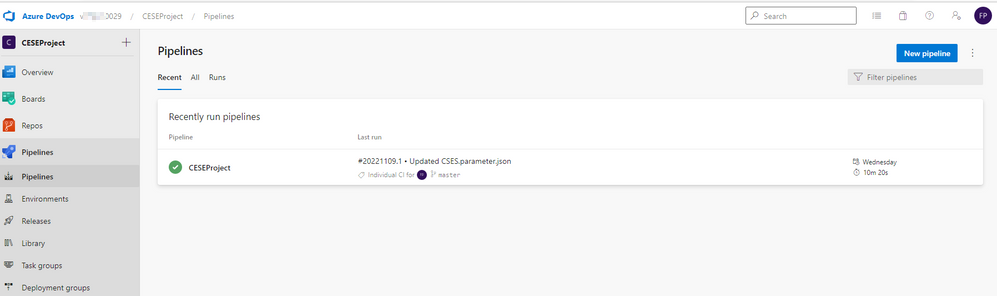
  14. Once you configure all the settings for your project's deployment, select Publish at the bottom of the dialog. You can monitor the process status in the Azure Activity Log output window in Visual Studio. Choose the Open in portal link to

Congratulations! You've published your cloud service (extended support) project to Azure. To publish again with the same settings, you can reuse the publishing profile, or repeat these steps to create a new one. The Azure Resource Manager (ARM) template and parameters that are used for deployment are saved in the bin/<configuration>/Publish folder.

Clean up Azure resources

To clean up the Azure resources you created by following this tutorial, go to the Azure portal, choose Resource groups, find and open the resource group you used to create the cloud service (extended support), and choose Delete resource group.