Manage labs in Azure Lab Services when using lab accounts
This article describes how to create and delete a lab. It also shows you how to view all the labs in a lab account.
Prerequisites
To set up a lab in a lab account, you must be a member of the Lab Creator role in the lab account. The account you used to create a lab account is automatically added to this role. A lab owner can add other users to the Lab Creator role by using steps in the following article: Add a user to the Lab Creator role.
Create a lab
Navigate to Lab Services web portal: https://labs.azure.com.
Select Sign in and enter your credentials. Select or enter a user ID that is a member of the Lab Creator role in the lab account, and enter password. Azure Lab Services supports organizational accounts and Microsoft accounts.
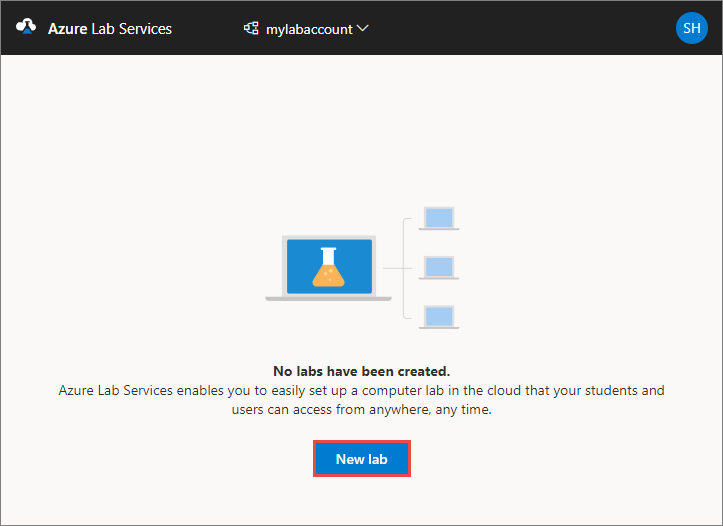
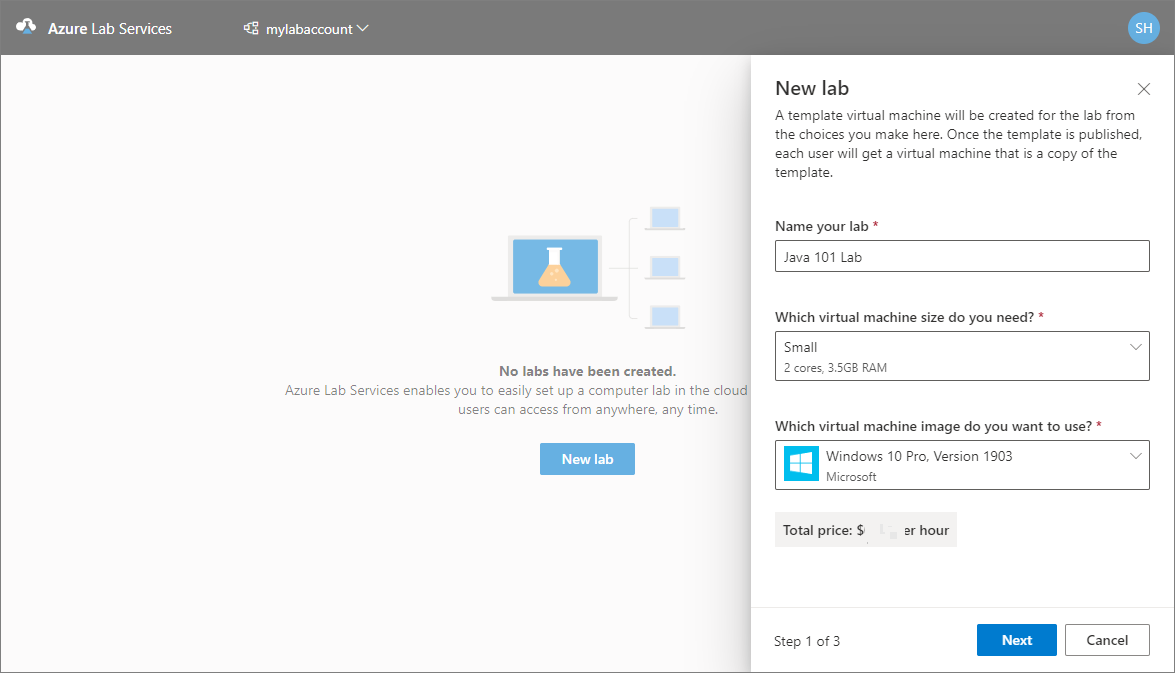
Select New lab.
In the New Lab window, do the following actions:
Specify a name for your lab.
Select the size of the virtual machines you need for the class. For the list of sizes available, see the VM Sizes section.
Select the virtual machine image that you want to use for the lab. If you select a Linux image, you see an option to enable remote desktop connection. For details, see Enable remote desktop connection for Linux.
Review the total price per hour displayed on the page.
Select Save.
Note
You see an option to select a location for your lab if the lab account was configured to allow lab creator to pick lab location option.
On the Virtual machine credentials page, specify default credentials for all VMs in the lab.
Specify the name of the user for all VMs in the lab.
Specify the password for the user.
Important
Make a note of user name and password. They won't be shown again.
Disable Use same password for all virtual machines option if you want students to set their own passwords. This step is optional.
An educator can choose to use the same password for all the VMs in the lab, or allow students to set passwords for their VMs. By default, this setting is enabled for all Windows and Linux images except for Ubuntu. When you select Ubuntu VM, this setting is disabled and students are prompted to set a password when they sign in for the first time.
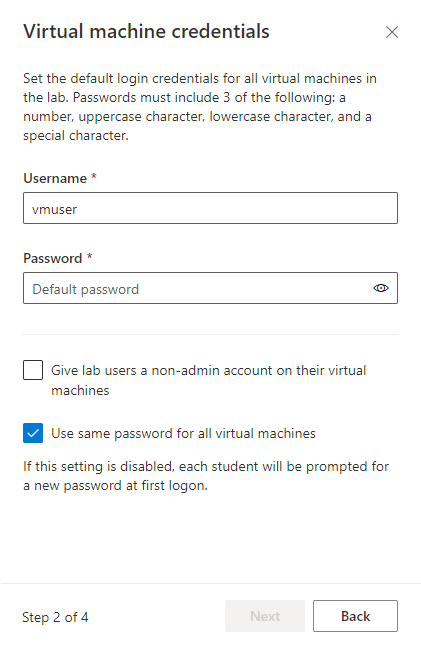
Then, select Next on the Virtual machine credentials page.
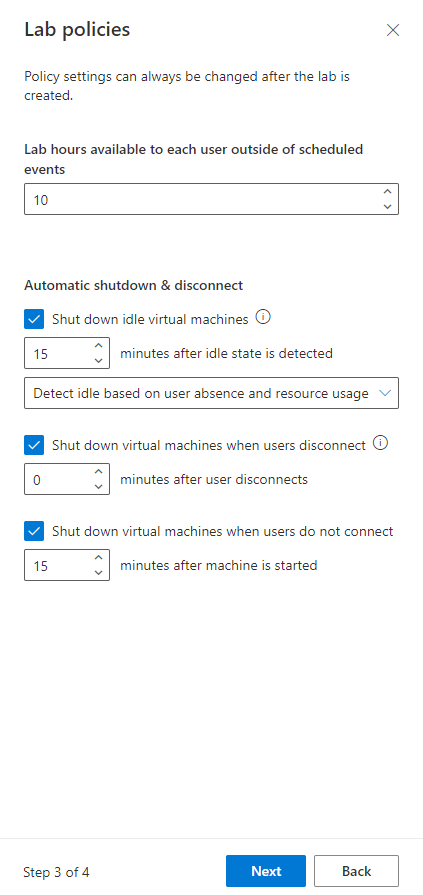
On the Lab policies page, do the following steps:
Enter the number of hours allotted for each user (quota for each user) outside the scheduled time for the lab.
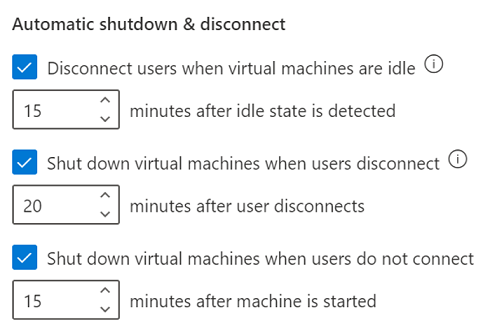
For the Auto-shutdown of virtual machines option, specify whether you want the VM to be automatically shut down when user disconnects. You can also specify how long the VM should wait for the user to reconnect before automatically shutting down. For more information, see Enable automatic shutdown of VMs on disconnect.
Then, select Finish.
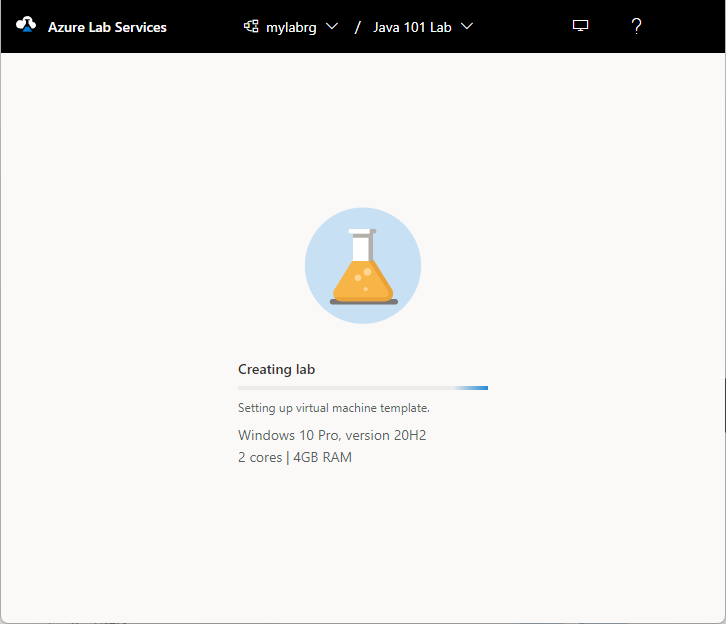
You should see the following screen that shows the status of the template VM creation. The creation of the template in the lab takes up to 20 minutes.
On the Template page, do the following steps: These steps are optional for the tutorial.
- Start the template VM.
- Connect to the template VM by selecting Connect. If it's a Linux template VM, you choose whether you want to connect using an SSH terminal or a graphical remote desktop. Additional setup is required to use a graphical remote desktop. For more information, see Enable graphical remote desktop for Linux virtual machines in Azure Lab Services.
- Select Reset password to reset the password for the VM. The VM must be running before the reset password button is available.
- Install and configure software on your template VM.
- Stop the VM.
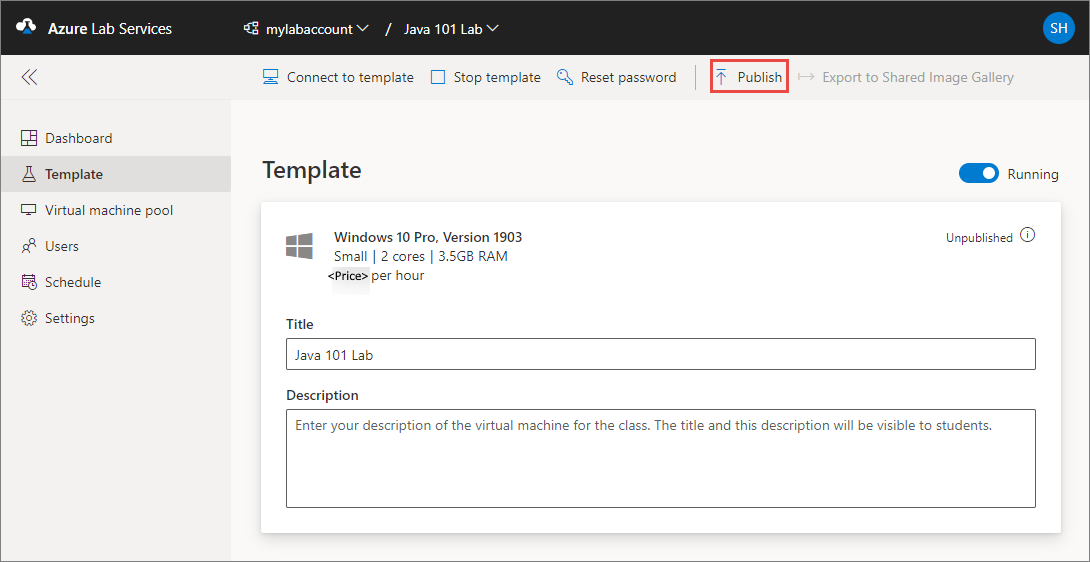
On Template page, select Publish on the toolbar.
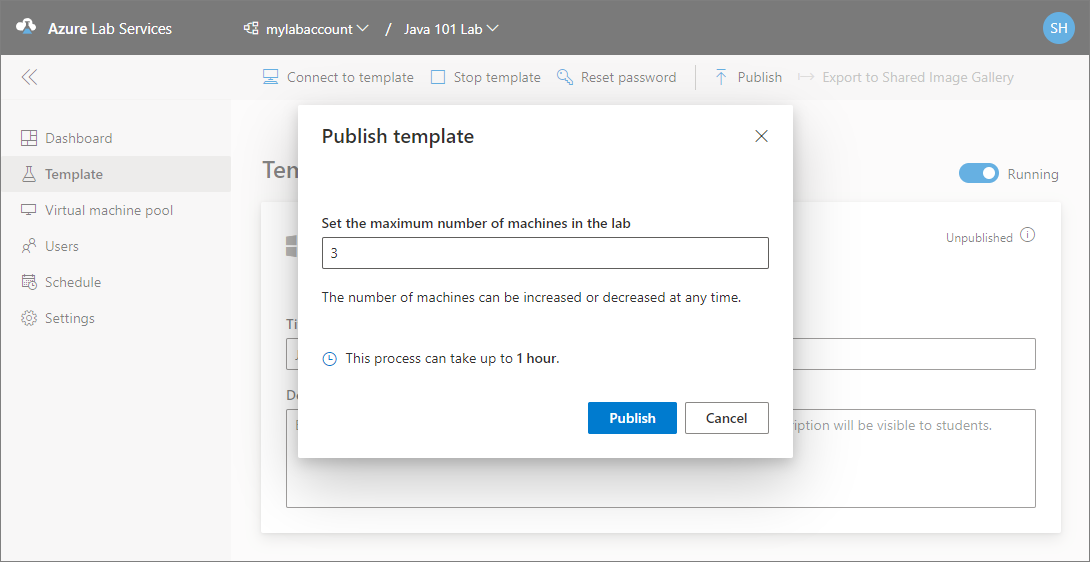
Warning
Once you publish, you can't unpublish.
On the Publish template page, enter the number of virtual machines you want to create in the lab, and then select Publish.
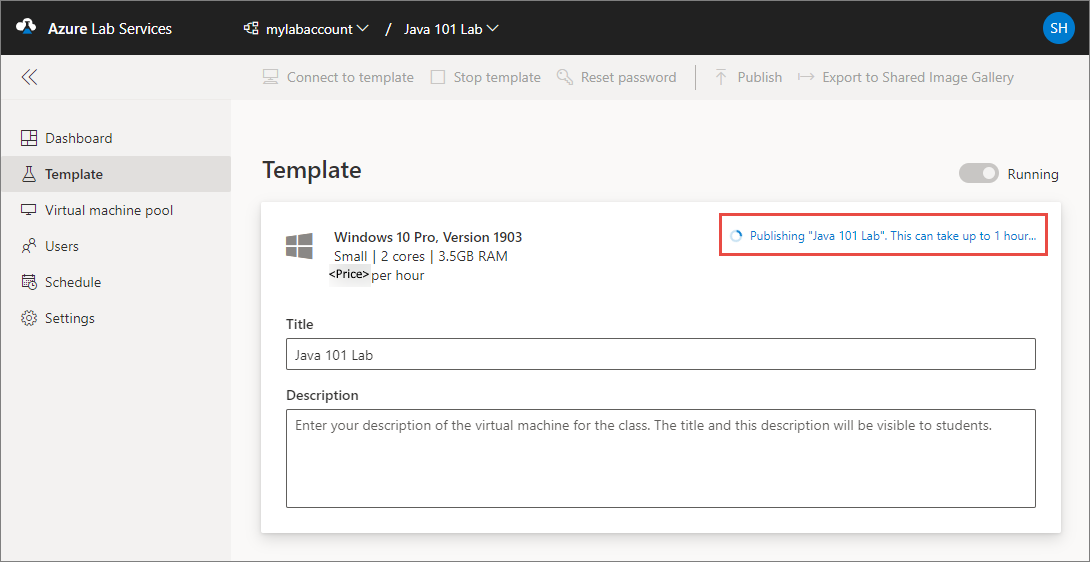
You see the status of publishing the template on page. This process can take up to an hour.
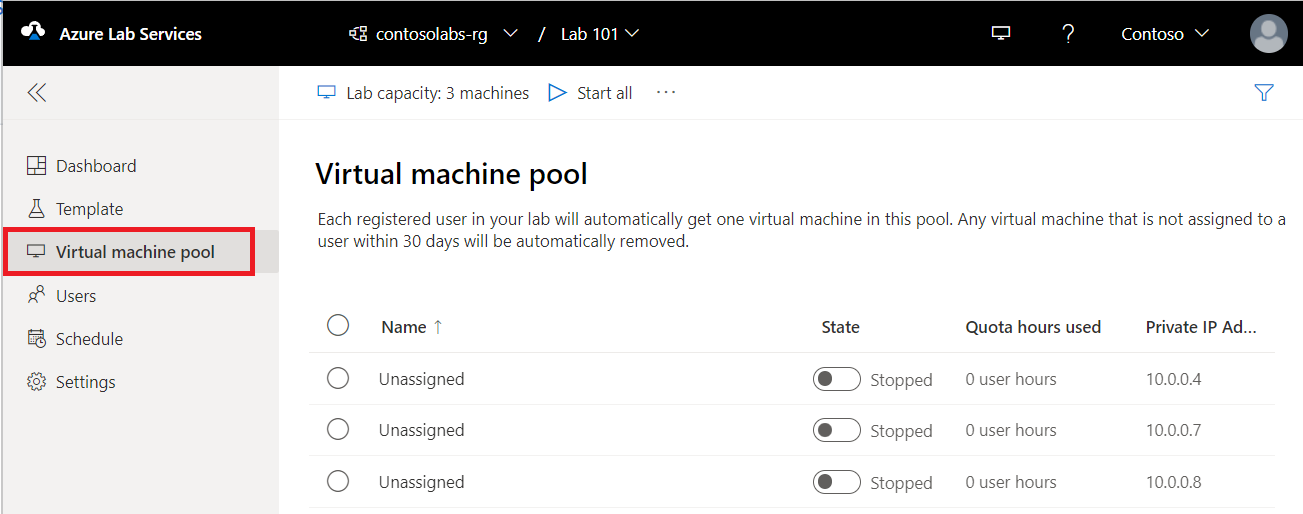
Switch to the Virtual machines pool page by selecting Virtual machines on the left menu or by selecting Virtual machines tile. Confirm that you see virtual machines that are in Unassigned state. These VMs aren't assigned to students yet. They should be in Stopped state. You can start a student VM, connect to the VM, stop the VM, and delete the VM on this page. You can start them in this page or let your students start the VMs.
You do the following tasks on this page (don't do these steps for the tutorial. These steps are for your information only.):
- To change the lab capacity (number of VMs in the lab), select Lab capacity on the toolbar.
- To start all the VMs at once, select Start all on the toolbar.
- To start a specific VM, select the down arrow in the Status, and then select Start. You can also start a VM by selecting a VM in the first column, and then by selecting Start on the toolbar.
VM sizes
For information on VM sizes and their cost, see the Azure Pricing Calculator.
Note
You may not see some of the expected VM sizes in the list when creating a lab. The list is populated based on the current capacity of the lab's location. If the lab account creator allows lab creators to pick a location for the lab, you may try choosing a different location for the lab and see if the VM size is available.
View all labs
Navigate to Lab Services web portal: https://labs.azure.com.
Select Sign in. Select or enter a user ID that is a member of the Lab Creator role in the lab account, and enter password. Azure Lab Services supports organizational accounts and Microsoft accounts.
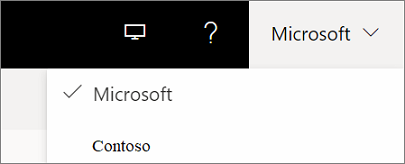
If you have an Administrator or Lab Owner role in two or more Microsoft Entra tenants, you can switch between tenants in the Lab Services web portal (https://labs.azure.com) by selecting the control at the upper right, as shown in the following screenshot:
Confirm that you see all the labs in the selected lab account. On the lab's tile, you see the number of virtual machines in the lab and the quota for each user (outside the scheduled time).

Use the drop-down list at the top to select a different lab account. You see labs in the selected lab account.
Delete a lab
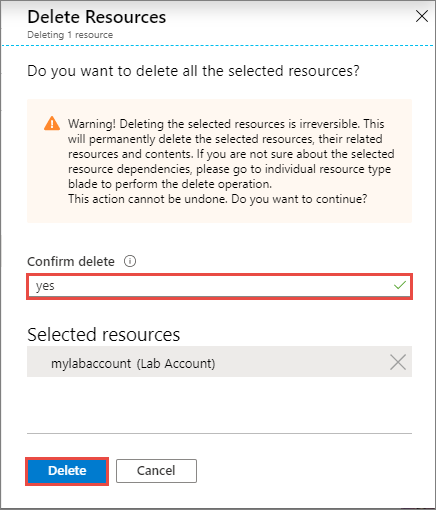
On the tile for the lab, select three dots (...) in the corner, and then select Delete.
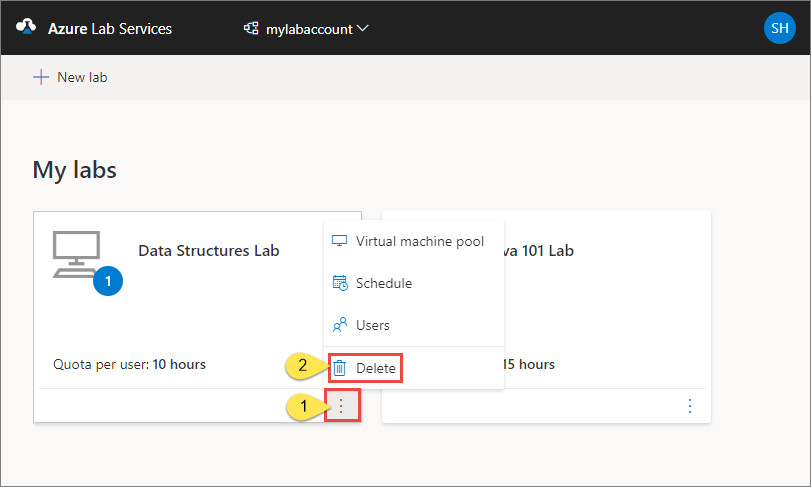
On the Delete lab dialog box, select Delete to continue with the deletion.
Switch to another lab
To switch to another lab from the current, select the drop-down list of labs in the lab account at the top.
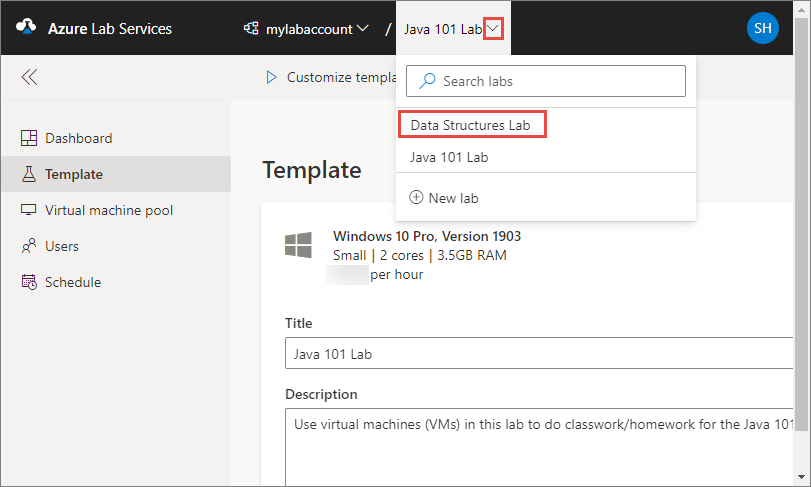
You can also create a new lab using the New lab in this drop-down list.
Note
You can also use the Az.LabServices PowerShell module to manage labs. For more information, see the Az.LabServices home page on GitHub.
To switch to a different lab account, select the drop-down next to the lab account and select the other lab account.
Troubleshooting
Lab creation fails because of insufficient IP addresses
Lab creation can fail if the lab account is peered to a virtual network but has too narrow of an IP address range. You can run out of space in the address range if there are too many labs in the lab account (each lab uses 512 addresses).
For example, if you have a block of /19, this address range can accommodate 8192 IP addresses and 16 labs (8192/512 = 16 labs). In this case, lab creation fails on the 17th lab creation.