How to deploy asp.net core web api to azure app service
In this video we will discuss how to deploy ASP.NET Core Web API along with SQL Server Database to Azure App Service right from with in Visual Studio. The following are the steps.
Create App Service Instance in Azure
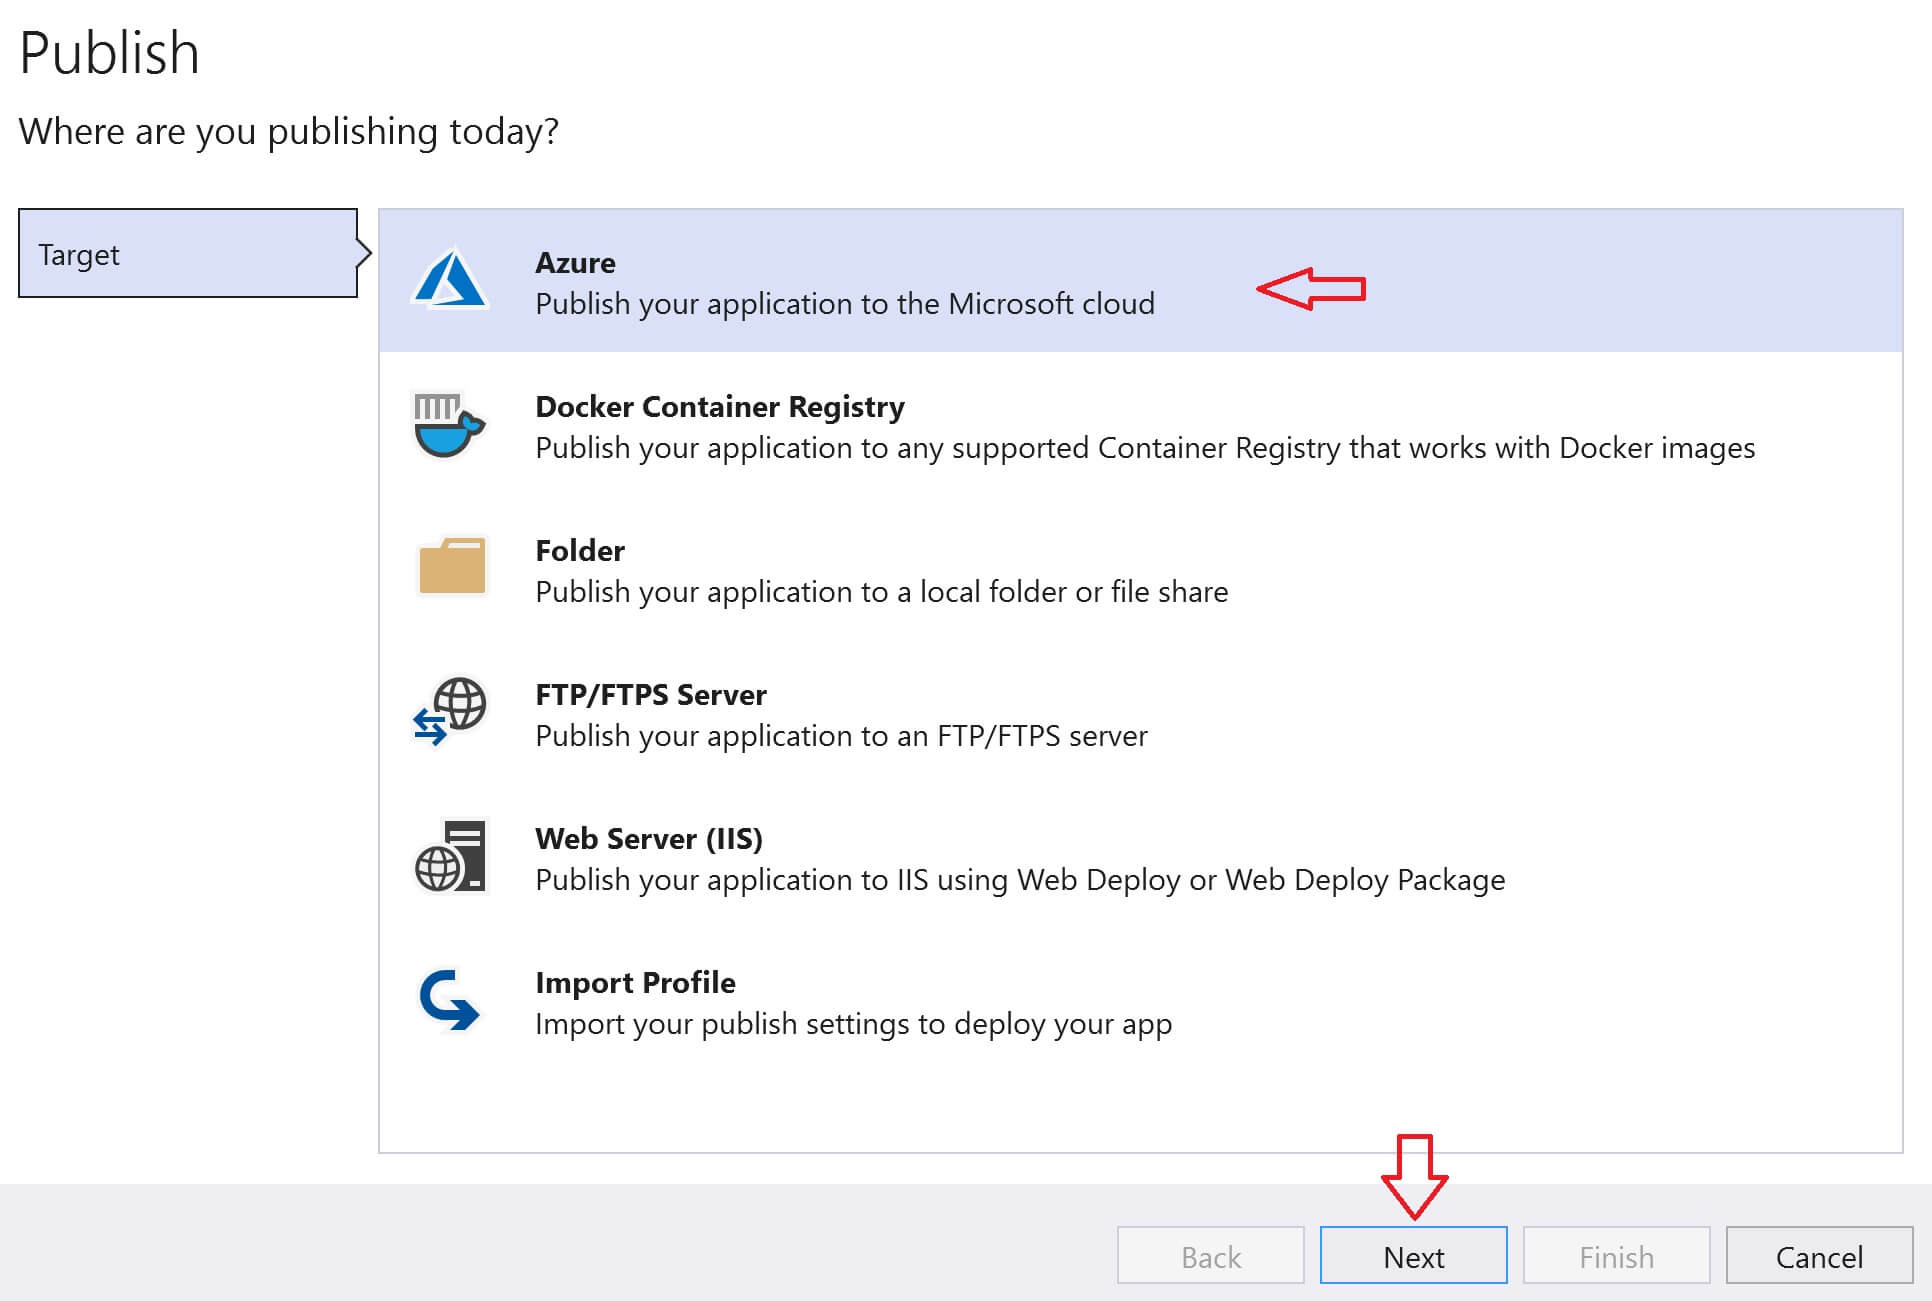
In Visual Studio, in the Solution Explorer, right click on the Web API project and click on Publish
Select Azure and click Next
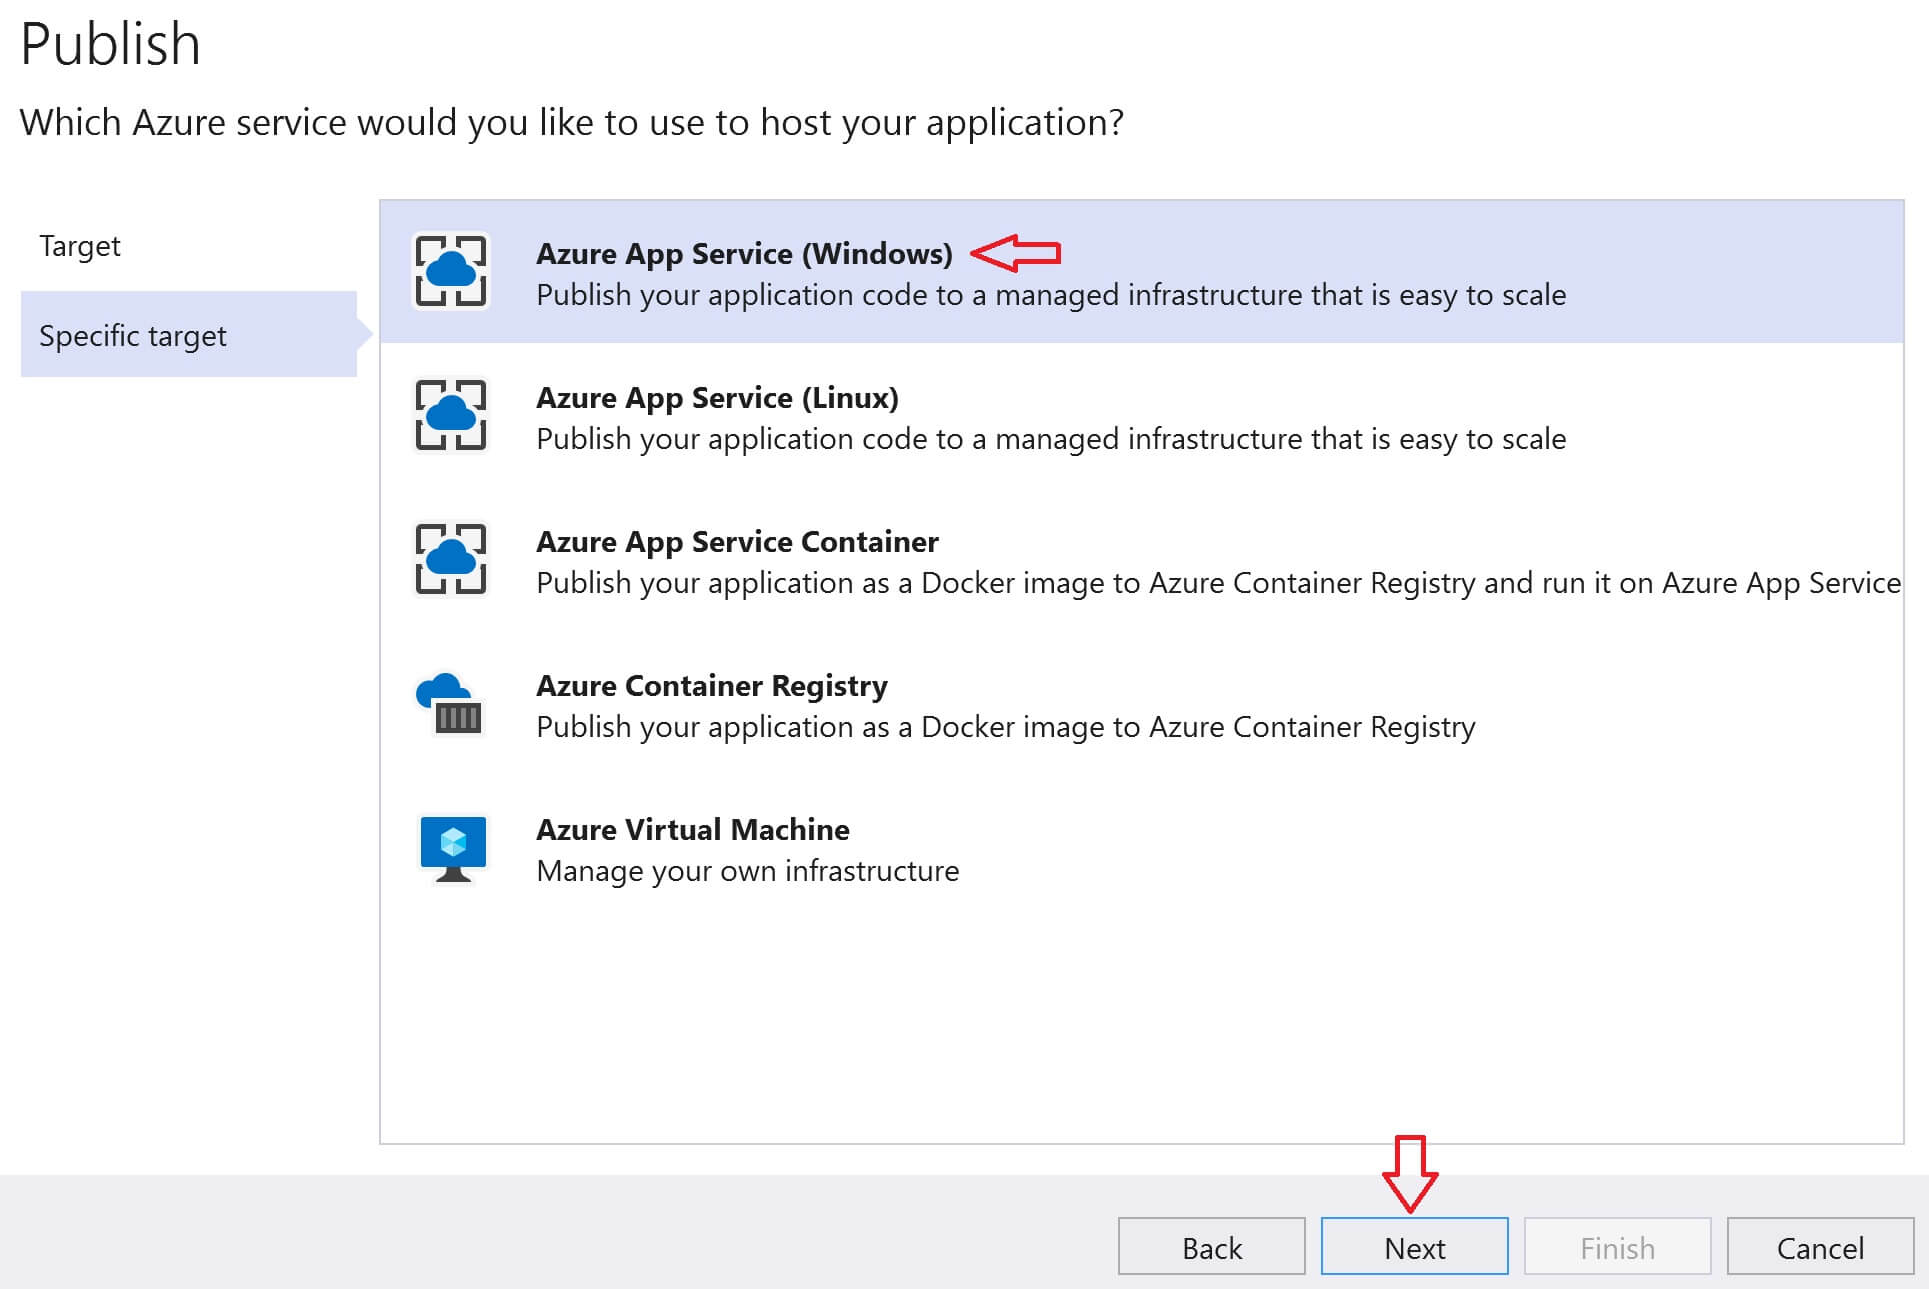
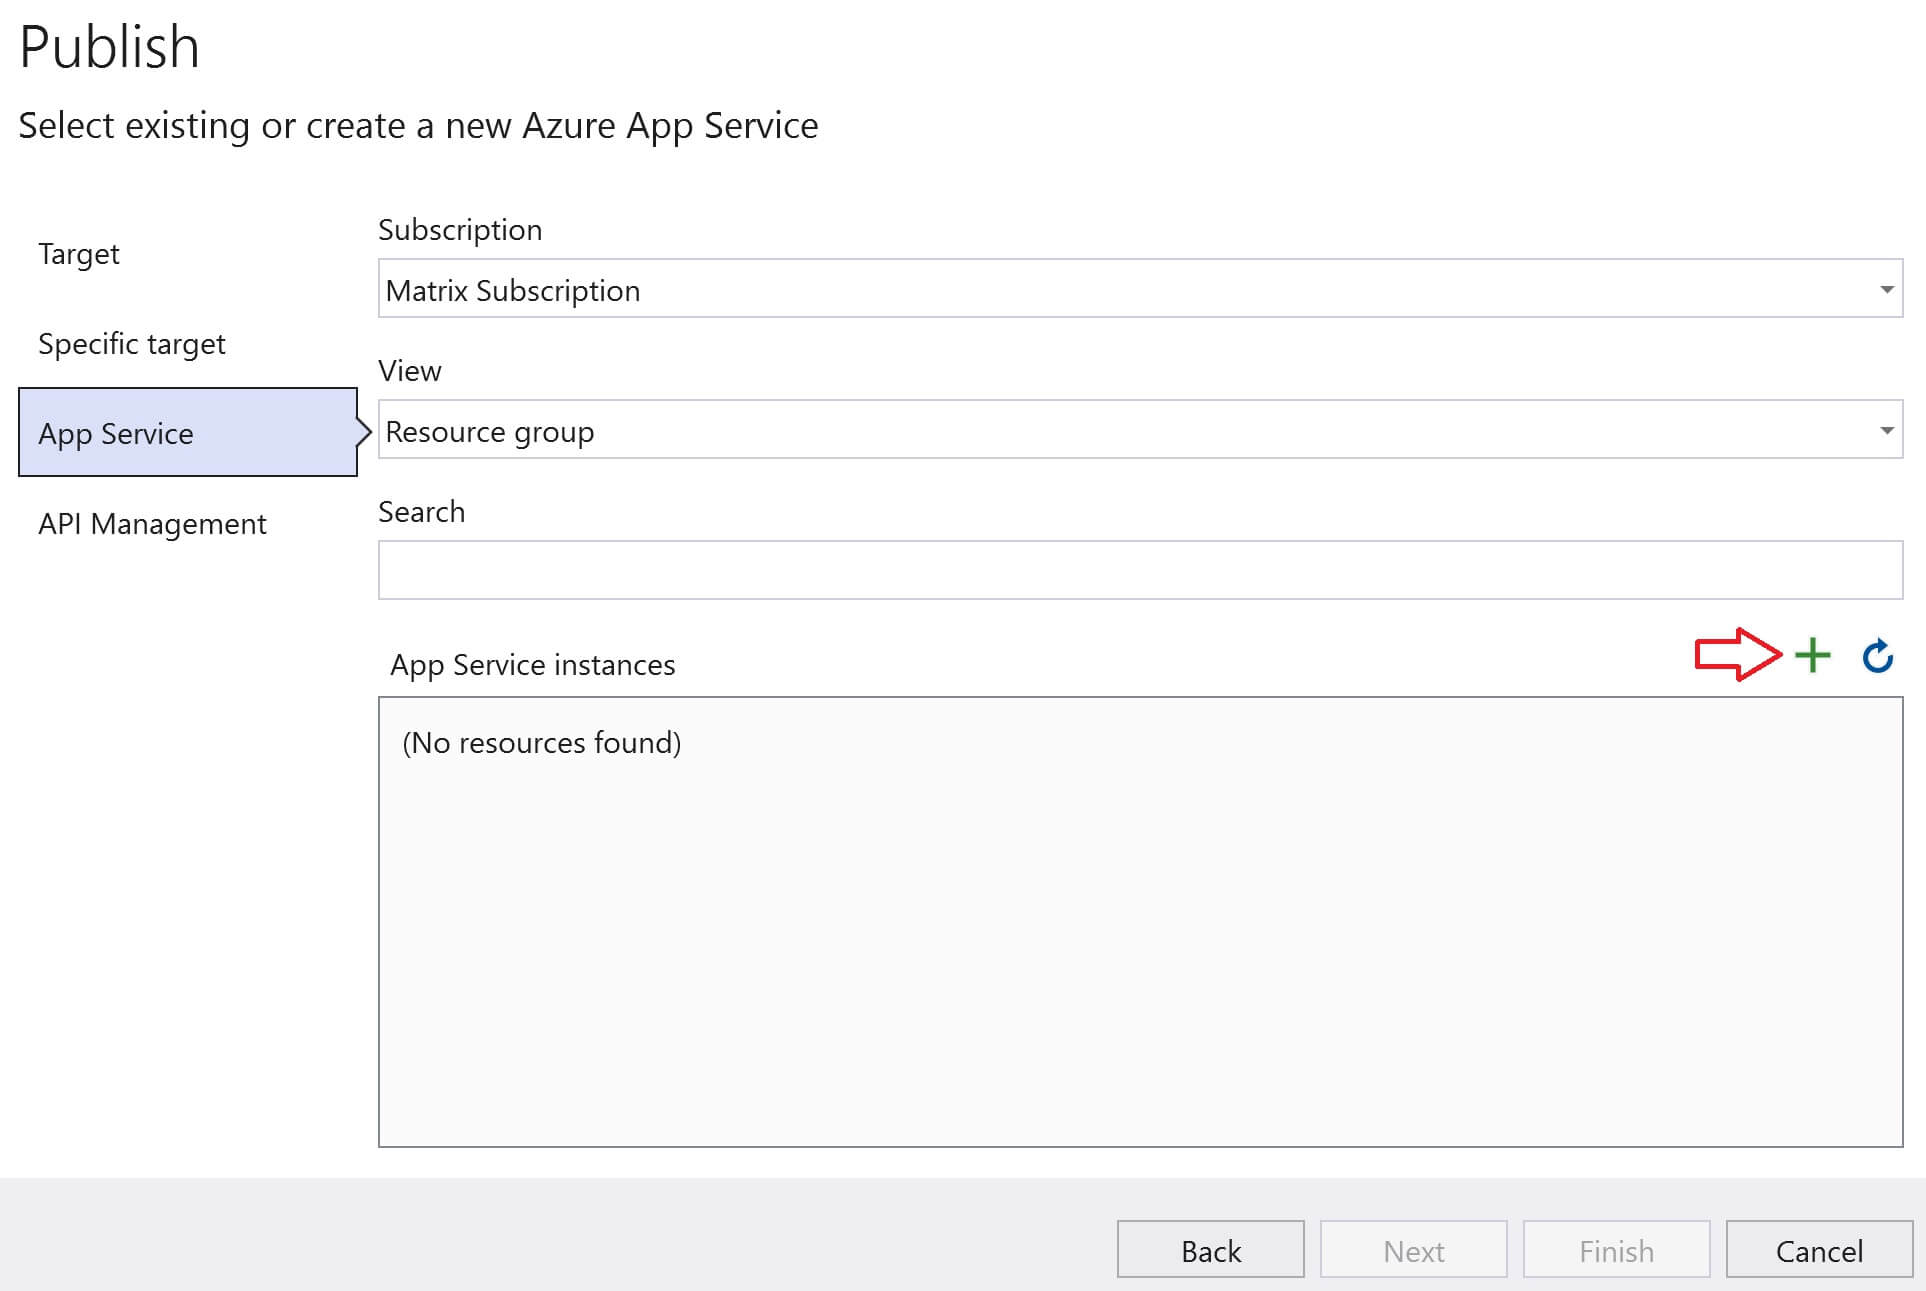
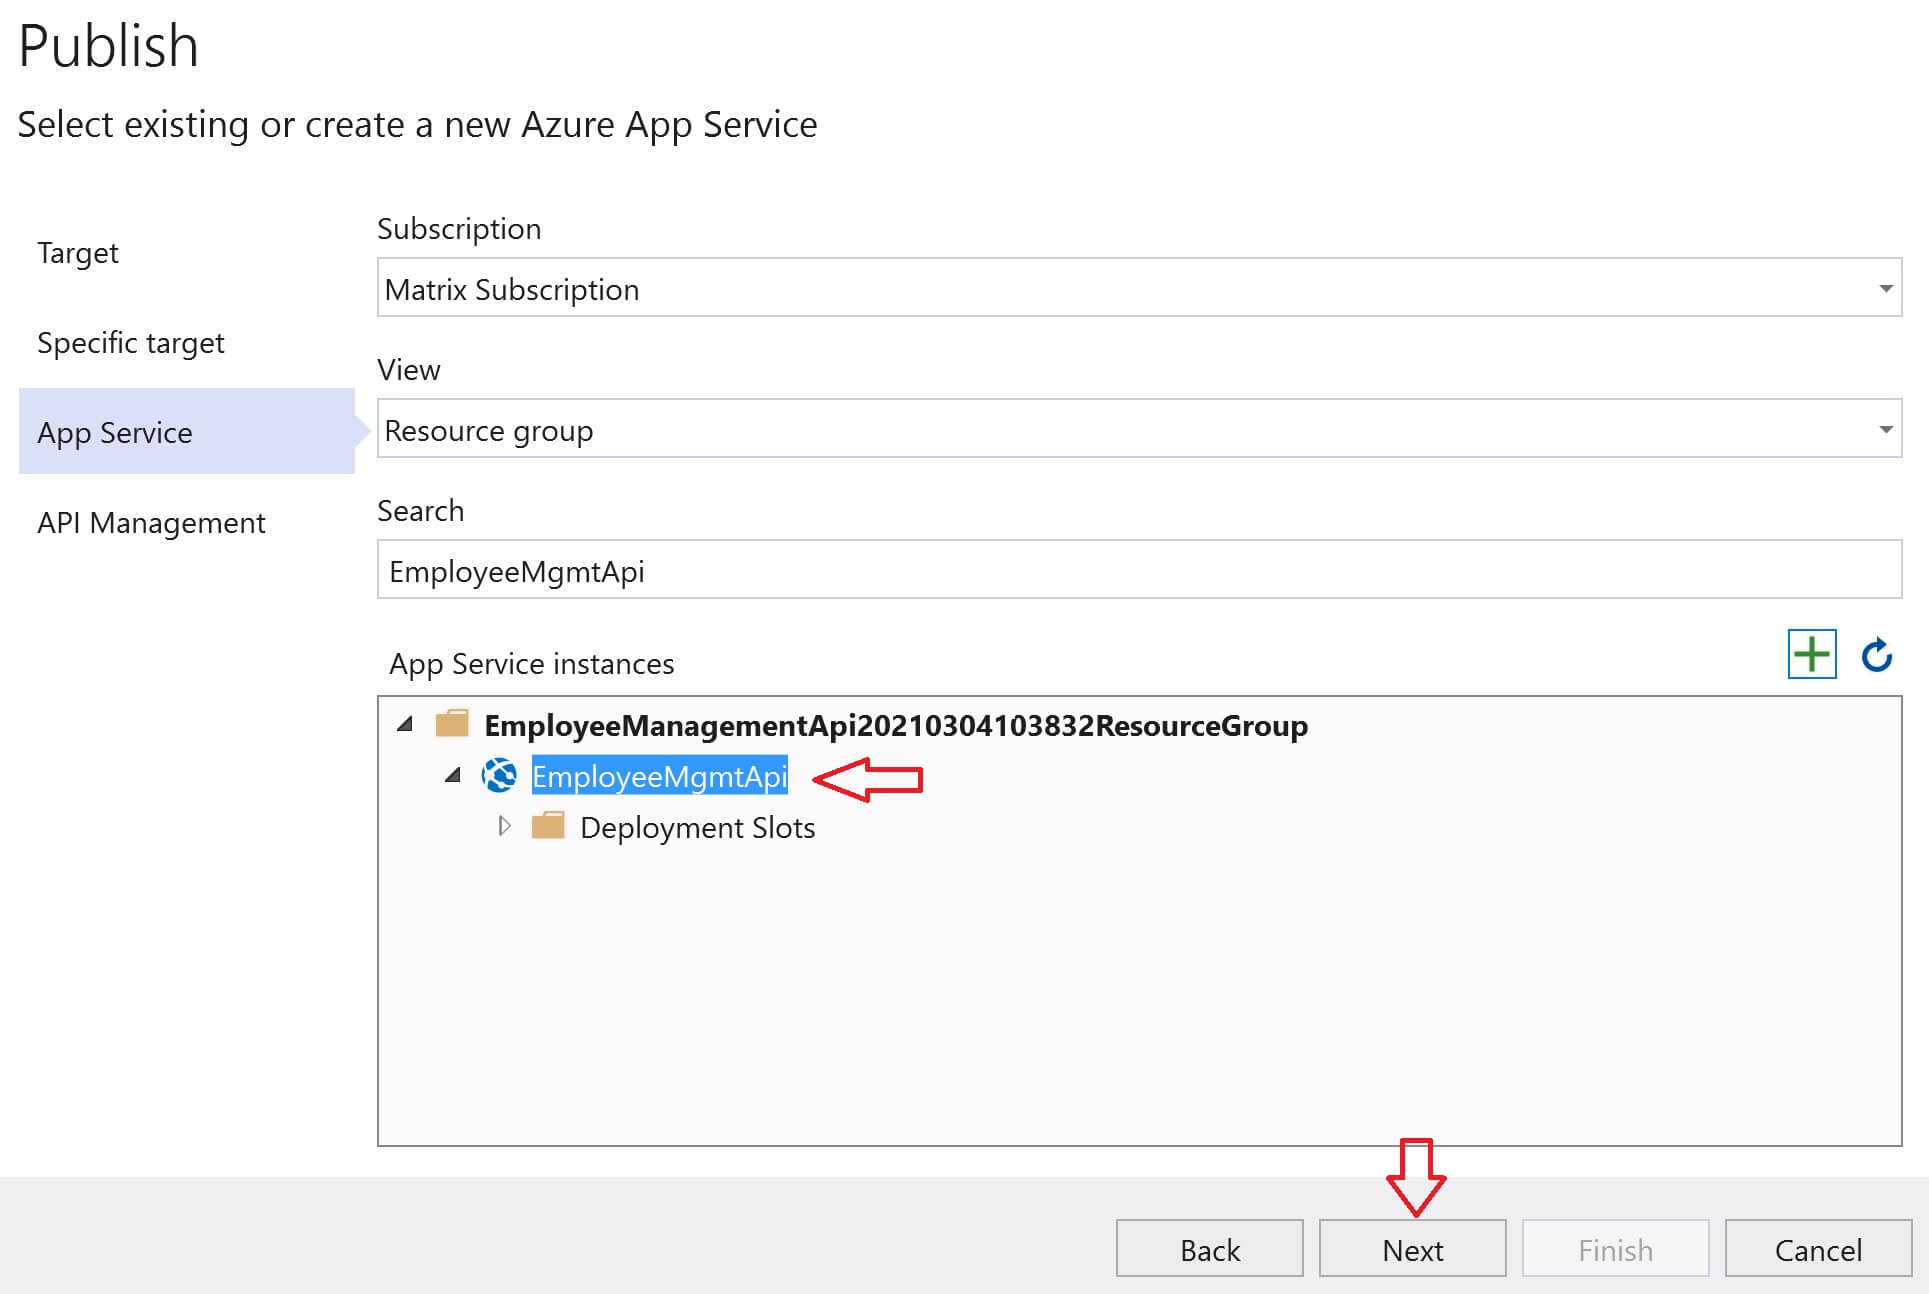
Select Azure App Service and click Next
Click on the + sign. This opens a new window, which allows us to create a new instance of App Service in Azure.
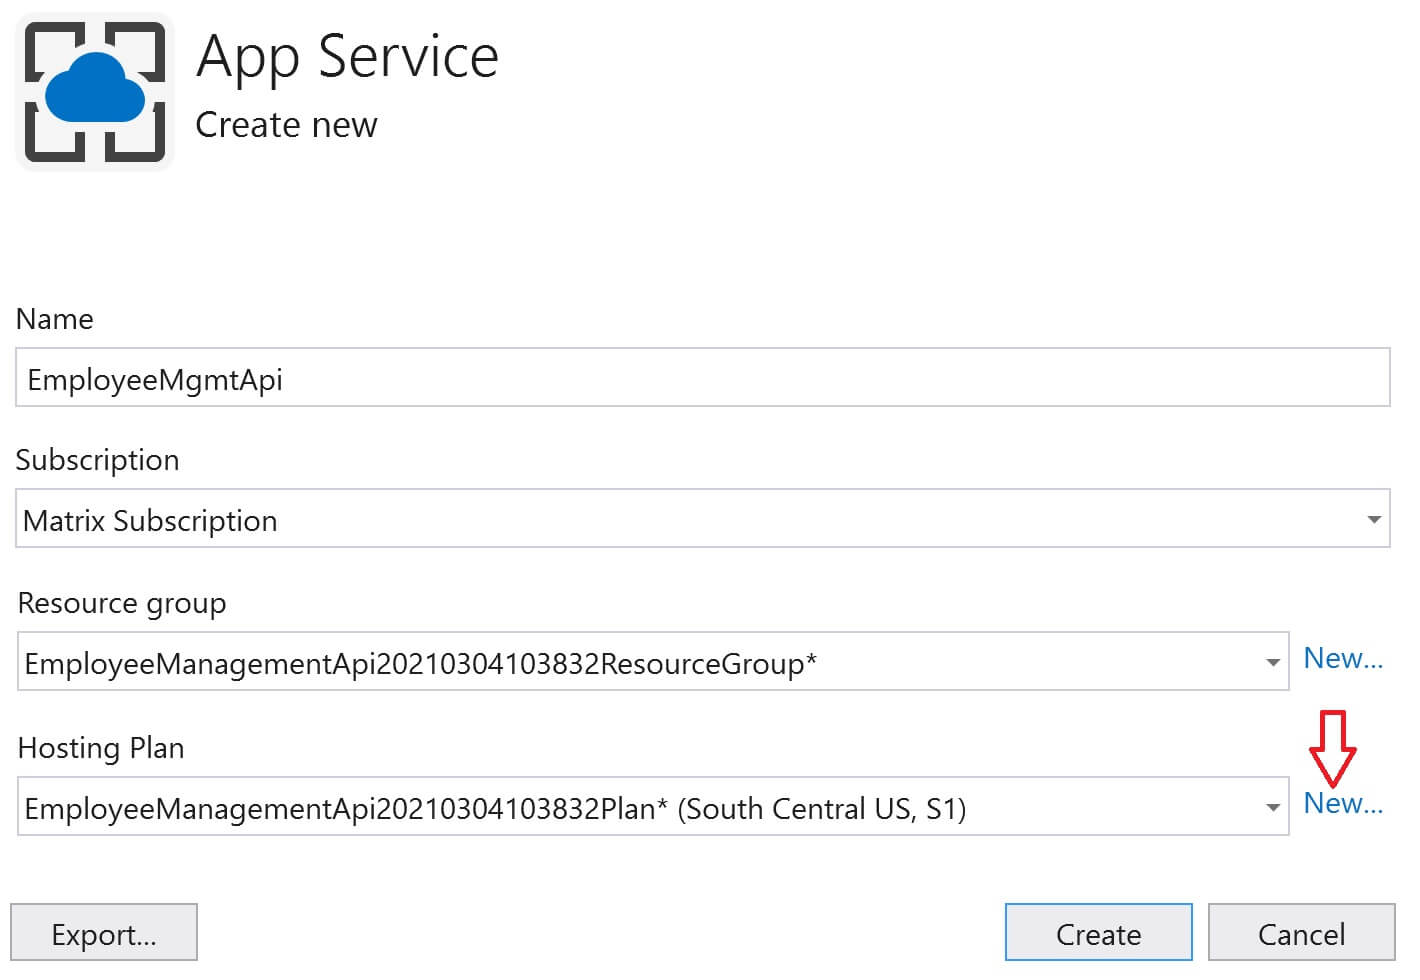
Provide a name for the App Service Instance. Select your azure Subscription and Resource Group from the respective dropdown list. Click on the New link next to the Hosting Plan dropdownlist. This allows to create a new Hosting Plan.
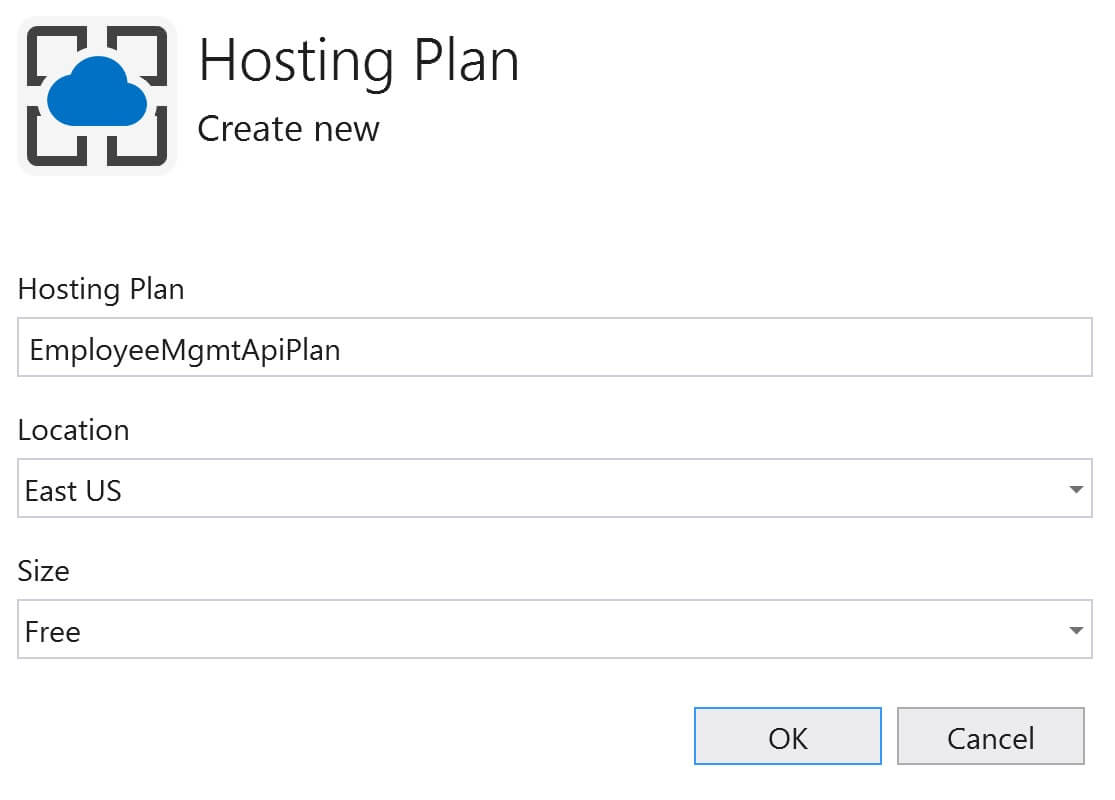
Provide a name for the hosting plan. Select a Location and the size. Click OK.
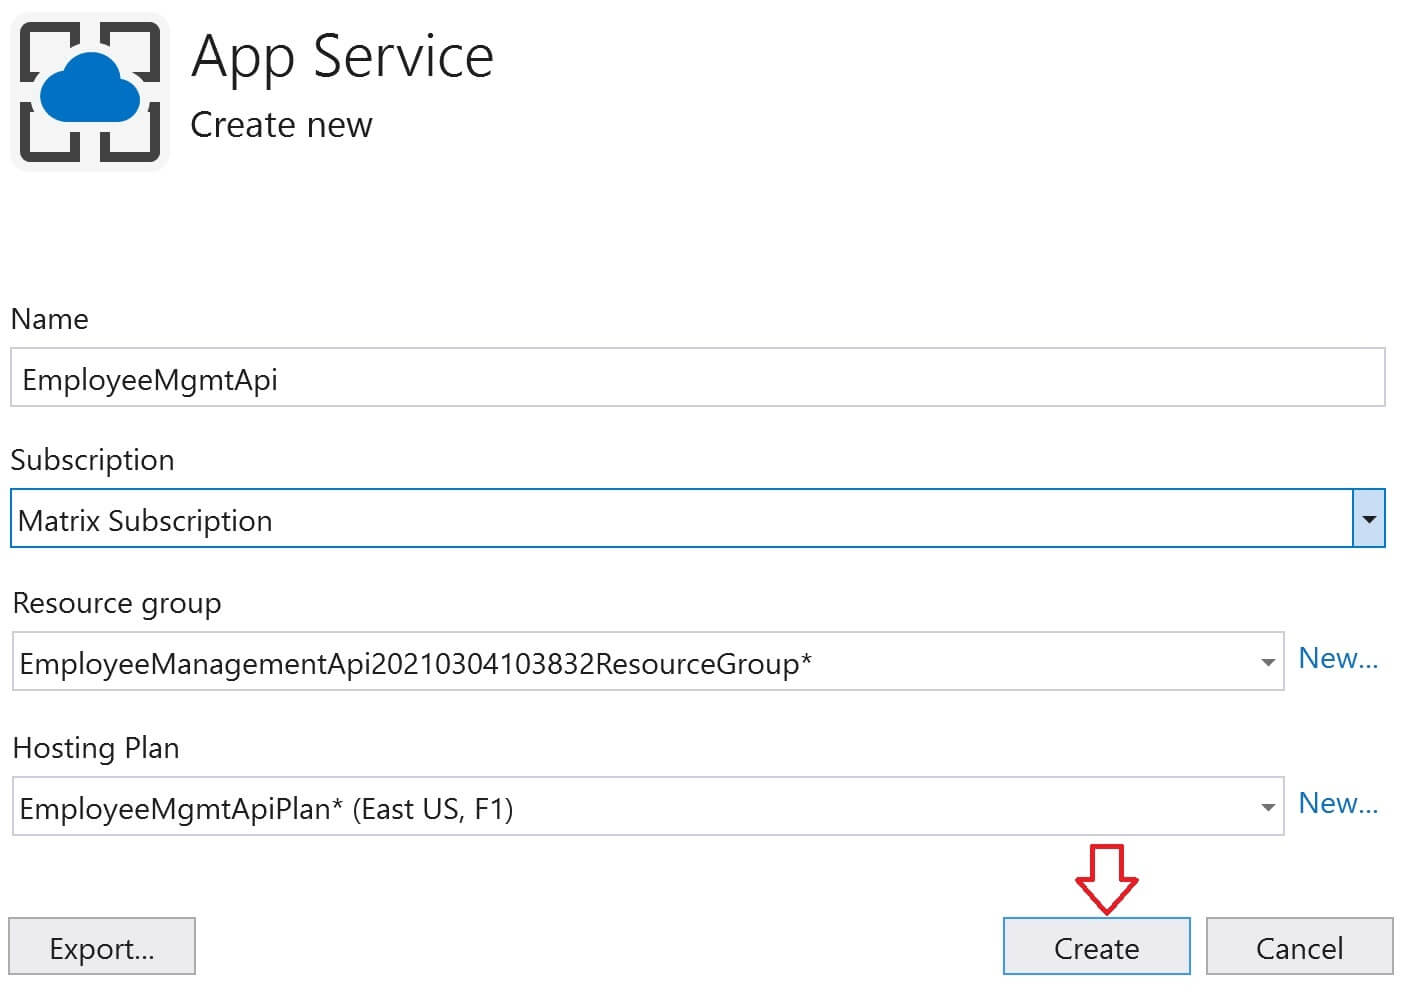
You should be back on the App Service window, click Create
After a few seconds, App Service instance is created in Azure. By default it is already selected. Click Next.
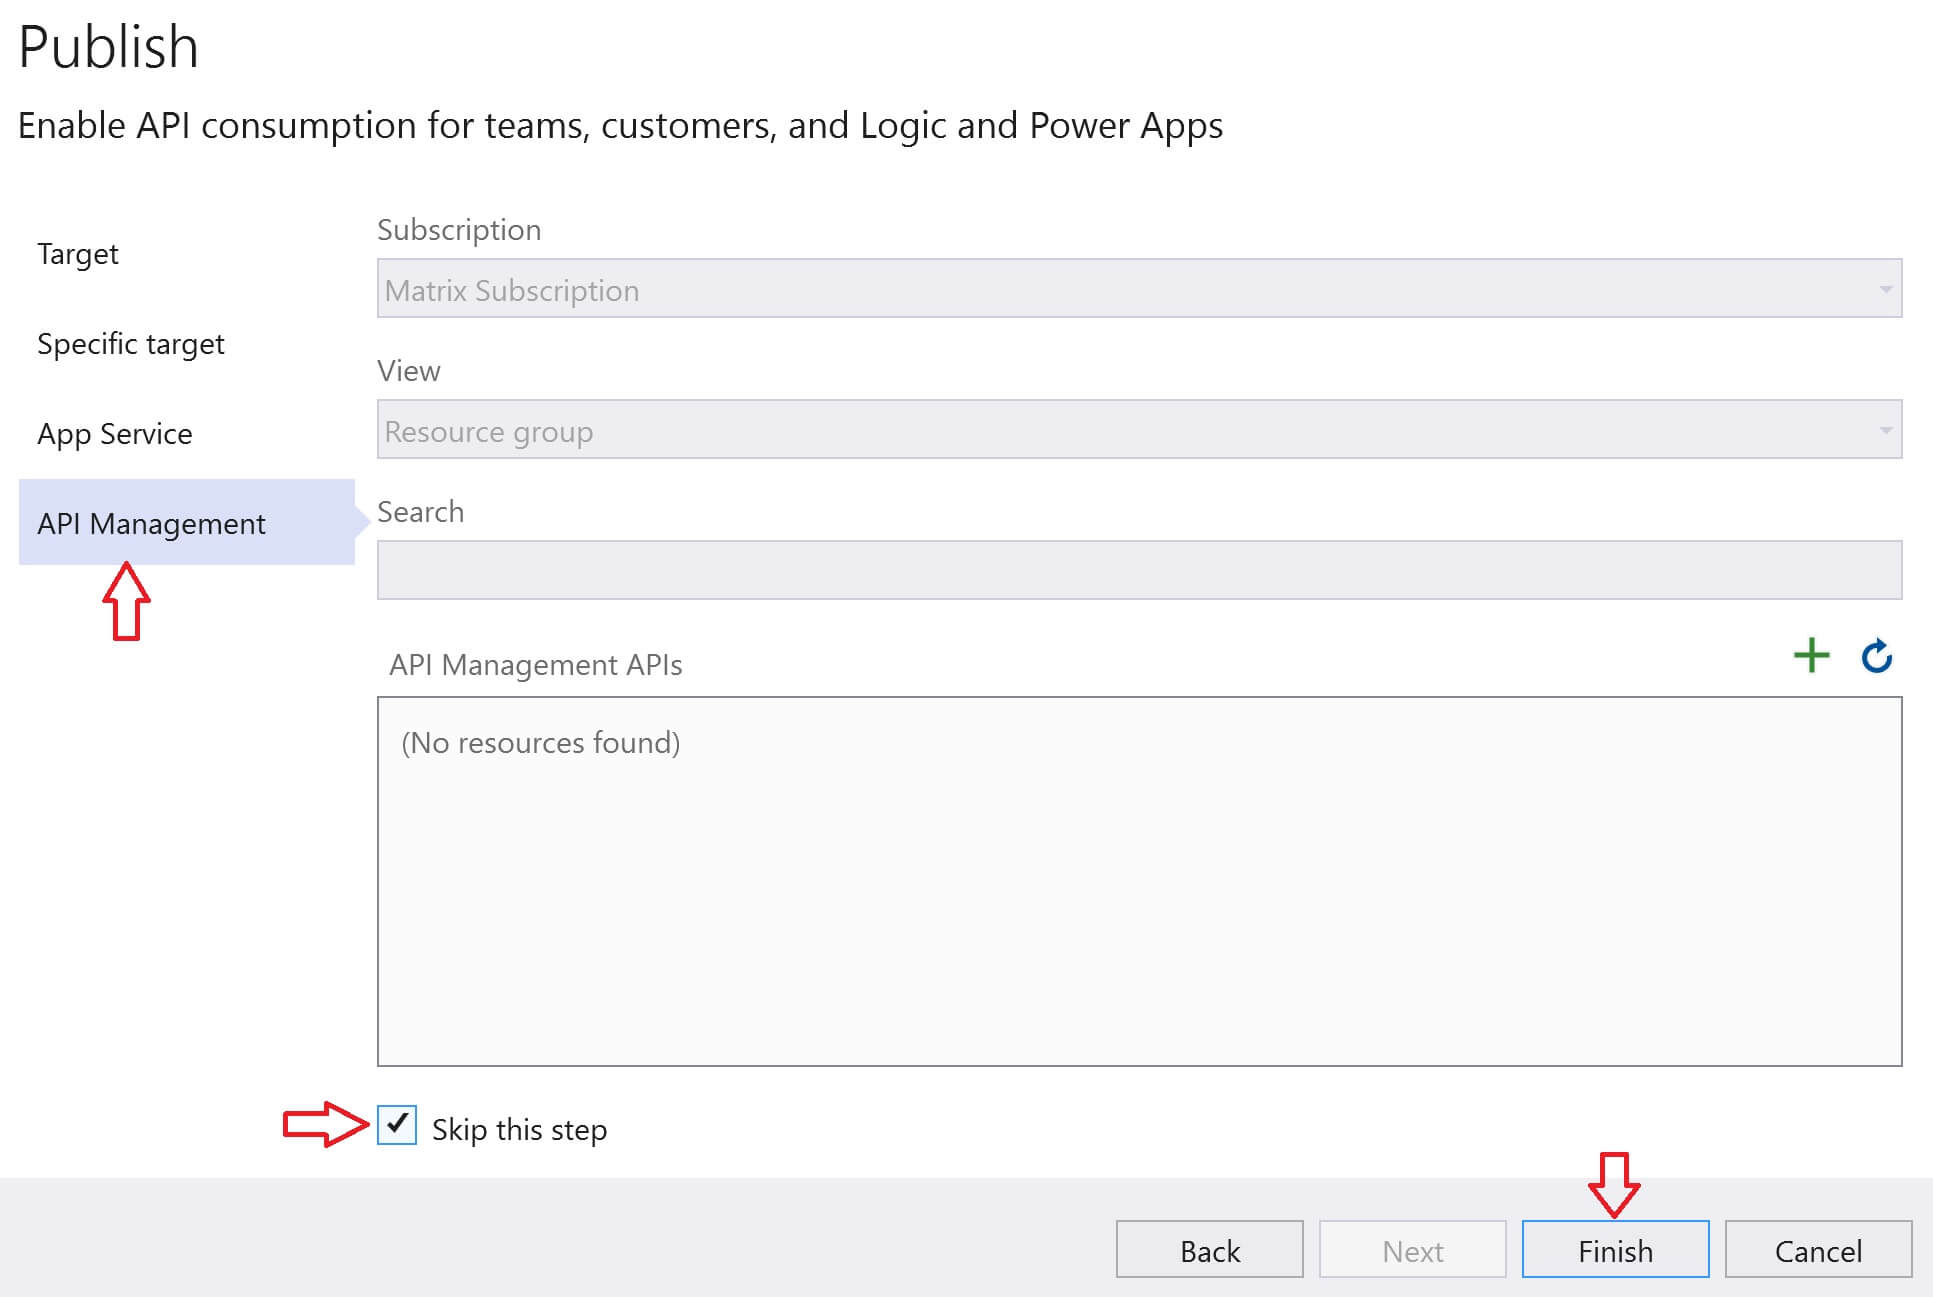
Azure API Management provides several benefits. We will discuss, what is API Management and the benefits it provide in our upcoming videos. For now, select the checkbox Skip this step and click Finish
Create SQL Database in Azure
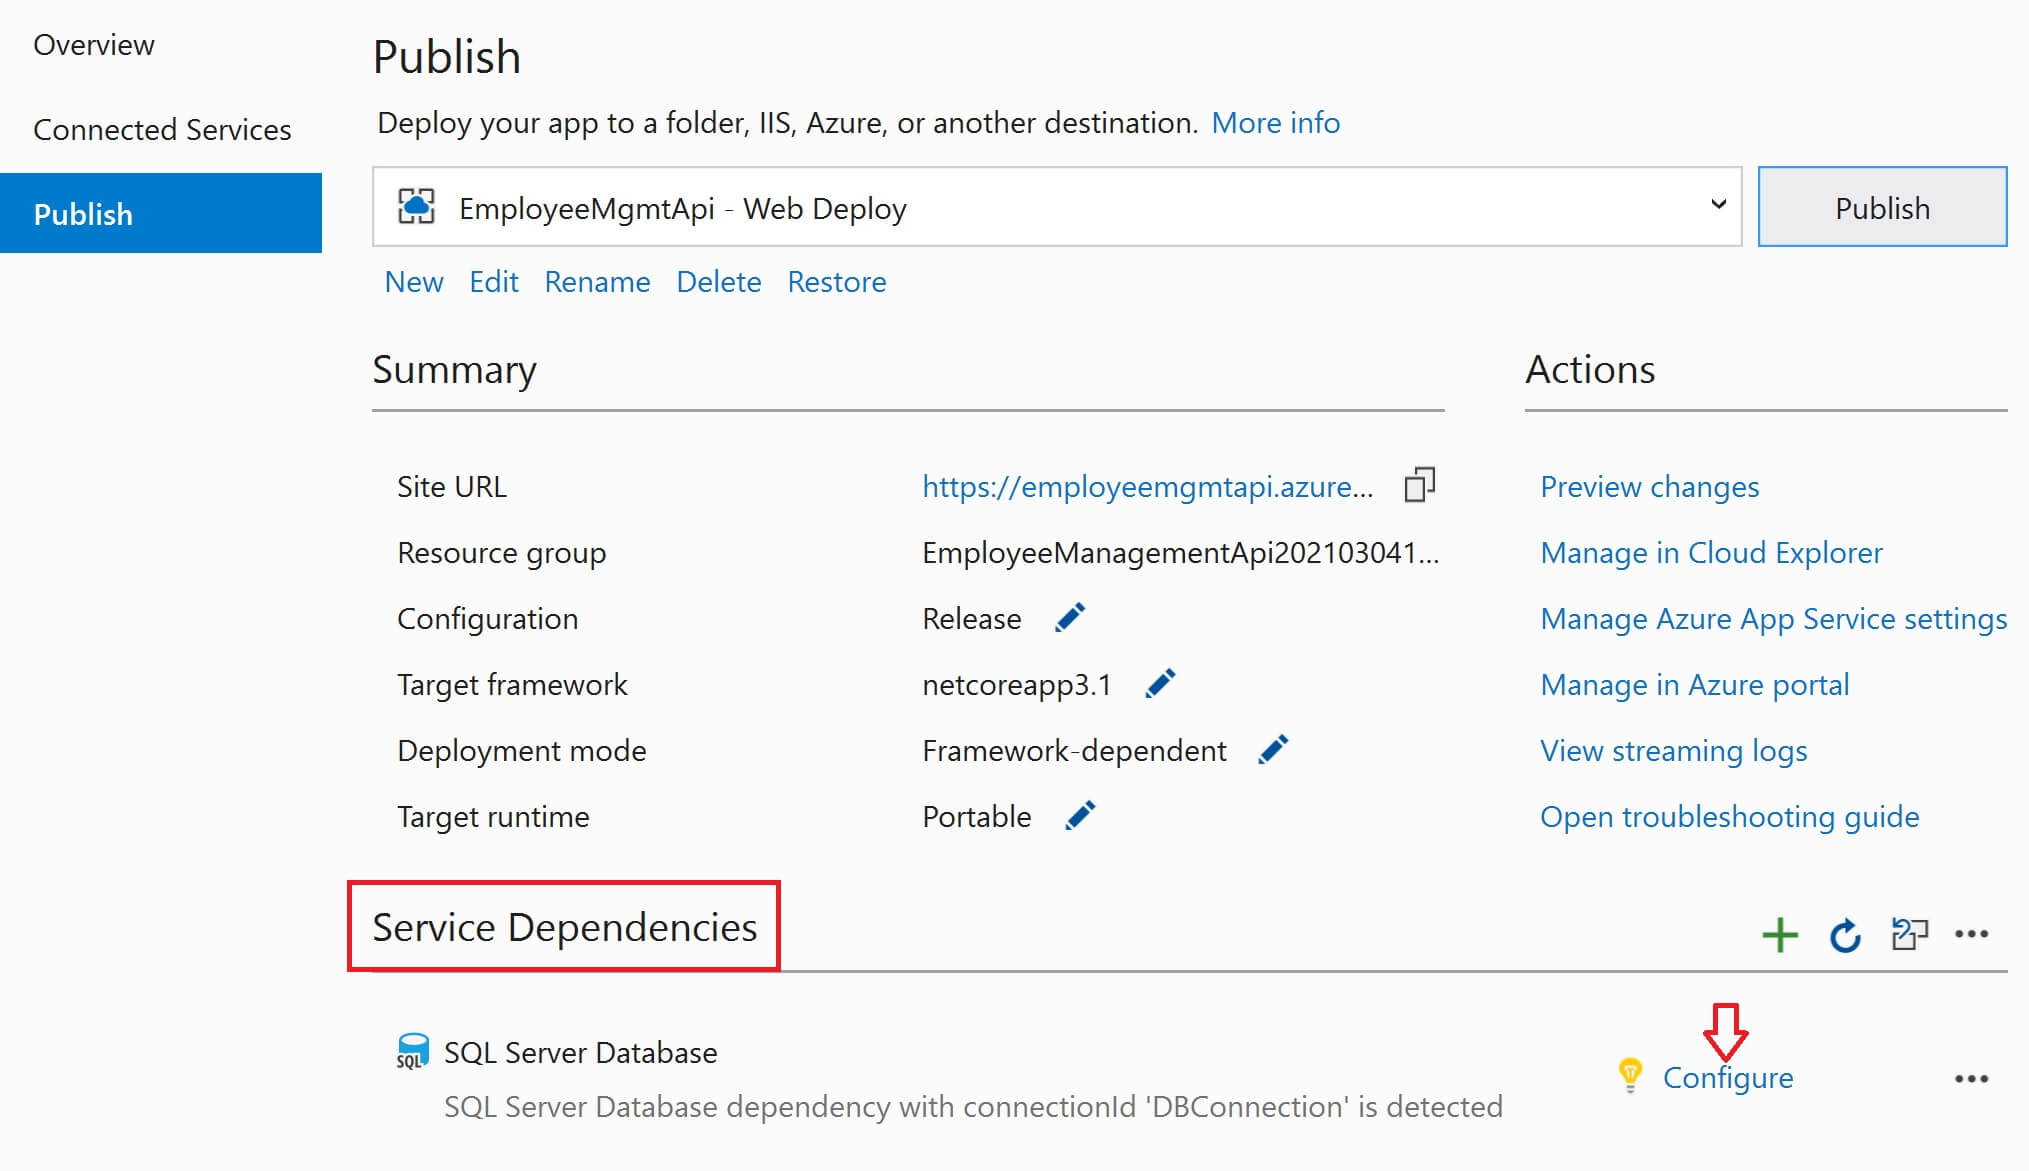
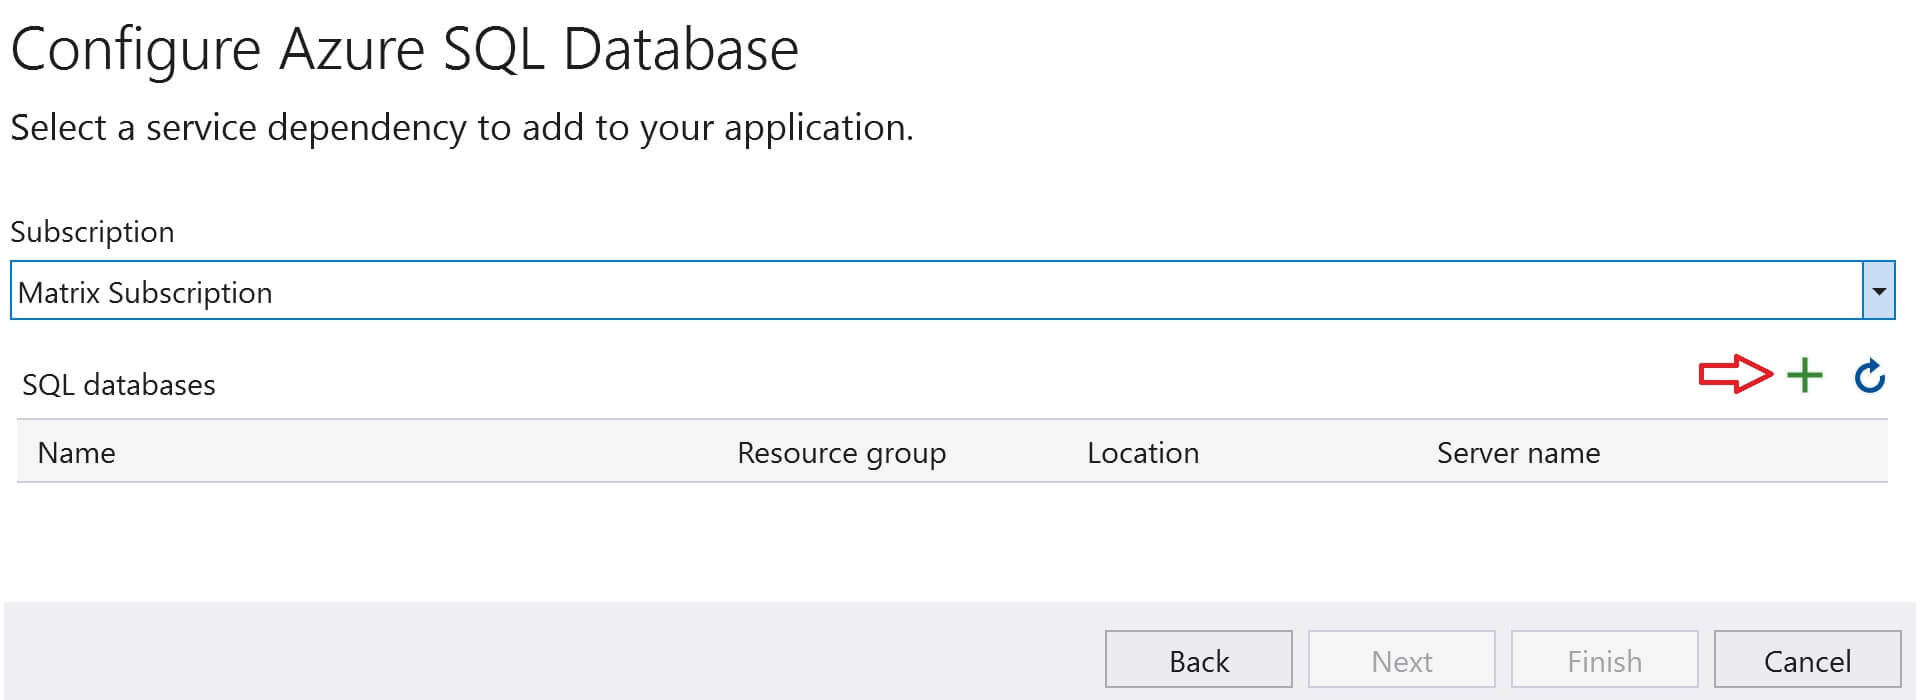
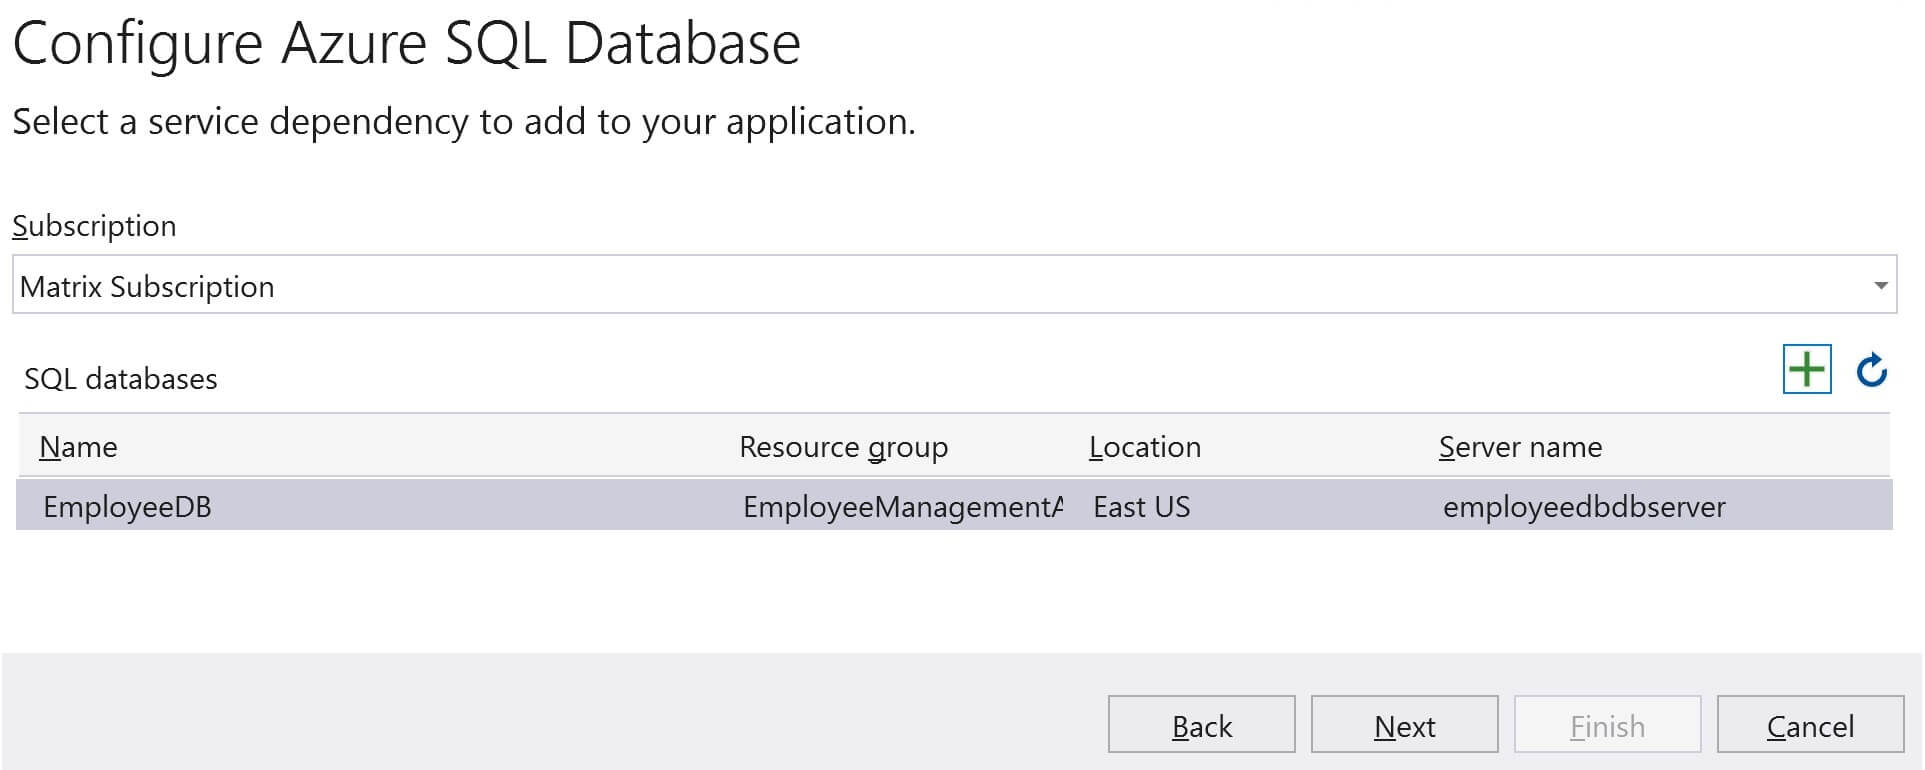
Visual Studio is smart enough to detect that our Employee Management API has a dependency on SQL Server database. It is shown under Service Dependencies. Click on the Configure link to create SQL Server Database in Azure.
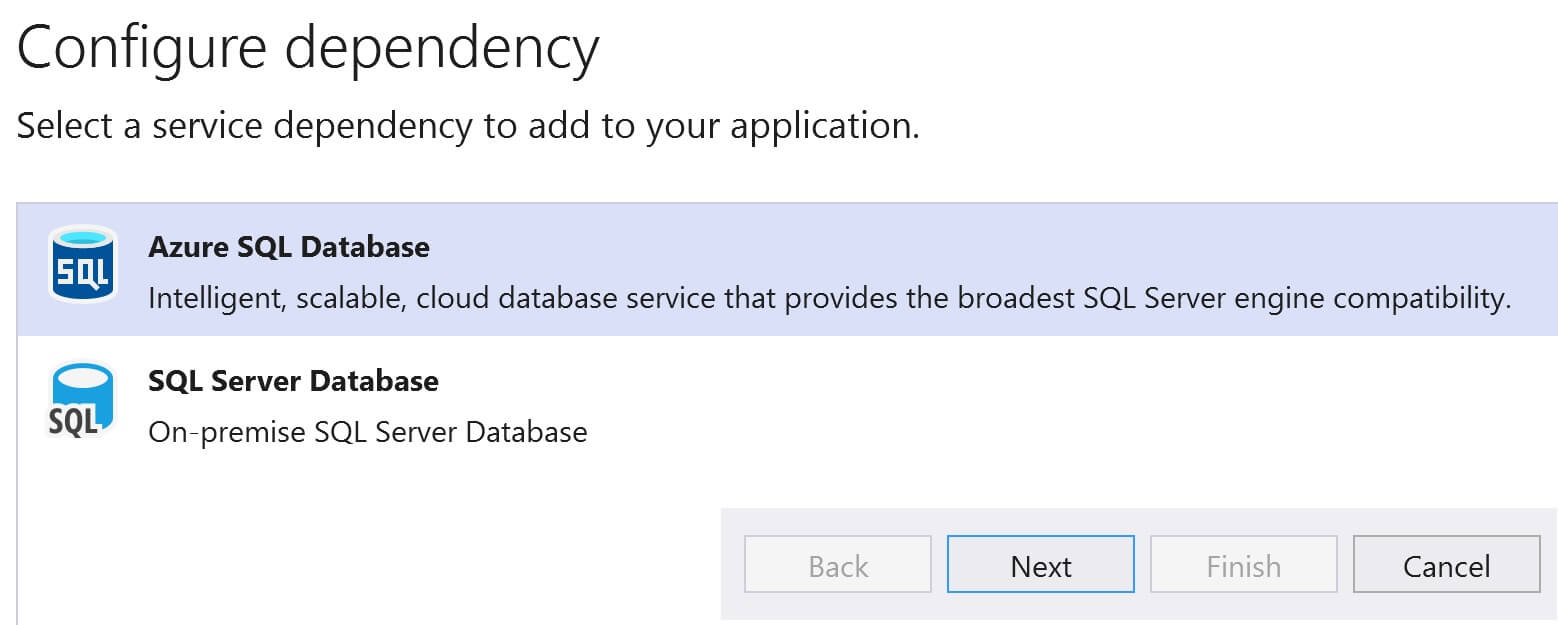
Select Azure SQL Database and click Next
Click on the + sign
Click on the New link next to Database server dropdownlist. Before we can create a SQL Database, we need to create SQL Server Instance.
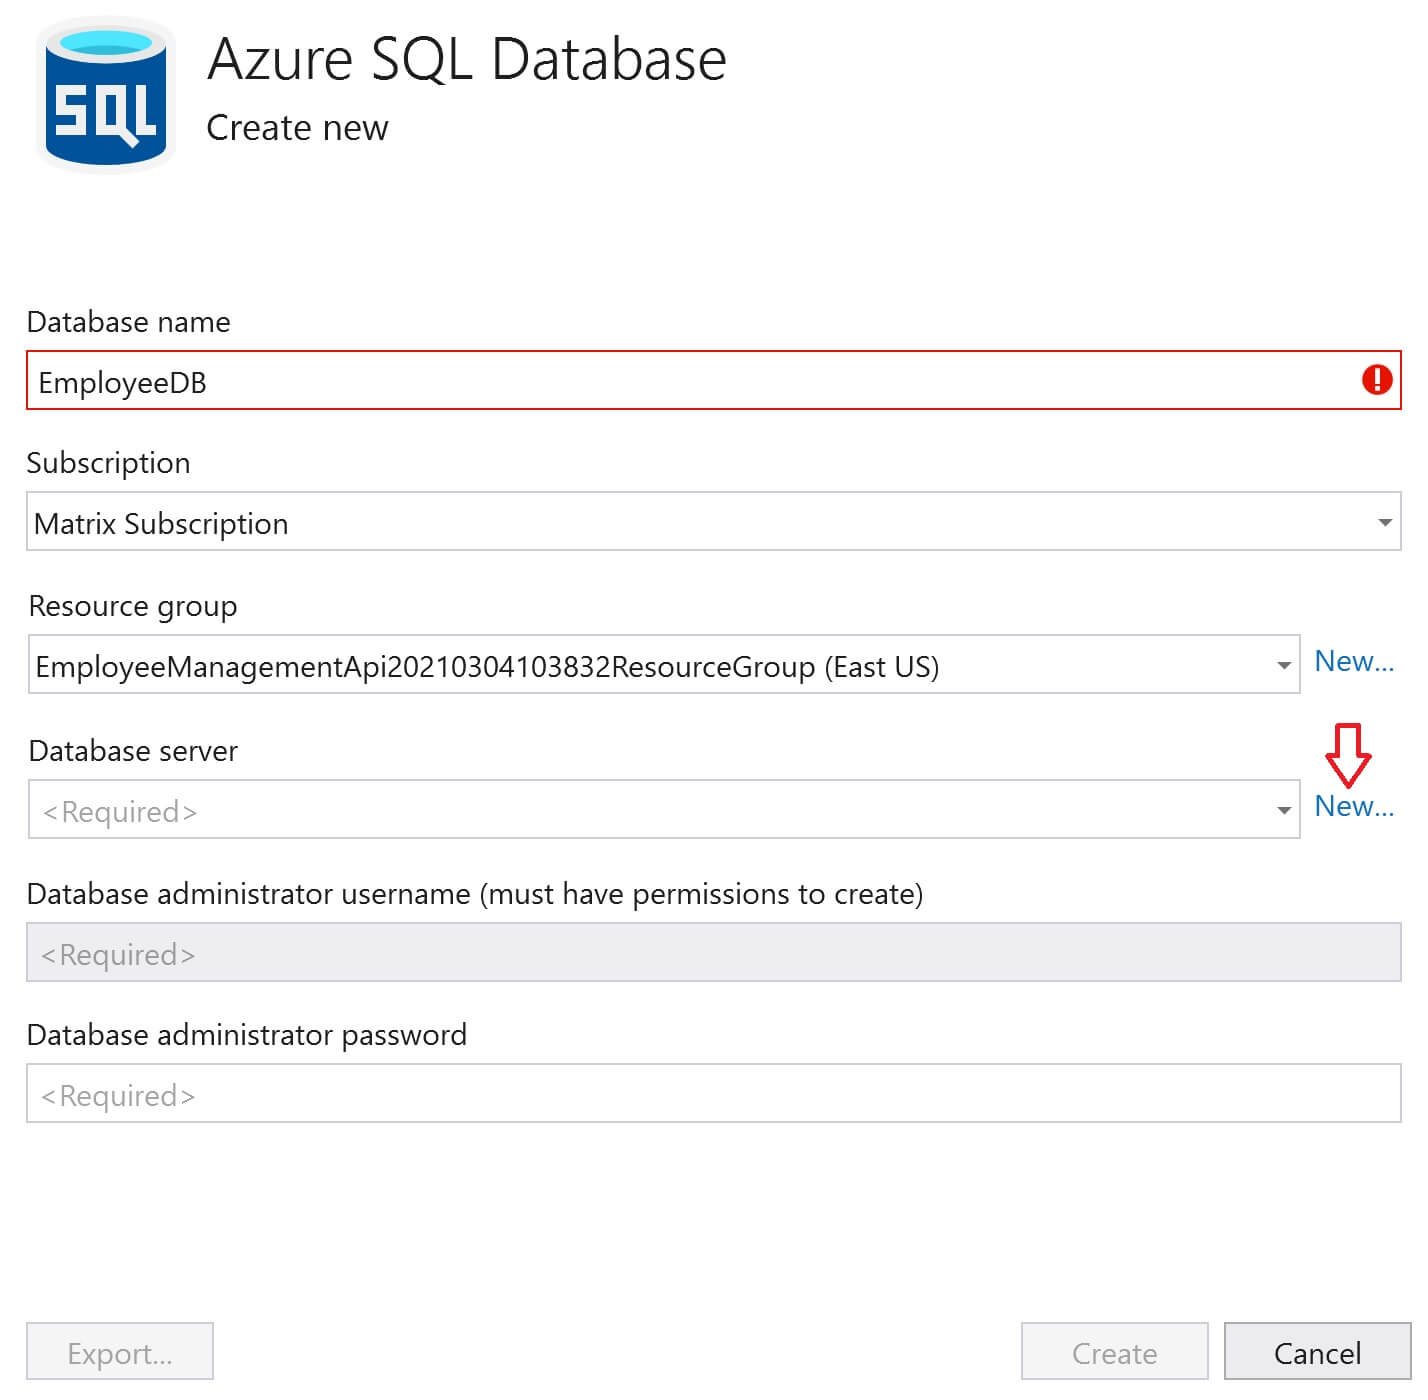
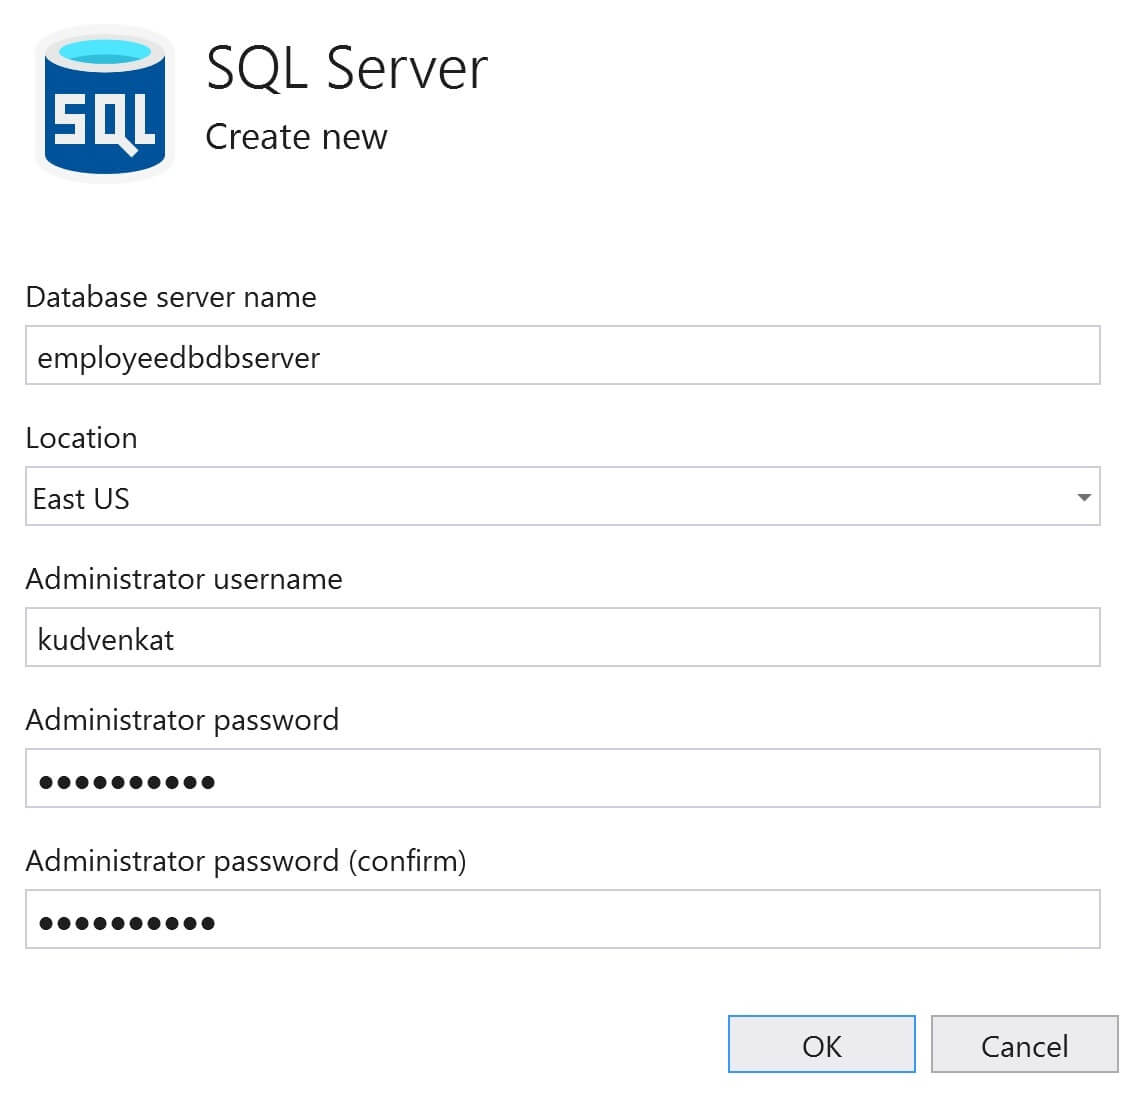
Provide a Database server name, location, Administrator username, password and click OK.
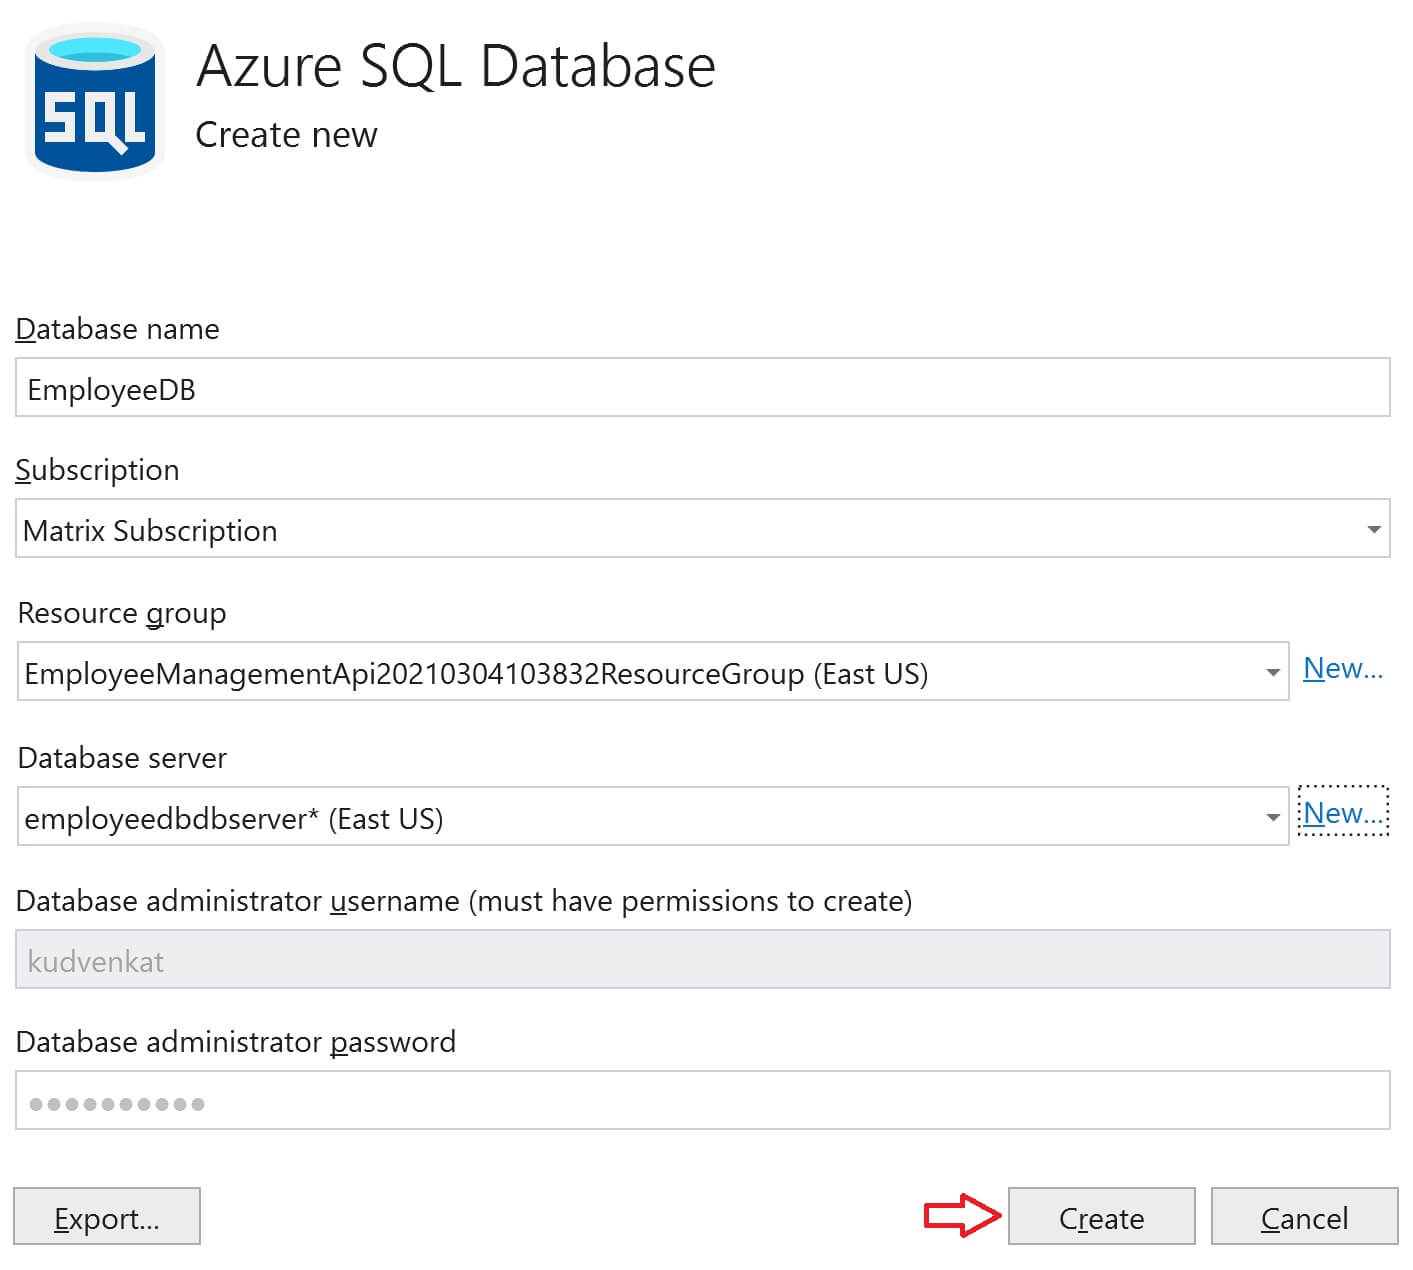
You are now back on Azure SQL Database. Click Create. This creates SQL Server Instance and the database in azure.
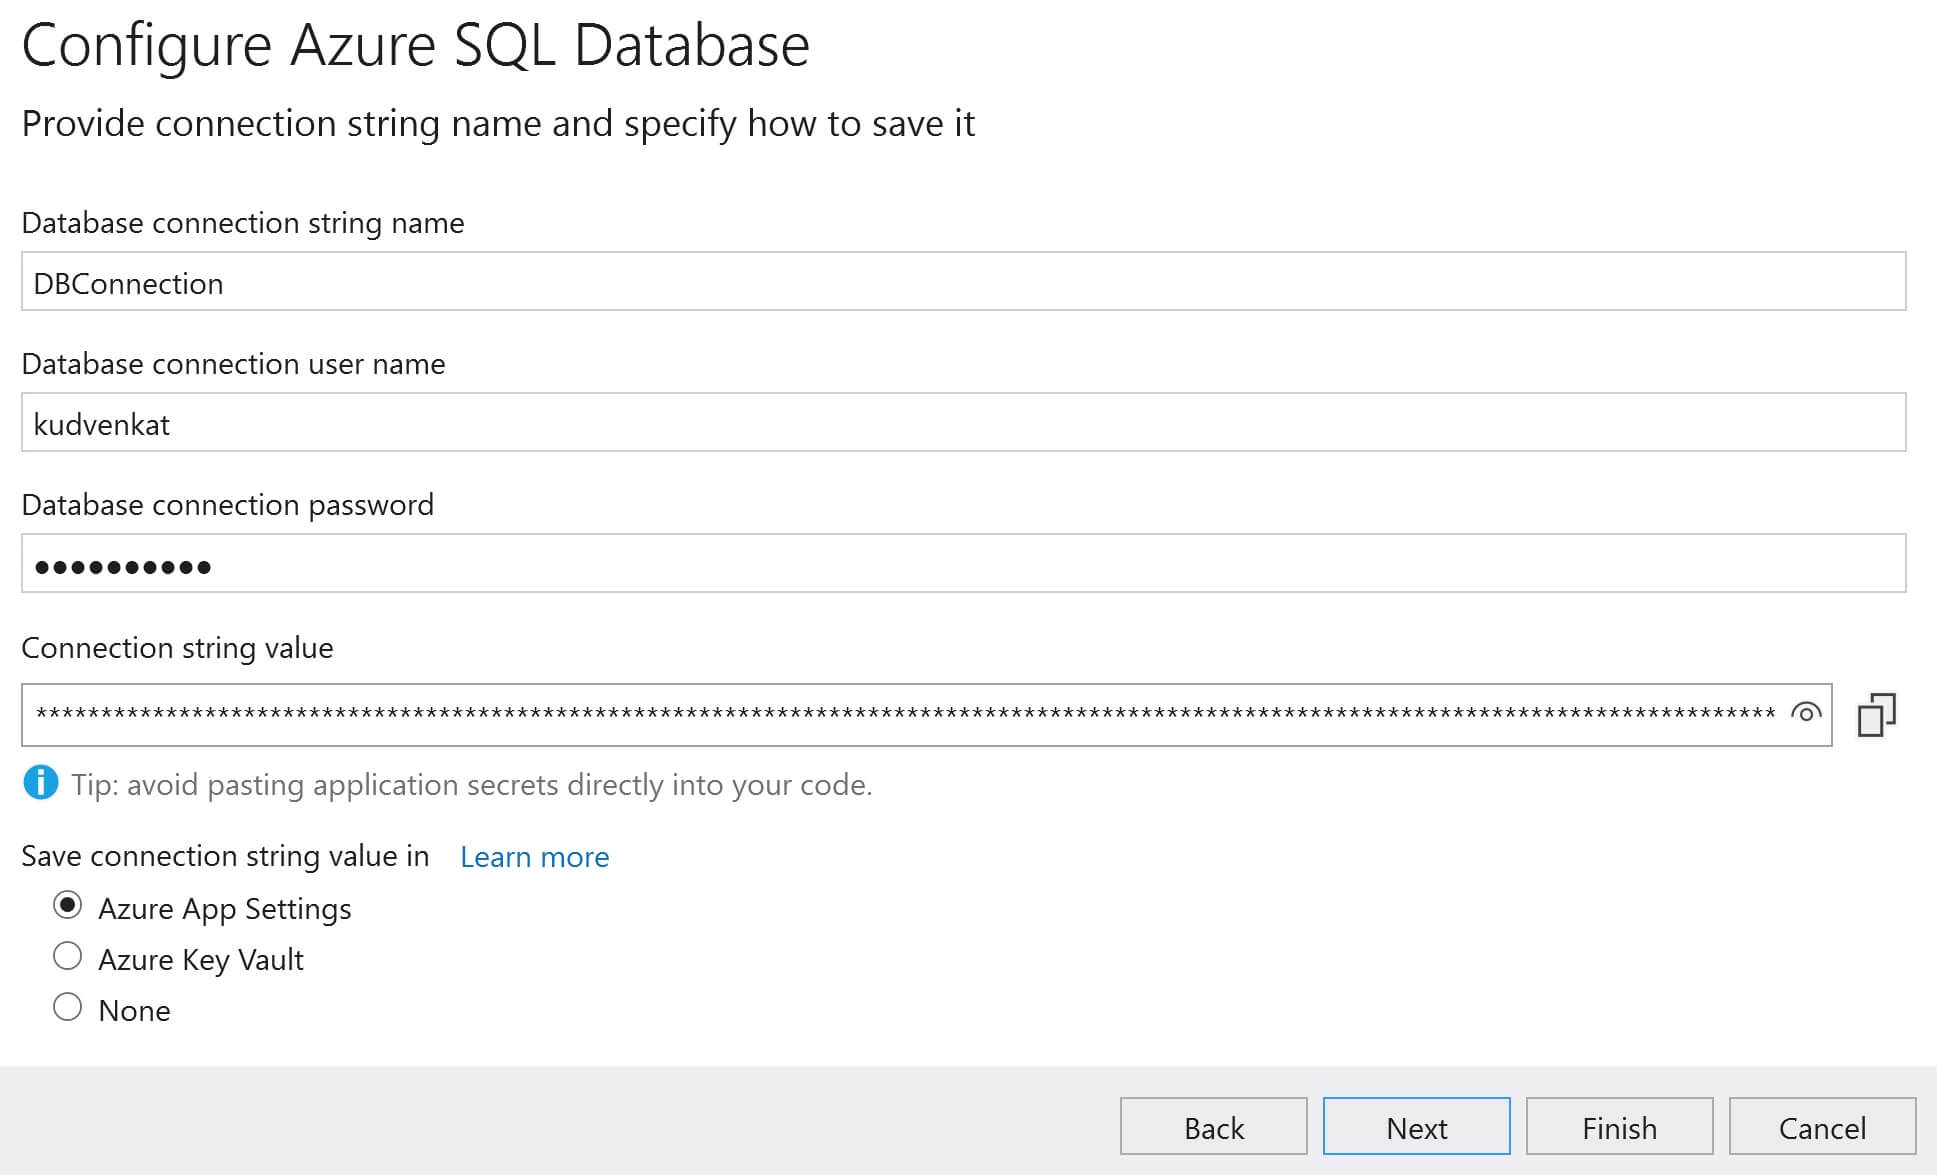
Click Next on Configure Azure SQL Database window.
Provide a database connection username, password and click Next, then Finish and finally Close.
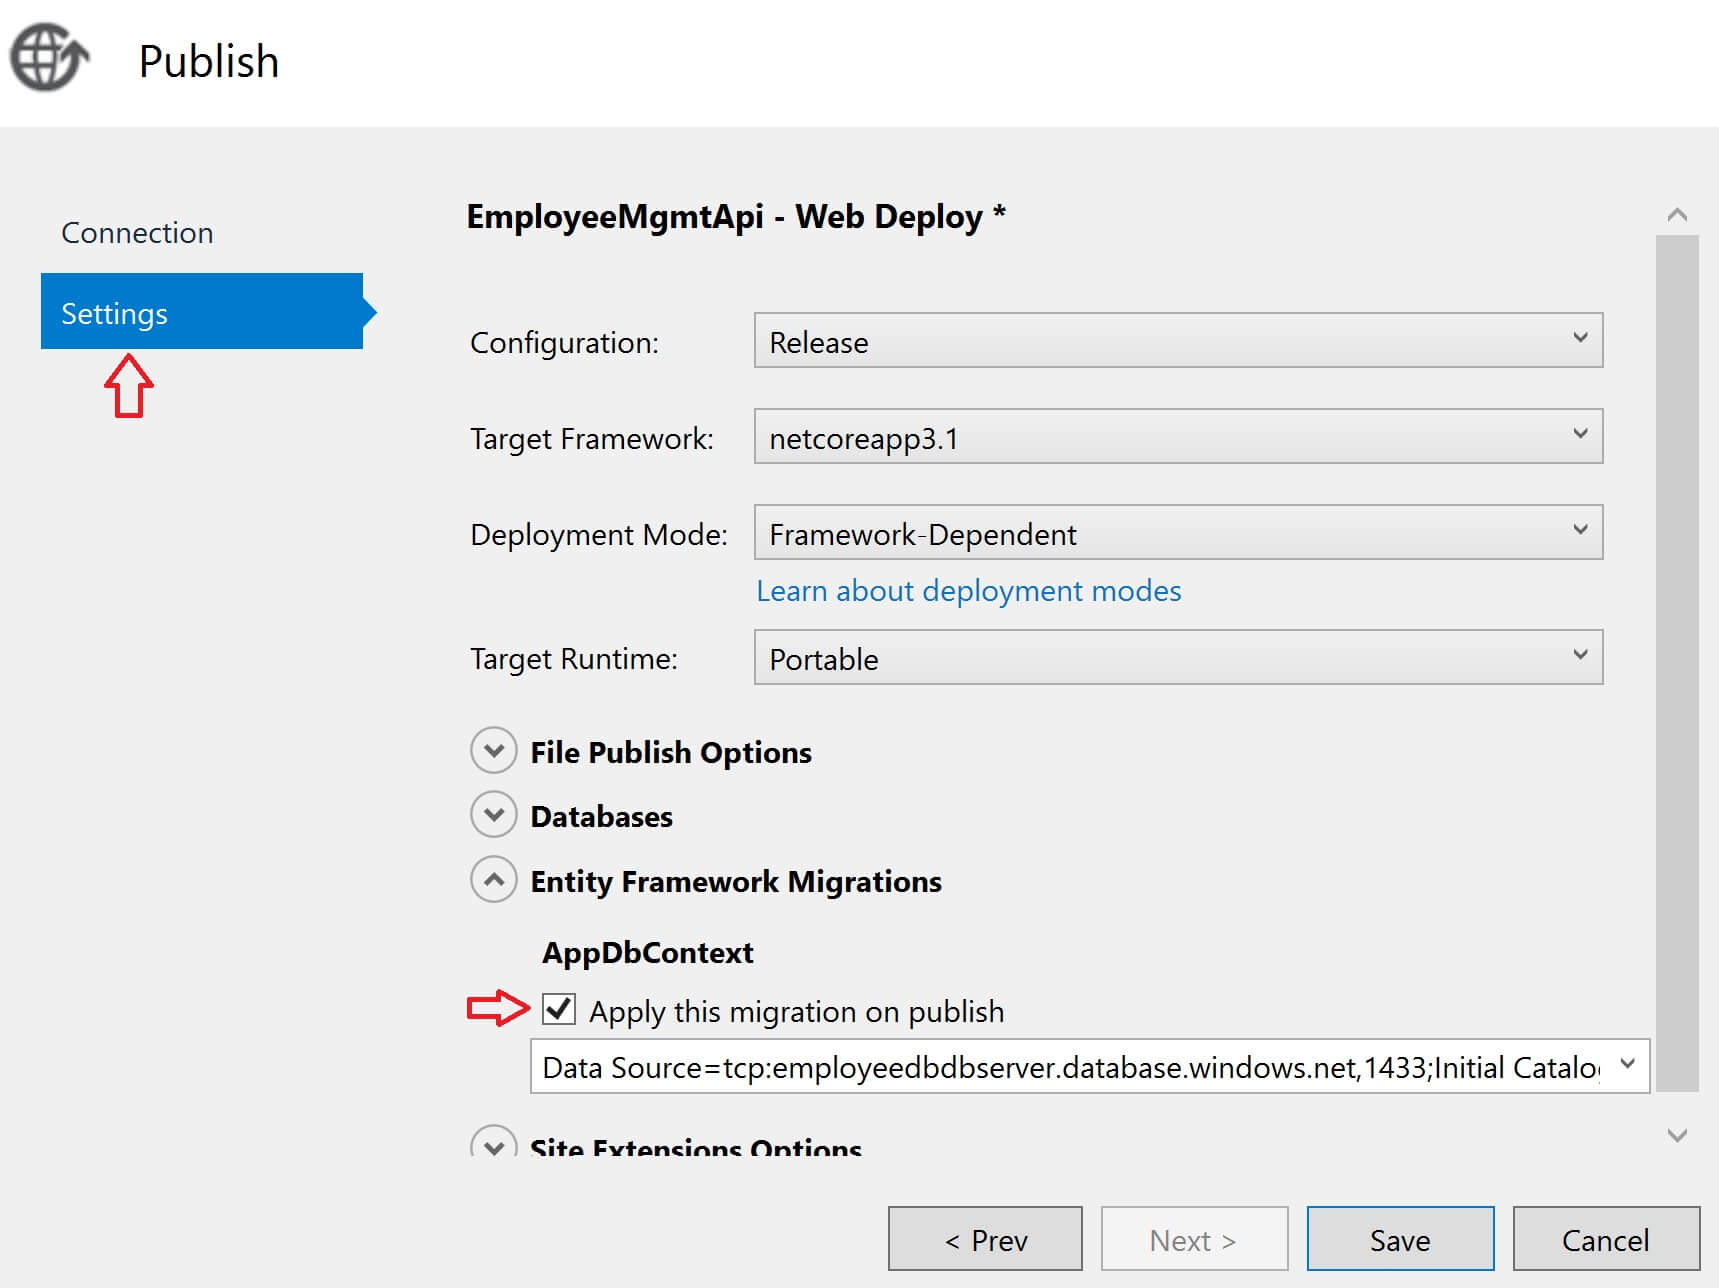
At this point, you should be back on the Publish page in Visual Studio. We have to tell Visual Studio to execute database migrations when we publish to azure. Click on the Edit link.

Click on the Settings tab. Expand Entity Framework Migrations. Select Apply this migration on publish checkbox and then Save.
Finally on the Publish page, click the Publish button.

After the deployment is complete. Navigate to the following URLs
- /api/employees - You will see the list of all employees
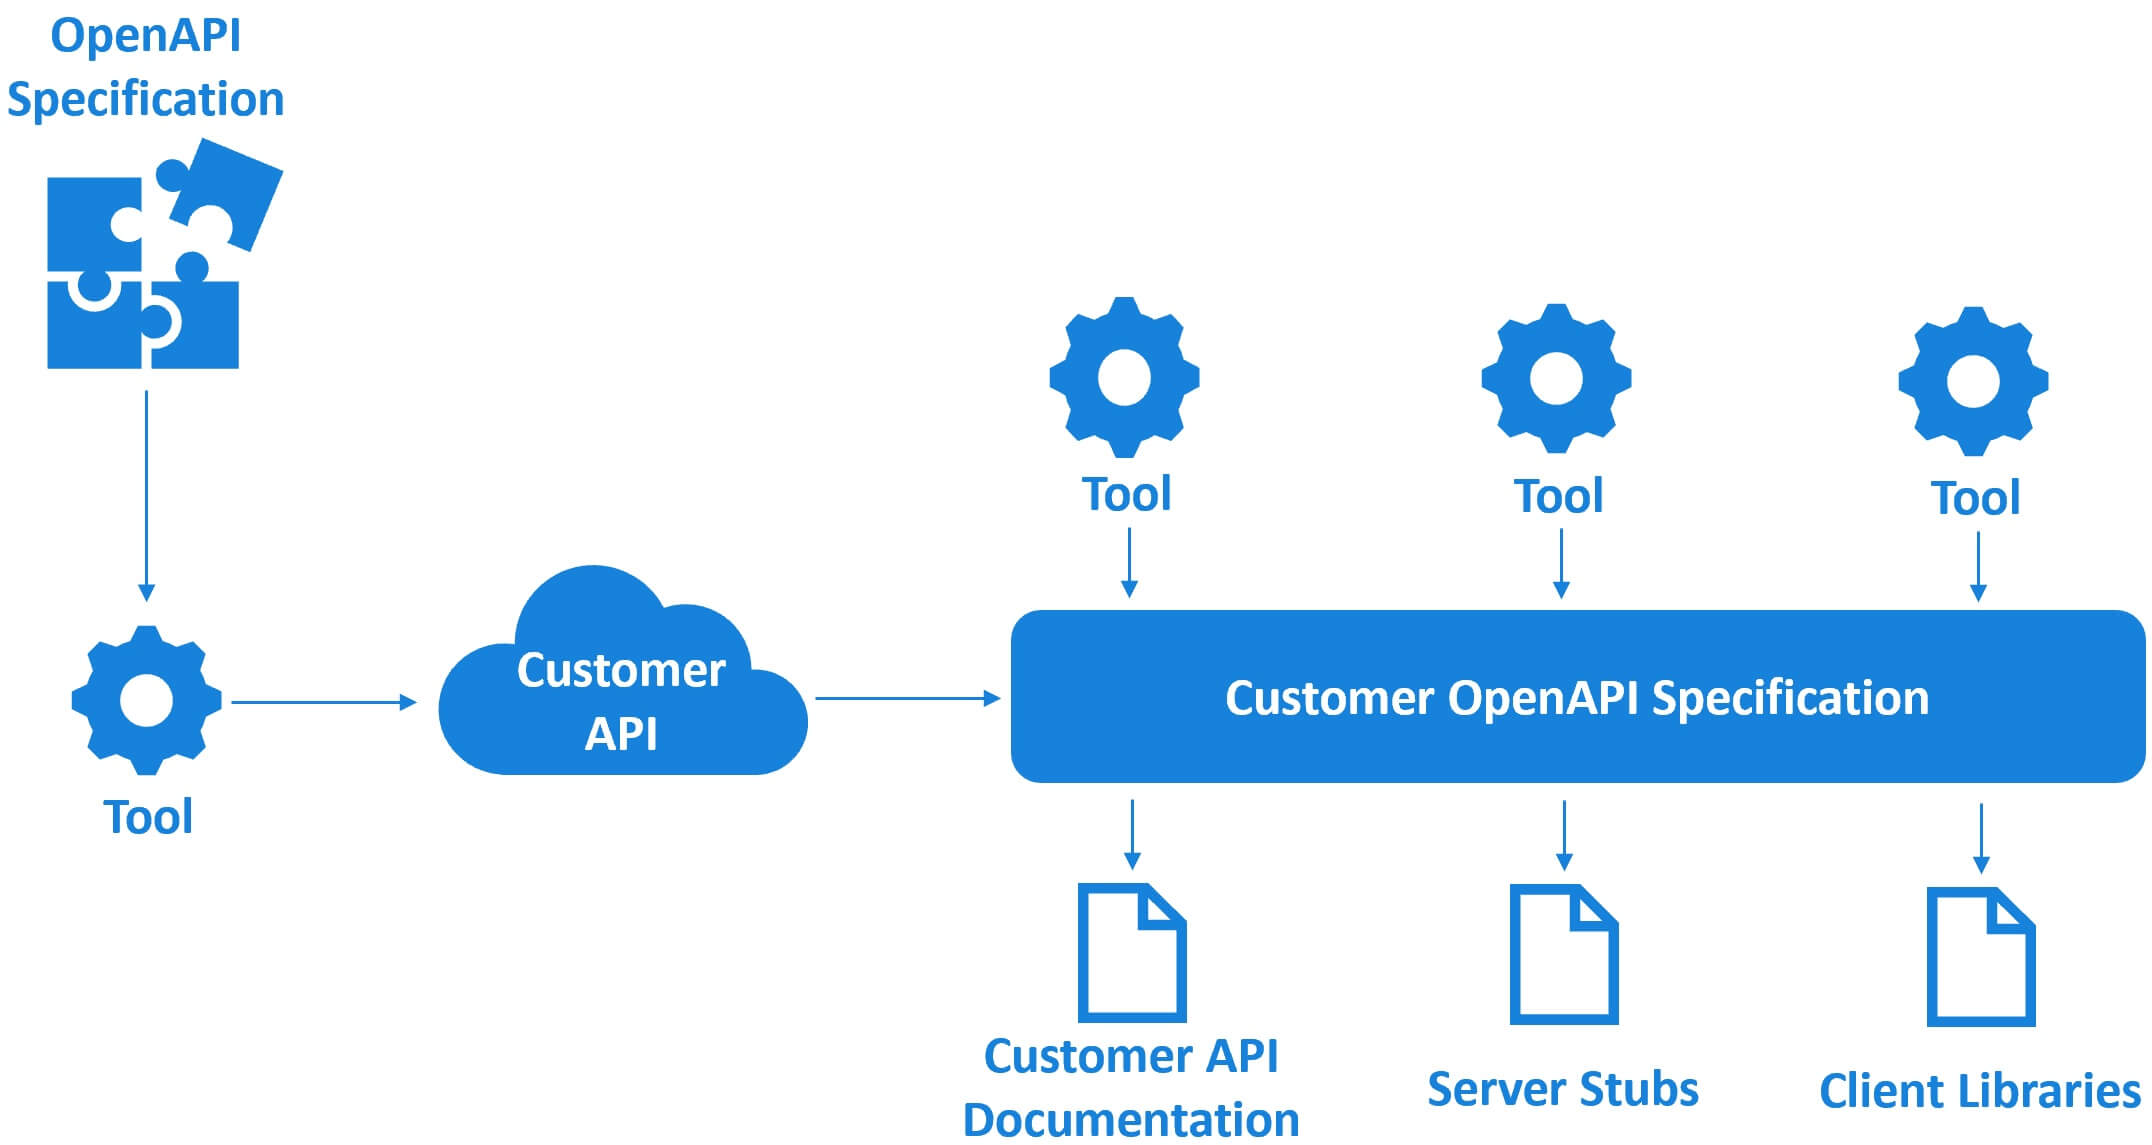
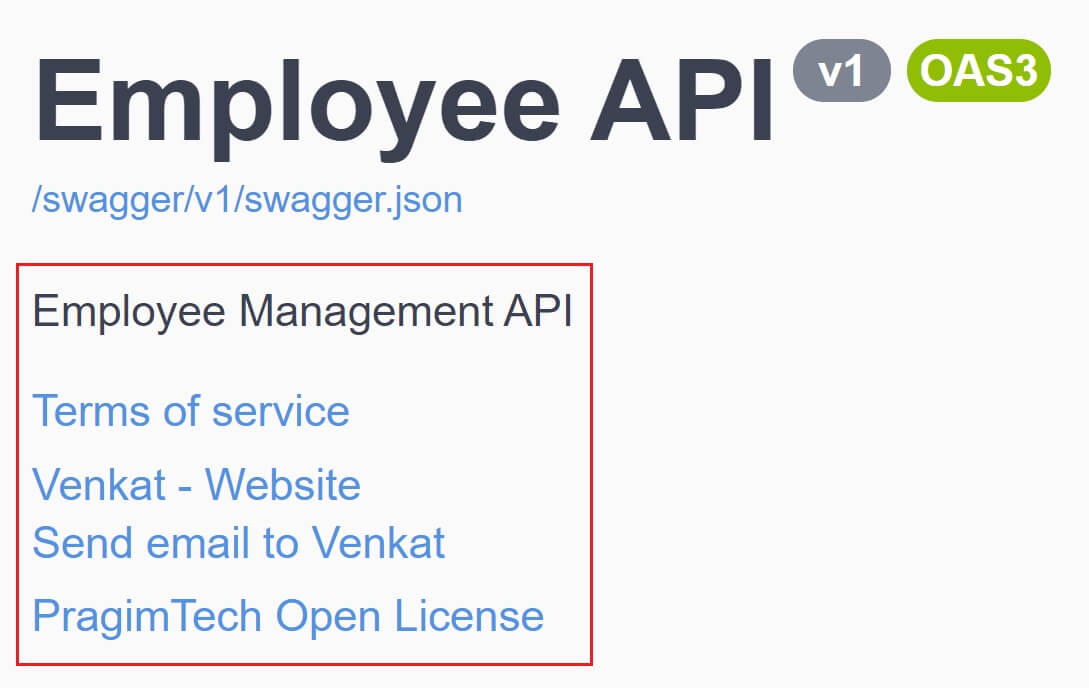
- /swagger/v1/swagger.json - You will see the Emloyee Management OpenAPI specification document.
- /swagger - You will see the Emloyee Management API documentation.
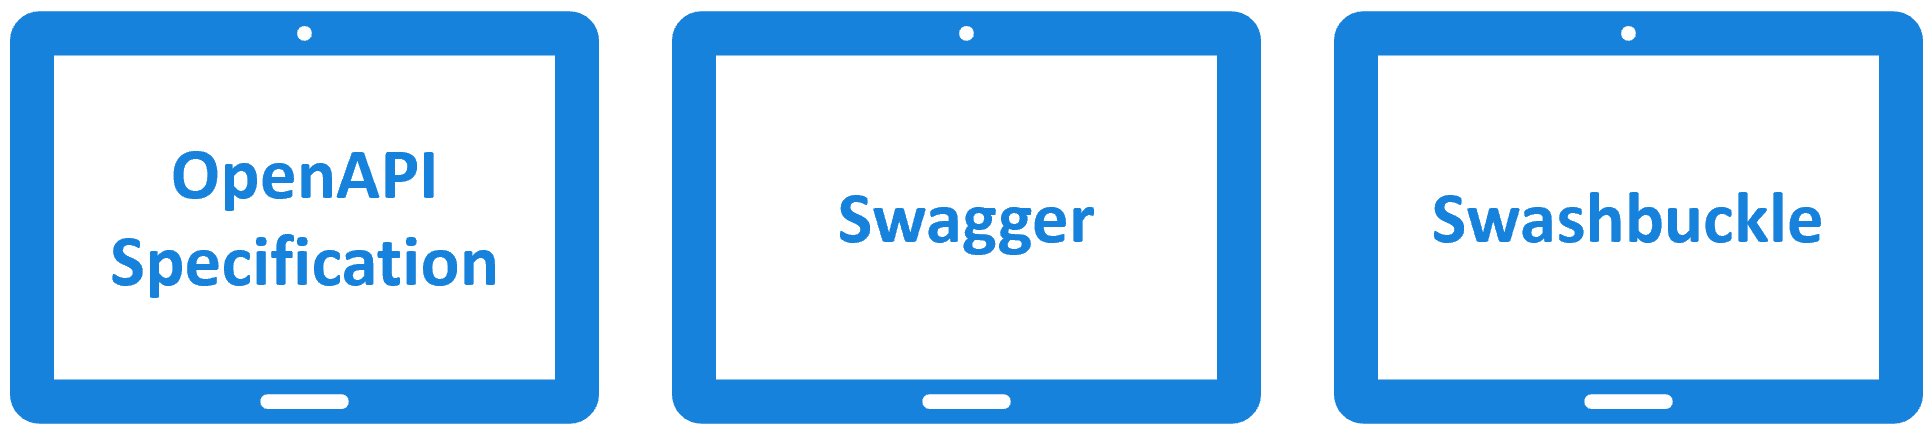


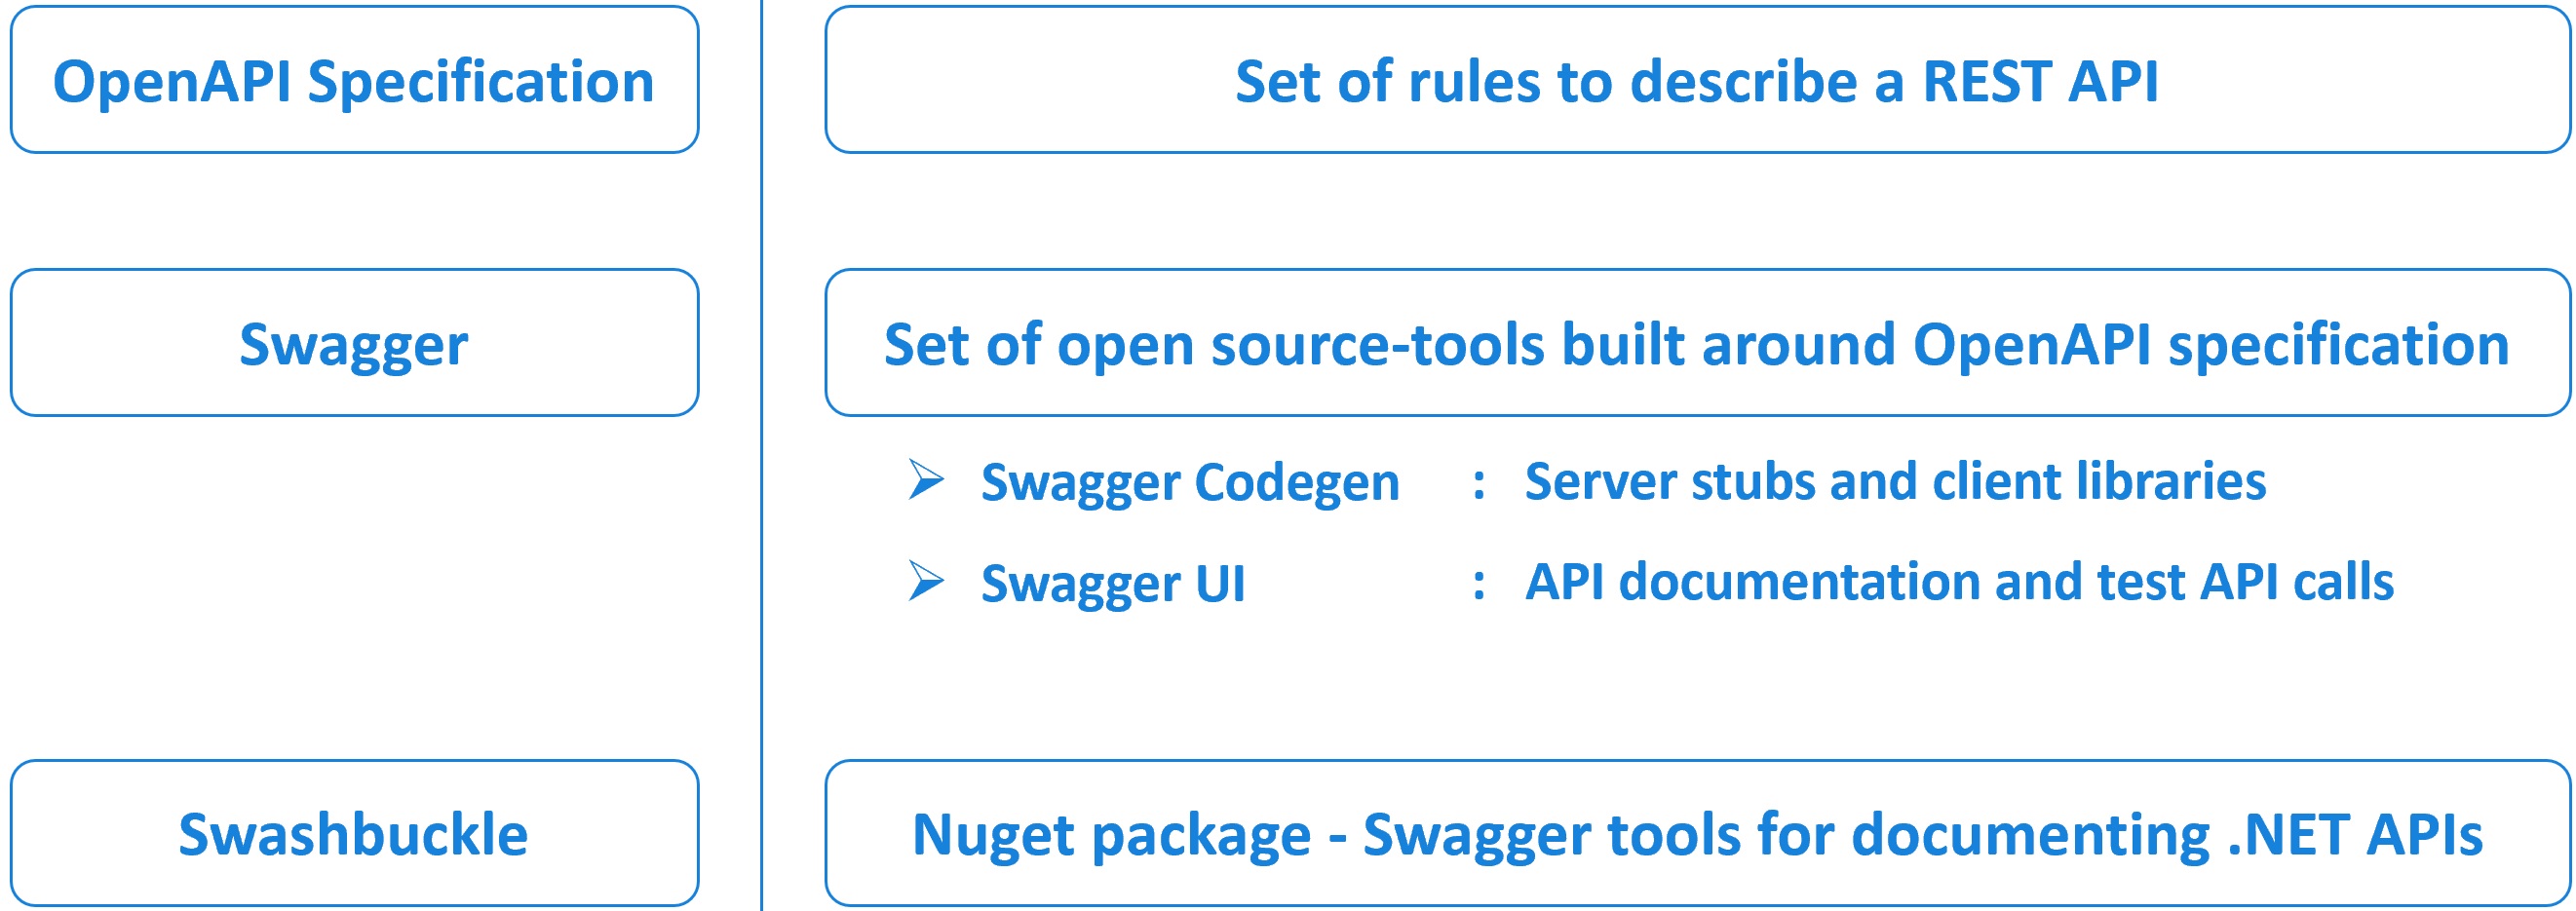
 Lot of people use these 2 terms - OpenAPI specification and Swagger specification interchangeably. Both of them refer to the samething. Initially it was called swagger specification but later renamed to OpenAPI specification.