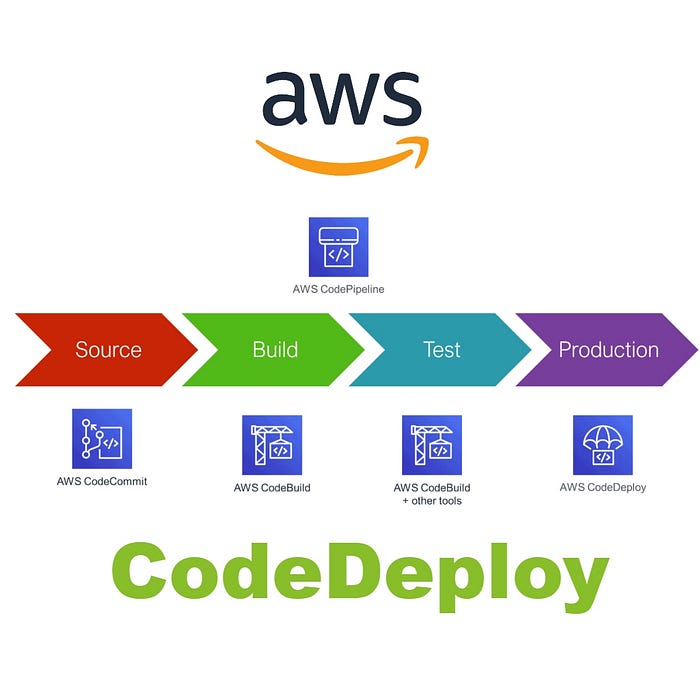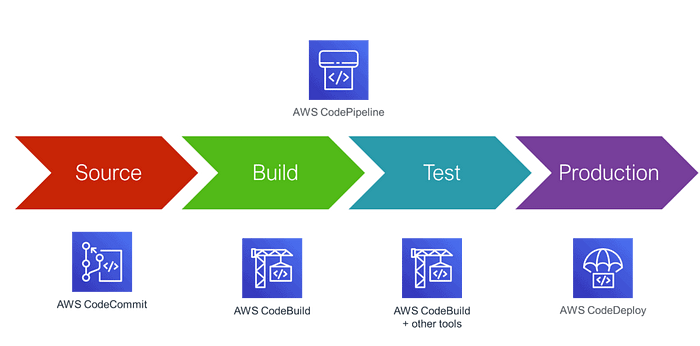
On our journey of making a CI/CD pipeline on AWS with these tools, you completed AWS CodeCommit & CodeBuild.
Next few days you’ll learn these tools/services:
- CodeDeploy
- CodePipeline
- S3
What is CodeDeploy..?
AWS CodeDeploy is a service provided by Amazon Web Services (AWS) that helps you automate software deployment on various types of computing resources such as EC2 instances, on-premises servers, or Lambda functions.
In simple terms, it’s a tool that allows you to deploy your code to multiple servers at once, making it easier and faster to update your applications or websites. With AWS CodeDeploy, you can avoid the manual process of deploying code, reduce the risk of errors and downtime, and improve the overall efficiency of your deployment process.
Here is our Today’s Task-01 :
- What is Appspec.yaml file for CodeDeploy..??
The AppSpec file is a YAML-formatted file used by AWS CodeDeploy to manage the deployment of an application.
It provides instructions to CodeDeploy about the application’s source code, the deployment target, the scripts to run, and the permissions required to execute the scripts.
It also includes information about the deployment lifecycle hooks, which allow developers to execute custom scripts at specific points during the deployment process.
- Deploy index.html file on EC2 machine using nginx..??
As we have seen in previously days tasks in day 50 and day 51.
We launched and configure some task of CodeCommit, CodeBuild, Builspec file and index.html so please refer day 50 and day 51 for better understandings. Here is the link for Day 50 and Part 51.
Day 50: Your CI/CD pipeline on AWS — Part-1 🚀 ☁
Day 51: Your CI/CD pipeline on AWS — Part 2 🚀 ☁
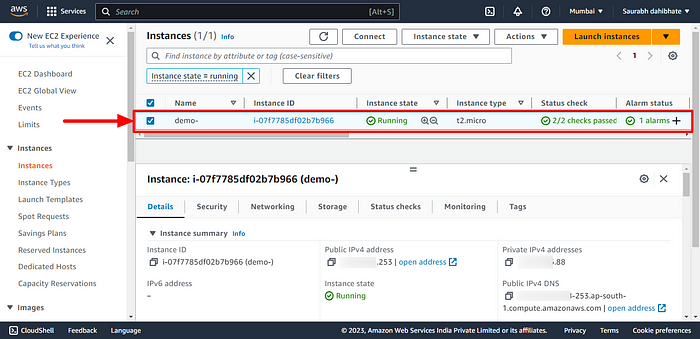
- Create an Instance or Restart previously created in AWS.
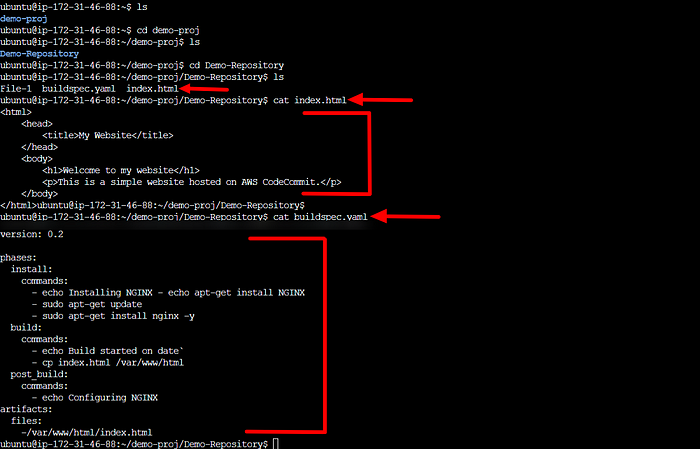
- Clone the CodeCommit repository to the server as we saw the same in my previous blog.
- The repository contained an HTML web application code. I have all files buildspec.yaml and index.html from Day 51 Task files.
- We Build the code in the AWS CodeBuild section in the management section and the code commited, Build and stored in the S3 bucket.
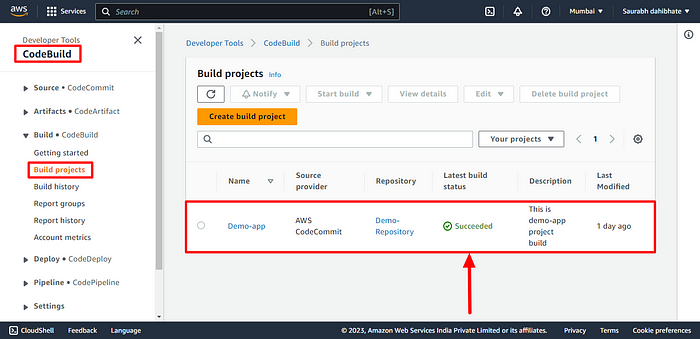
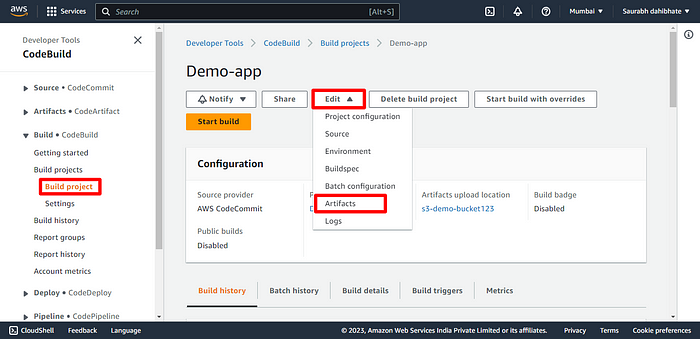
- For todays deployment we have to edit artifact configuration of project as follows.
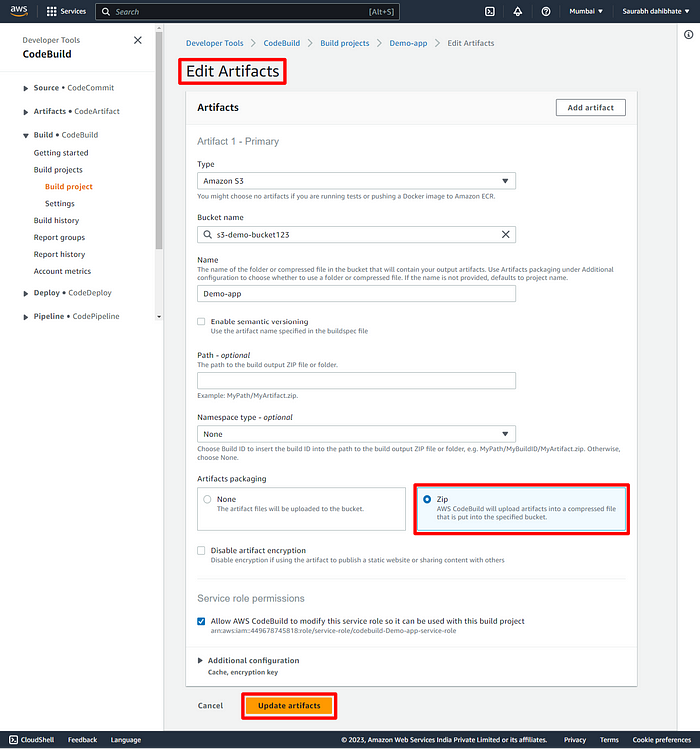
- Select Zip file format for code storage in S3.
- Now, let’s navigate to the CodeDeploy section in AWS.
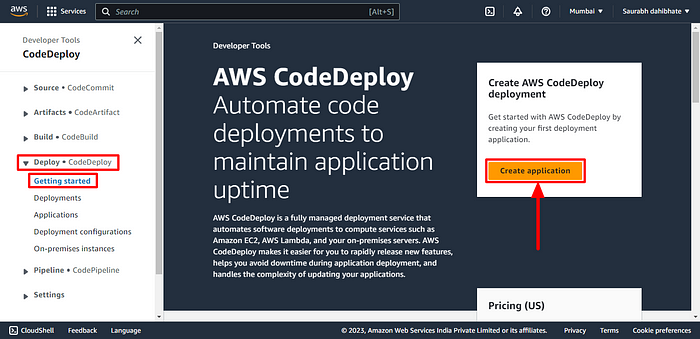
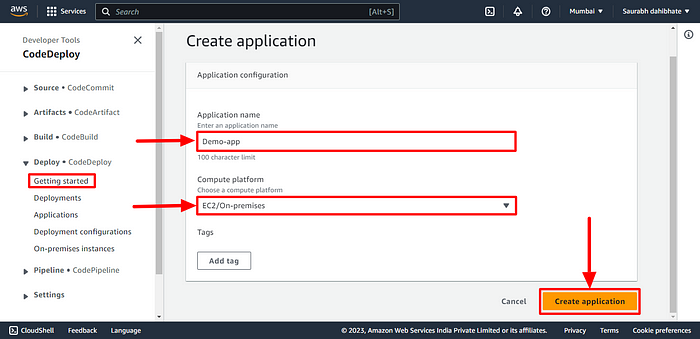
- Create an application by providing the name and compute platform. Here we are using EC2 instance.
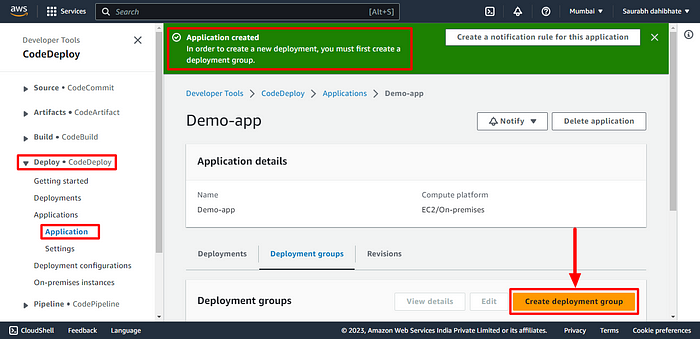
- The application is created now. Now create a deployment group.
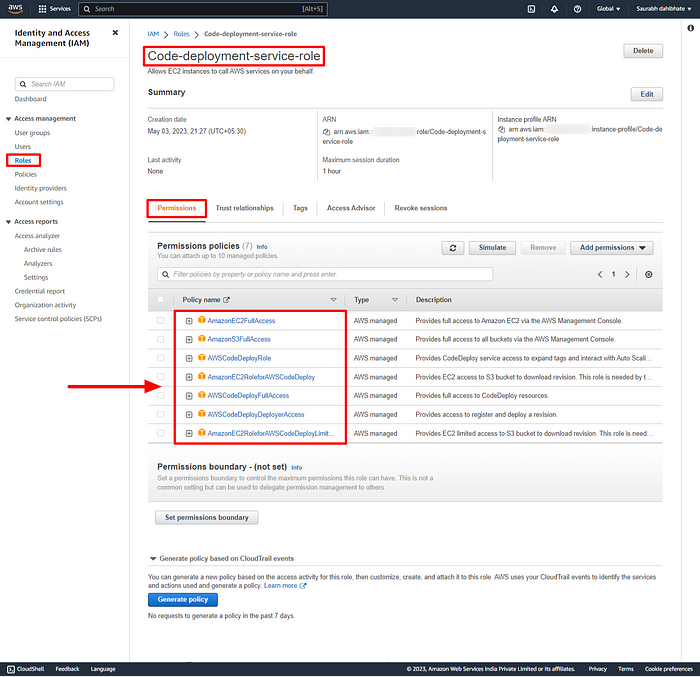
- Before that, we need to give access to deployment to access the AWS resource for which we need to create a role in IAM. Provide all the necessary access as mentioned below.
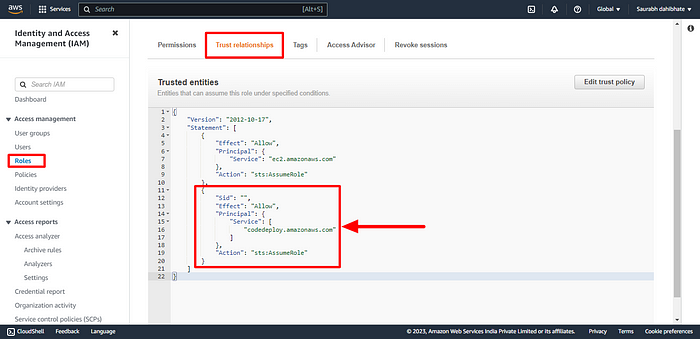
- Edit the trust policy and add Statement for CodeDeploy and update policy.
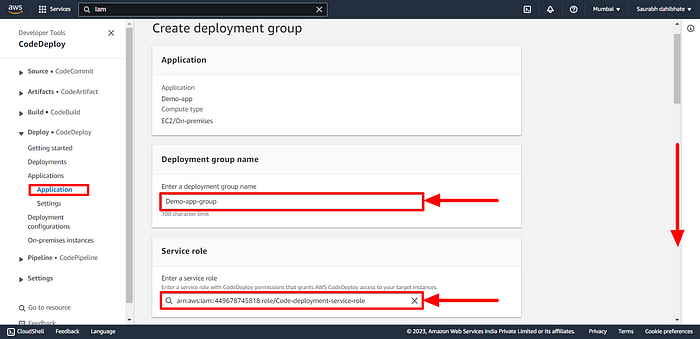
- Now, Create deployment group. Provide the deployment group name, and service role and enter the ARN id from the above role.
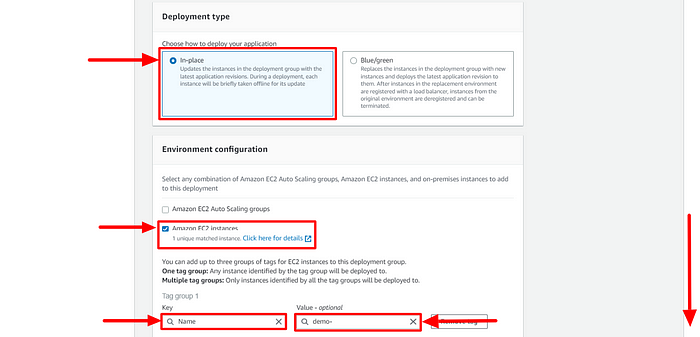
- Provide the EC2 instance details in Environment configuration.
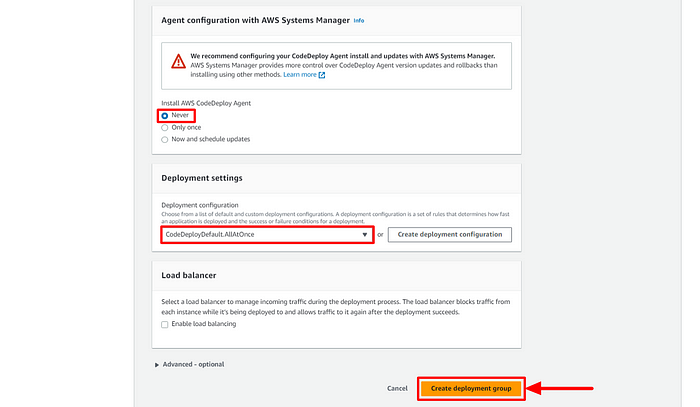
- Provide the below configurations. Now, Create deployment Group.
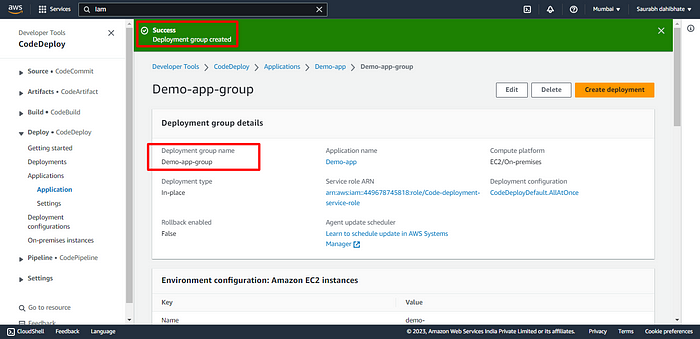
- A deployment group is now created.
- We need to install the CodeDeploy agent on the server for which we need to write a script file with all the dependencies.
#!/bin/bash

# This script installs the CodeDeploy agent and its prerequisites on Ubuntu 22.04.

# Update package list
sudo apt-get update

# Install Ruby and its dependencies
sudo apt-get install ruby-full ruby-webrick wget -y

# Change to temporary directory
cd /tmp

# Download the CodeDeploy agent package
wget https://aws-codedeploy-us-east-1.s3.us-east-1.amazonaws.com/releases/codedeploy-agent_1.3.2-1902_all.deb

# Create a directory to extract the package contents
mkdir codedeploy-agent_1.3.2-1902_ubuntu22

# Extract the package contents
dpkg-deb -R codedeploy-agent_1.3.2-1902_all.deb codedeploy-agent_1.3.2-1902_ubuntu22

# Update the package dependencies to use Ruby 3.0
sed 's/Depends:.*/Depends:ruby3.0/' -i ./codedeploy-agent_1.3.2-1902_ubuntu22/DEBIAN/control

# Repackage the updated package
dpkg-deb -b codedeploy-agent_1.3.2-1902_ubuntu22/

# Install the updated package
sudo dpkg -i codedeploy-agent_1.3.2-1902_ubuntu22.deb

# List all systemd units that contain "codedeploy" in their name
systemctl list-units --type=service | grep codedeploy

# Check the status of the CodeDeploy agent service
sudo service codedeploy-agent status- Create install.sh file and execute the shell script.
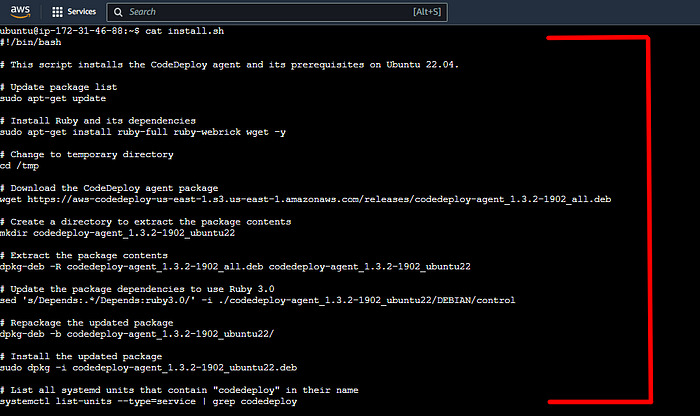
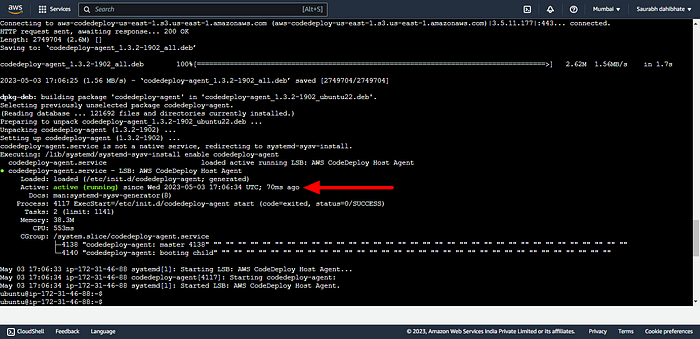
- Run the script file and all the dependencies are installed now on the server.
- CodeDeploy Agent is up and running.
Here is our Today’s Task-02 : Executing the code build and deployment
- Add appspec.yaml file to CodeCommit Repository and complete the deployment process.
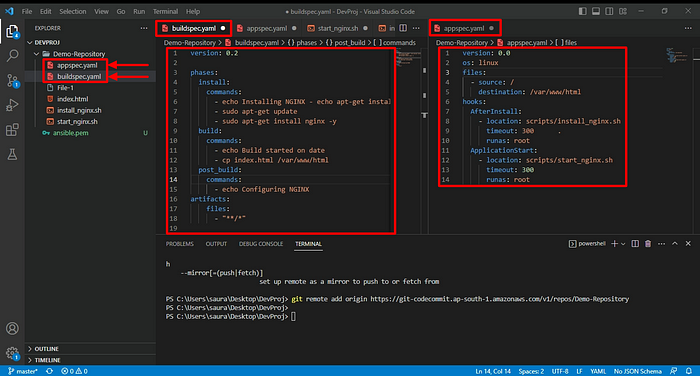
- App Spec file is required to create a bridge between the AWS CodeDeploy and EC2 instance. Create the yaml file.
- appspec.yaml
version: 0.0               #specifies the version number of the file format.
os: linux                  #specifies the operating system to be used.
files:                     #is an array of files to be copied from the source to the destination directory.
  - source:/               #specifies the source directory.
destination: /var/www/html #specifies the destination directory where the files will be copied to.
  hooks:                   #is an array of scripts to be executed at different points during the deployment process.
    AfterInstall:          #specifies a script to be executed after the installation of the application.
      - location: scripts/install_nginx.sh #specifies the location of the script file to be executed
        timeout: 300       #specifies the maximum amount of time in seconds that the script can run for.
        runas: root        #specifies the user that the script should be run as.
    ApplicationStart:      #specifies a script to be executed after the application has started.
      - location: scripts/start_nginx.sh
        timeout: 300
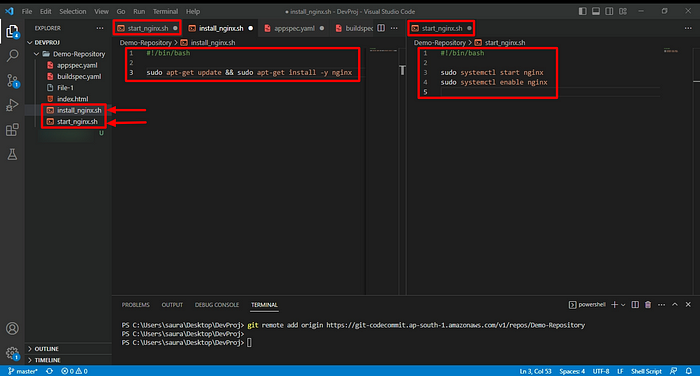
runas: root- Create the dependency files as well for installing and starting nginx on the server.
- install_nginx.sh
#!/bin/bash

sudo apt-get update && sudo apt-get install -y nginx- start_nginx.sh
#!/bin/bash

sudo systemctl start nginx
sudo systemctl enable nginx- Make sure to change the buildspec.yaml file so that the CodeBuild will build the appspec.yml file and transfer the artifact to S3 bucket.
version: 0.2

phases:
  install:
    commands:
      - echo Installing NGINX - echo apt-get install NGINX
      - sudo apt-get update
      - sudo apt-get install nginx -y
  build:
    commands:
      - echo Build started on date
      - cp index.html /var/www/html
  post_build:
    commands:
      - echo Configuring NGINX
artifacts:
    files:
      - "**/*"
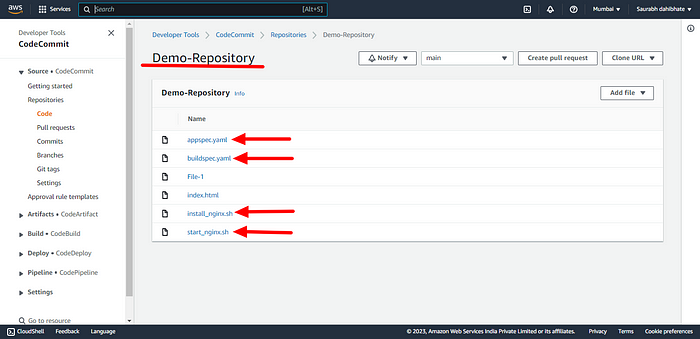
Here is all required files index.html, buildspec.yaml, appspec.yaml, install_nginx.shand start_nginx.sh.
- Commit the code and transfer all to the CodeCommit repository.
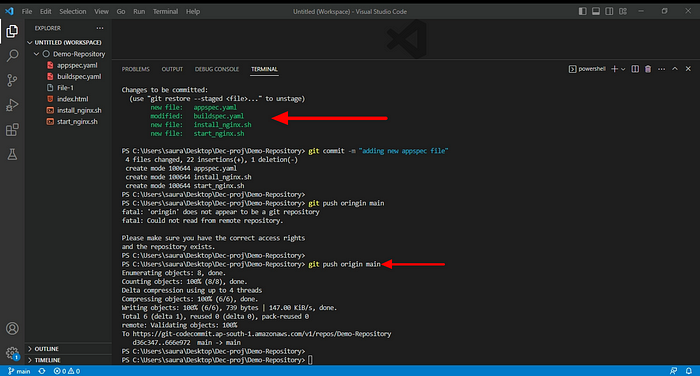
- You can view the new code files in the CodeCommit repository.
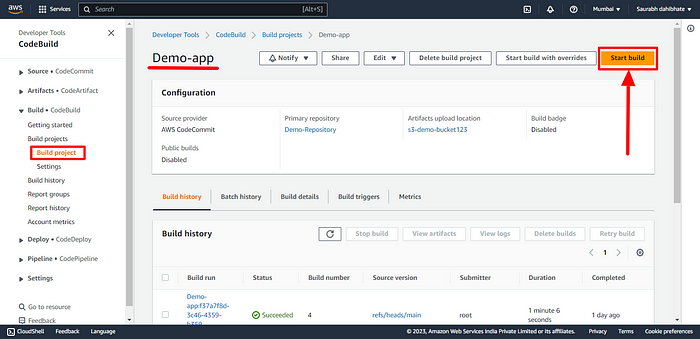
- Build the project now.
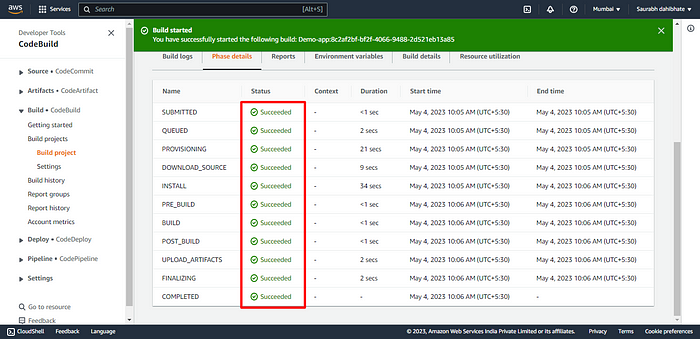
- Project successfully build
- Now create a deployment in the deployment group that we made previously.
- But before that we have to Create a role for giving access to EC2 instance with all the neccessary permission policies as shown below.
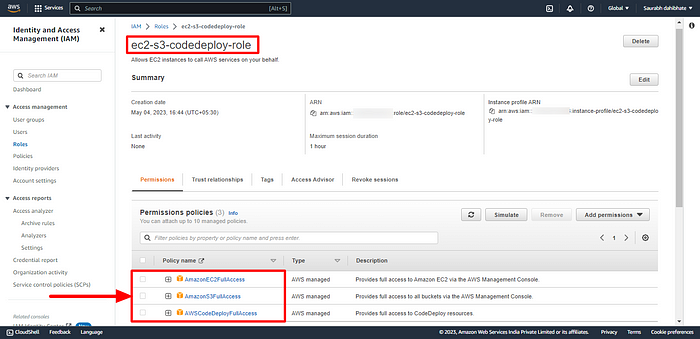
- Now, navigate to the instance and modify the IAM role. Select the IAM role created above.
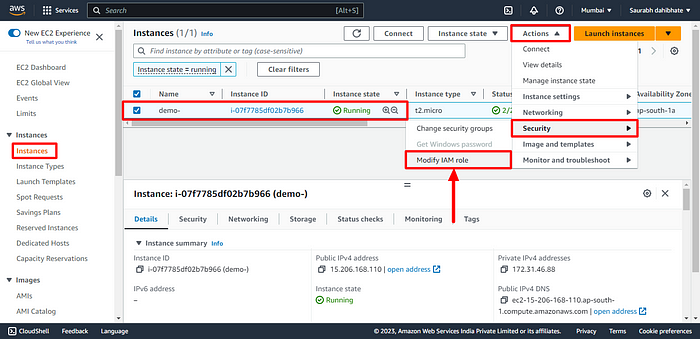
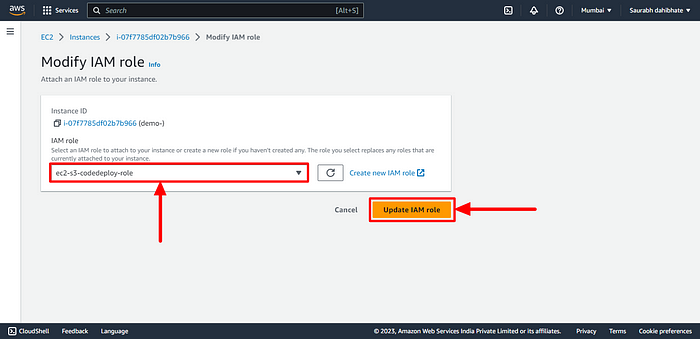
- Now create a deployment in the deployment group that we made previously.
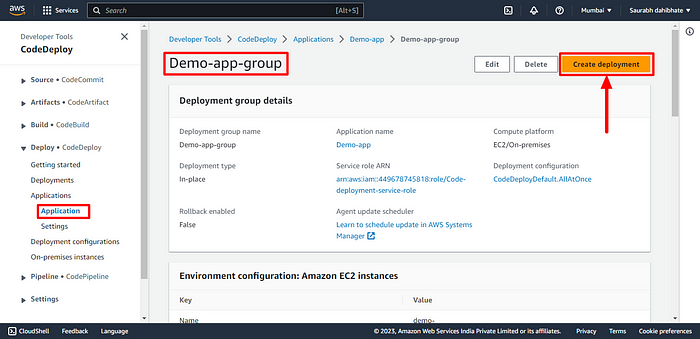
- Provide the S3 artifactory details. This will pull the code at the time of CodeDeploy. Then create the deployment.
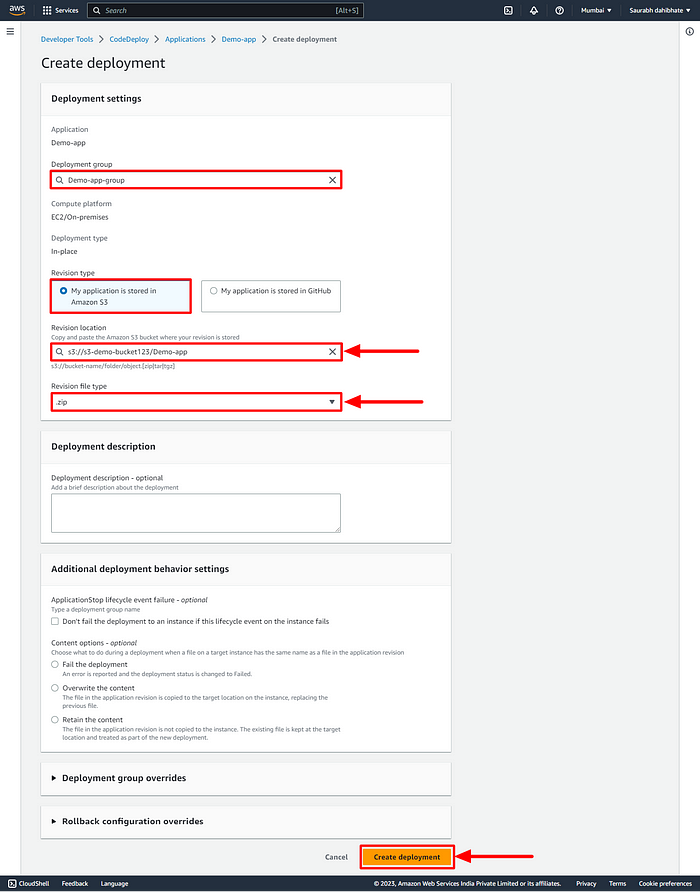
- Execute the deployment. But we can see the code is not getting deployed.
- Restart the codedeploy-agent in the EC2 instance.
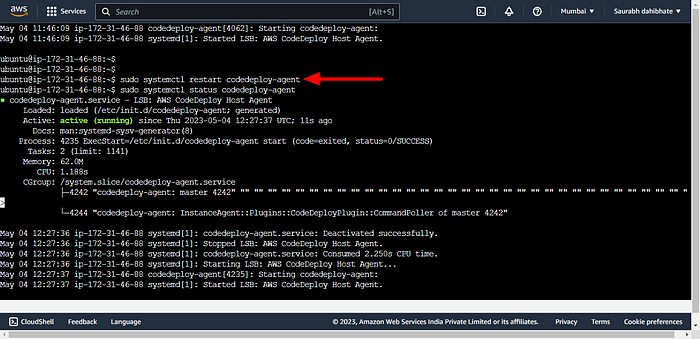
- HHuuusssh Finally, the Code deploy is successful.
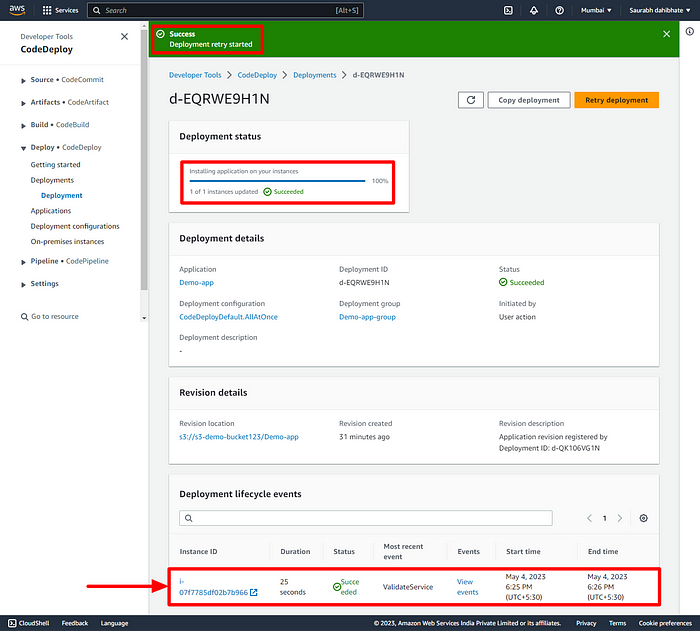
- Verify the Public IP of the instance to view the Webpage.
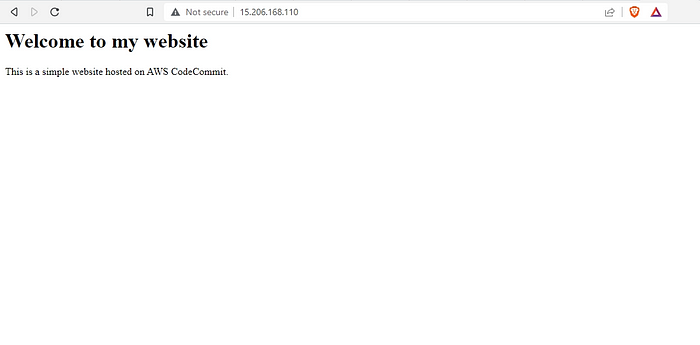
🔶That’s all about today’s very long task of DevOps journey.
🔸Thankyou for reading 👍.
If you liked this story then click on 👏👏 do follow for more interesting and helpful stories.
— — — — — — — — #keepLearning_DevOpsCloud ♾️☁️ — — — — — —
