How To Automate Code Deployment on AWS using CodePipeline, CodeCommit, CodeDeploy, CloudWatch :
Despite high competition, AWS has continued its stronghold on the cloud market till now. New services are continuously added, resulting in improved and high performance. And while AWS tries to keep things simple for developers, using the platform isn’t always easy. Especially for a big organization.
For this reason, AWS provides multiple tools to help AWS developers utilize and develop with its cloud platform and services. Let’s take a look at such tools that can help you build applications with AWS.
Developer Tools Offered By AWS Used In Case Study
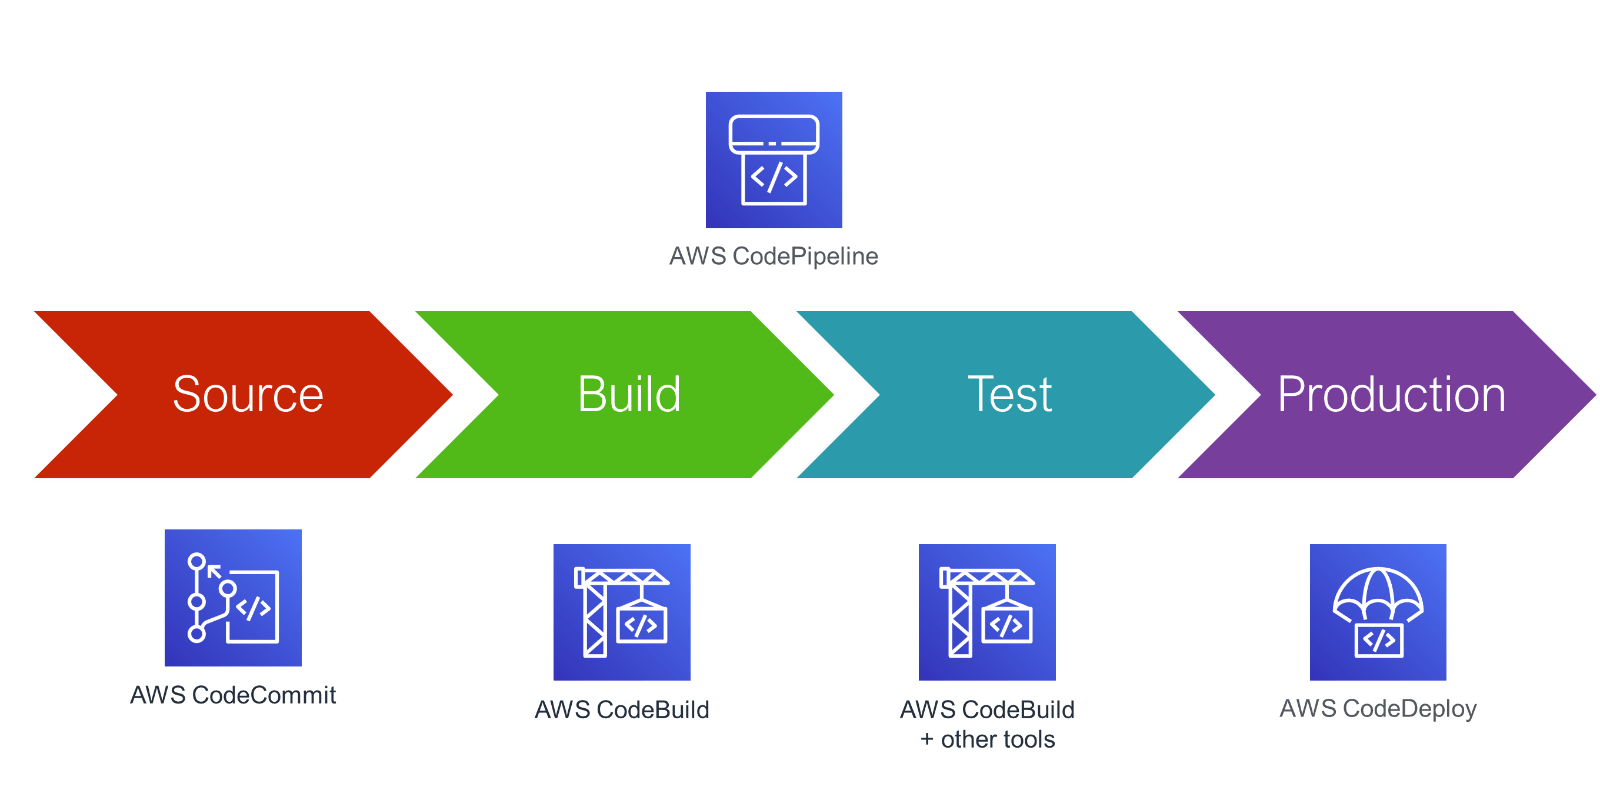
The developing tool in Amazon Web Services helps their users/customers to get the software to deliver safely. It also modifies the developers and IT operations to make the service outcome even better. This helps to build, test, and deploy the application to AWS or the required destination. This tool helps the user to monitor, store, and provide surveillance to the application source code. you’ll be able to use AWS CodePipeline to orchestrate associate degree end-to-end computer code advancement using these services and third-party tools or integrate every service severally along with your existing tools.
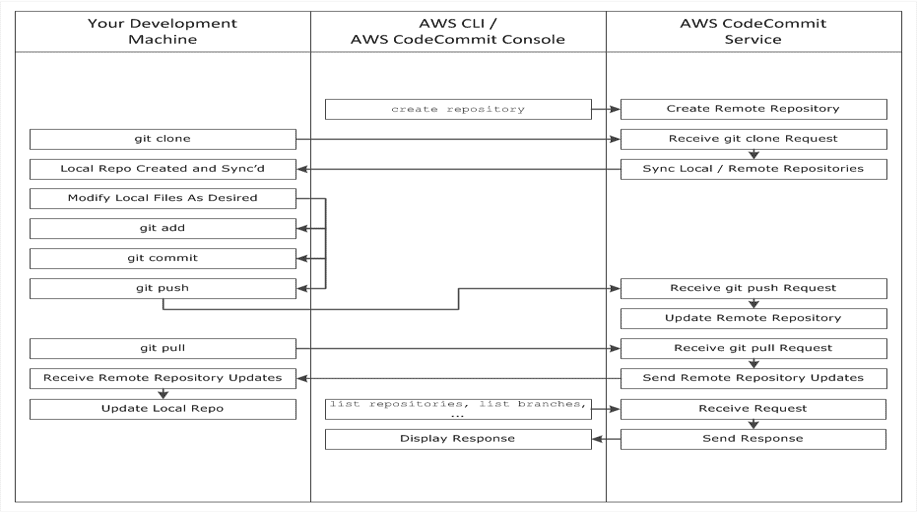
AWS CodeCommit – It is a fully-managed source control service that hosts secure Git-based repositories. CodeCommit makes it easy for teams to collaborate on code in a secure and highly scalable ecosystem.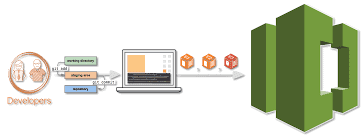
AWS CodeBuild – A fully managed continuous integration service that compiles source code, runs tests and produces software packages that are ready to deploy, on a dynamically created build server.
AWS CodeDeploy – A fully managed deployment service that automates software deployments to a variety of computing services such as Amazon EC2, AWS Fargate, AWS Lambda, and your on-premises servers.
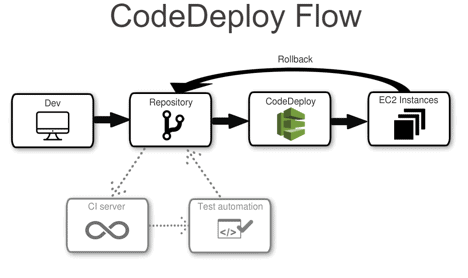
AWS CodePipeline – A fully configured continuous delivery service that helps the user to automate their released pipelines for fast and reliable application and infrastructure updates.
Base Scenario (Use Case)
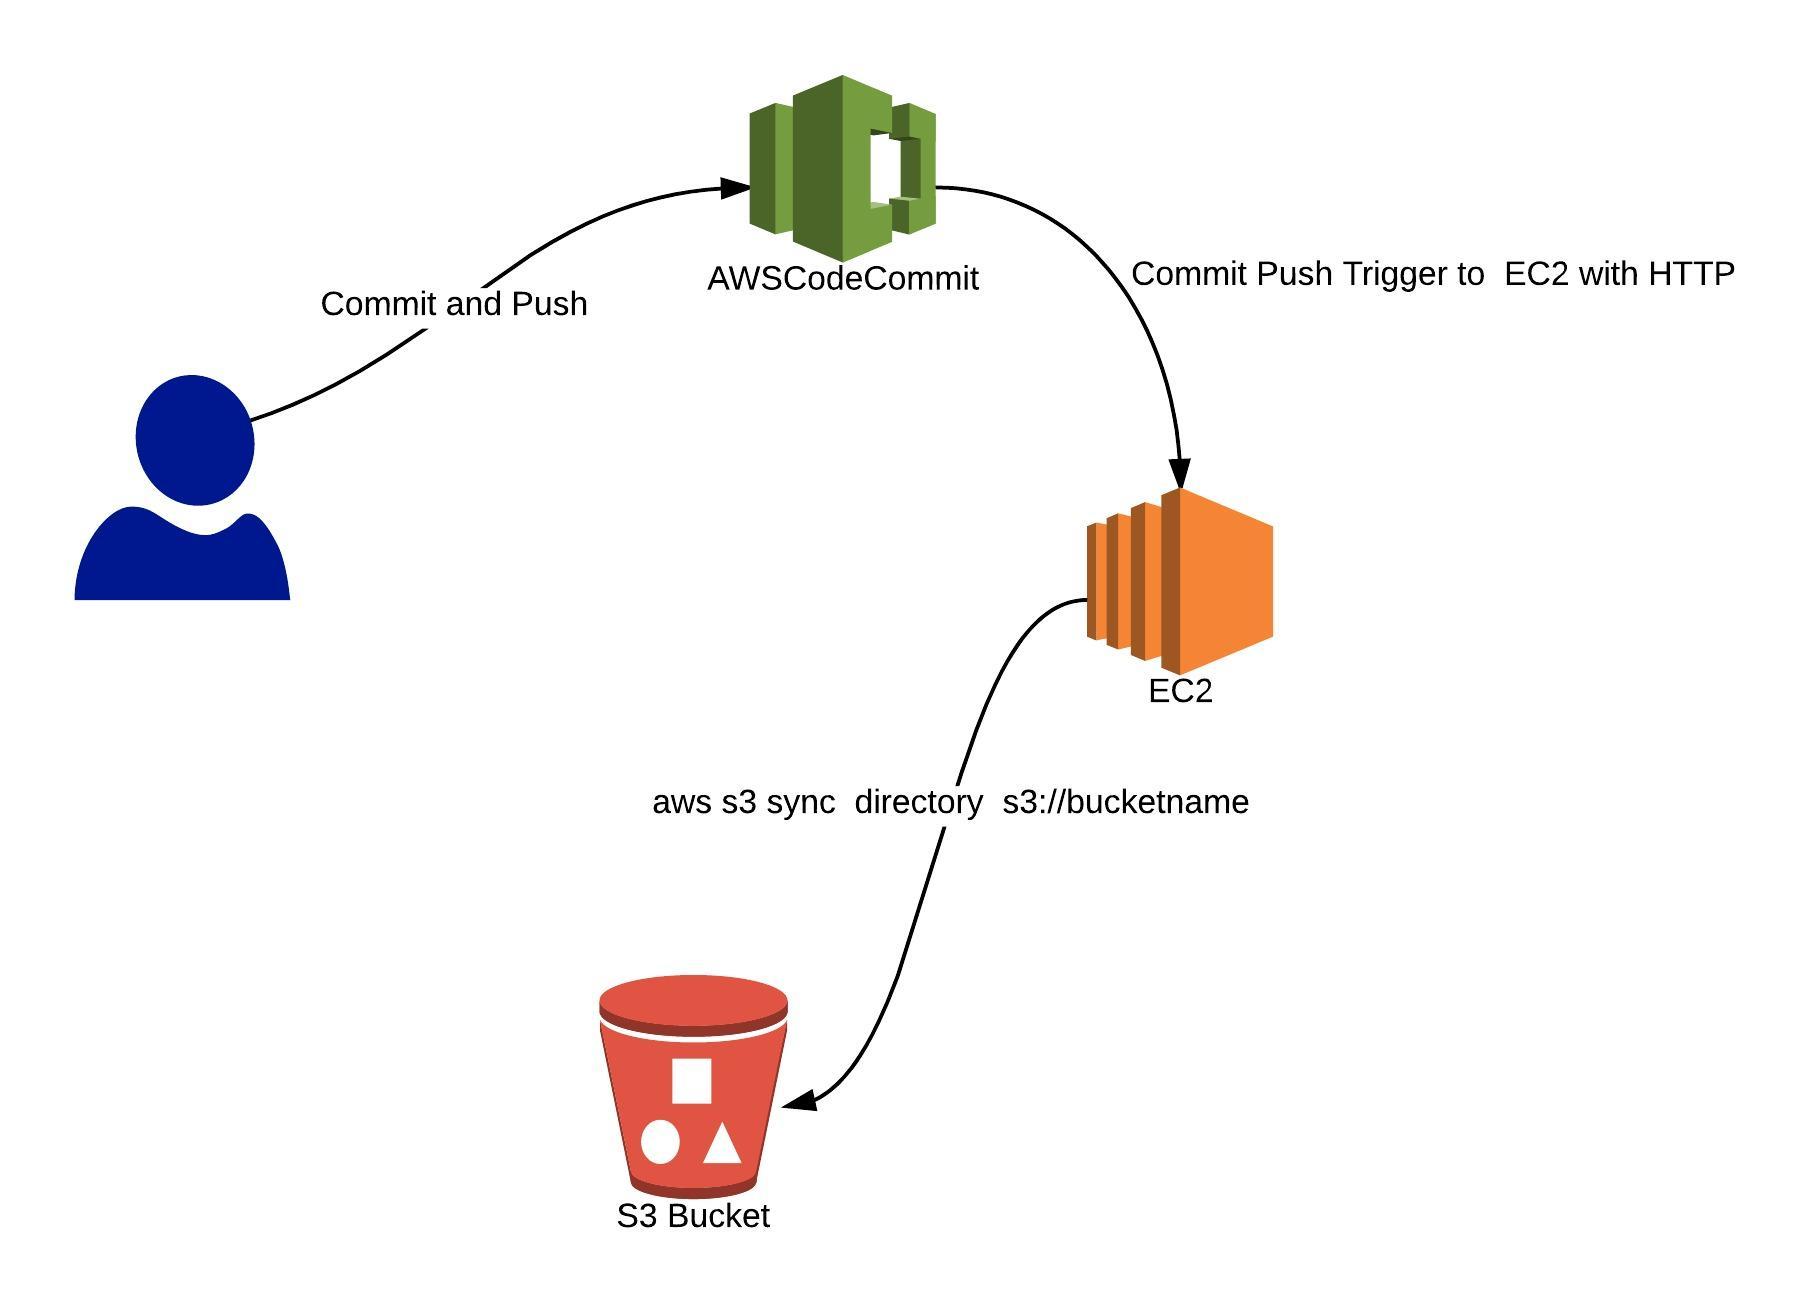
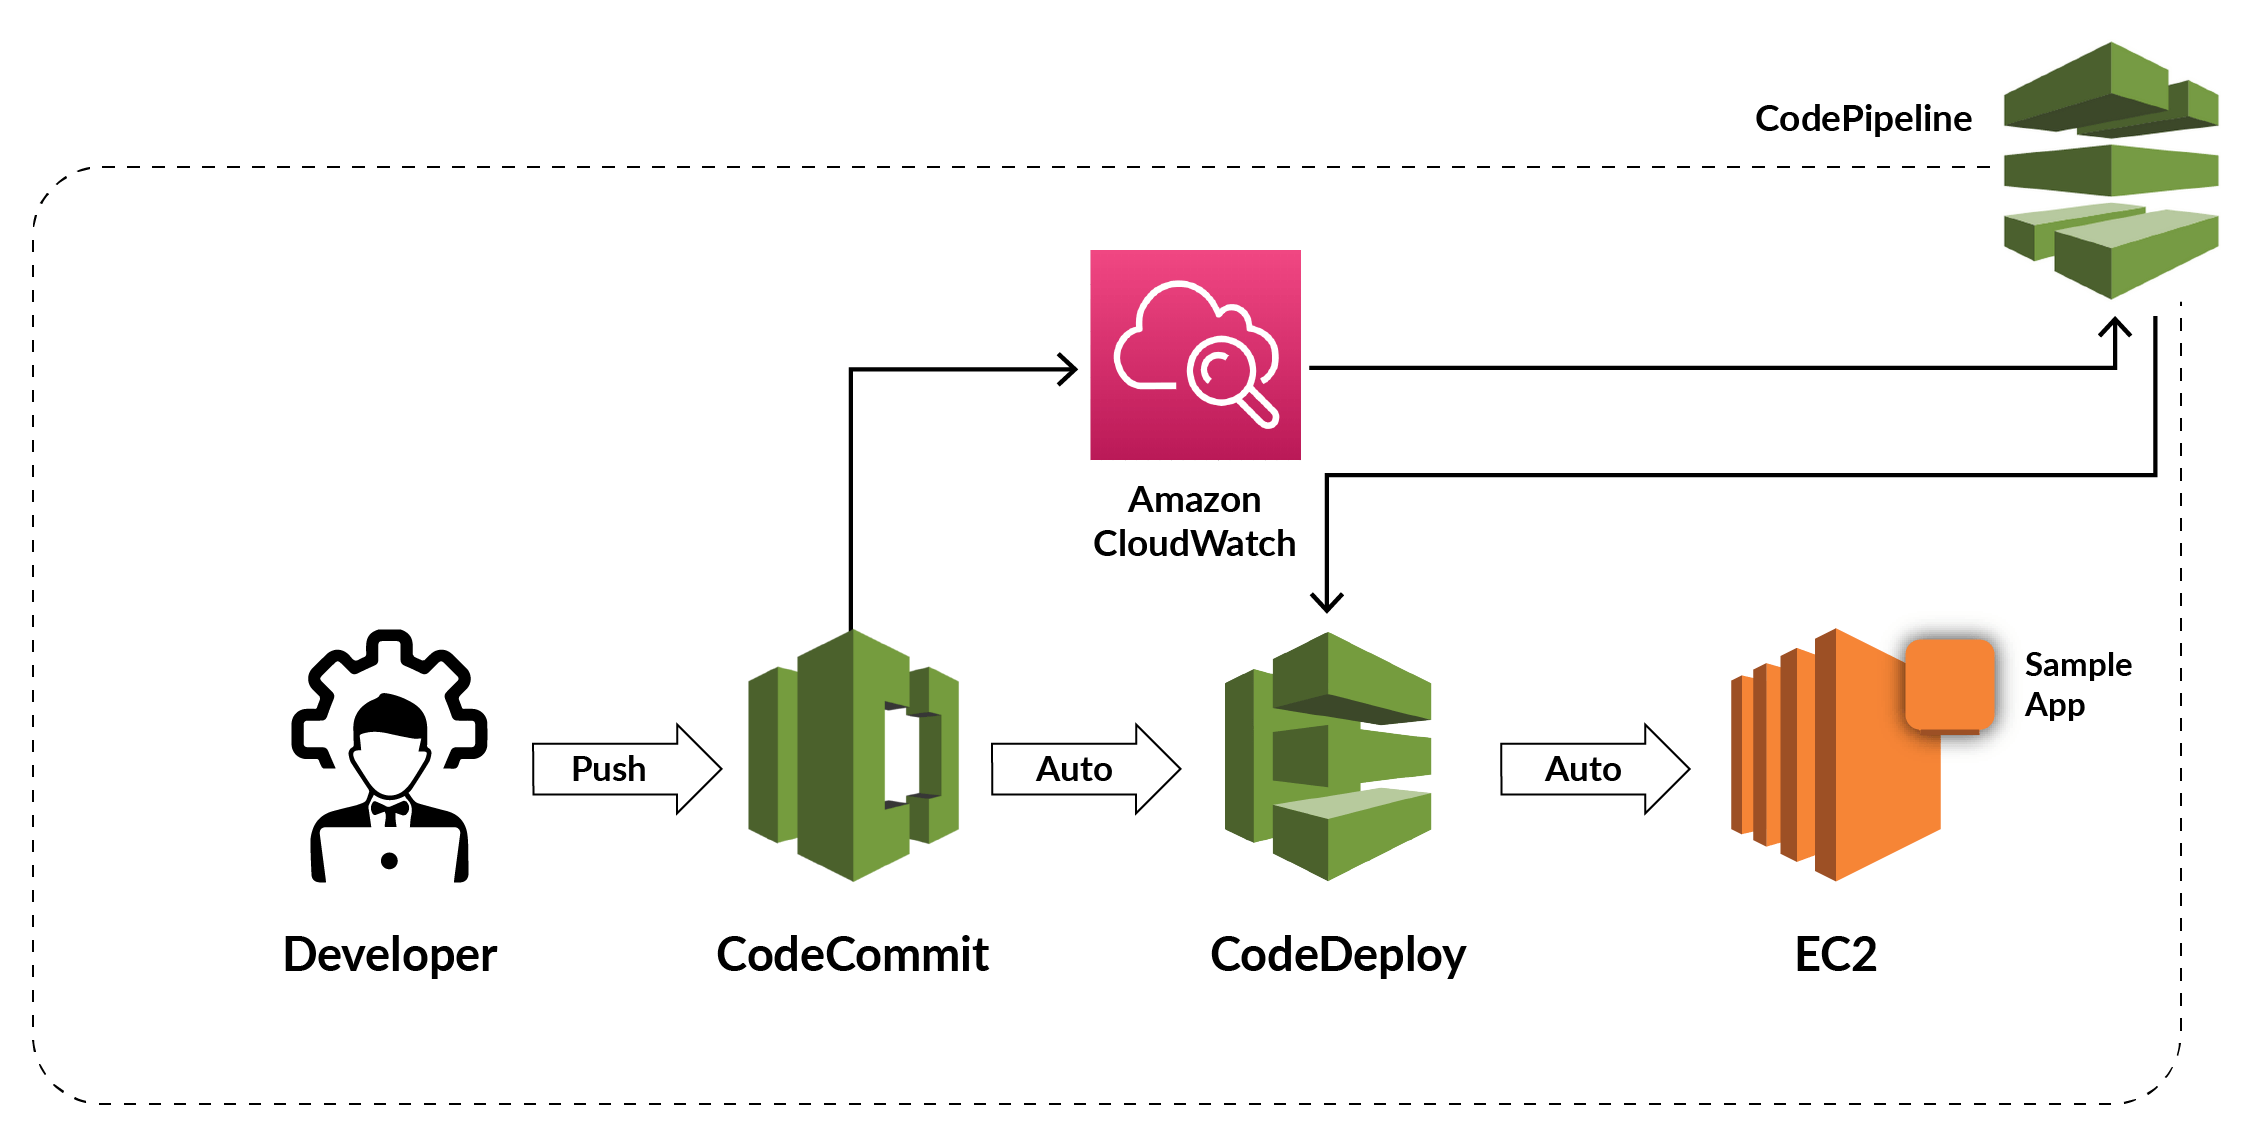
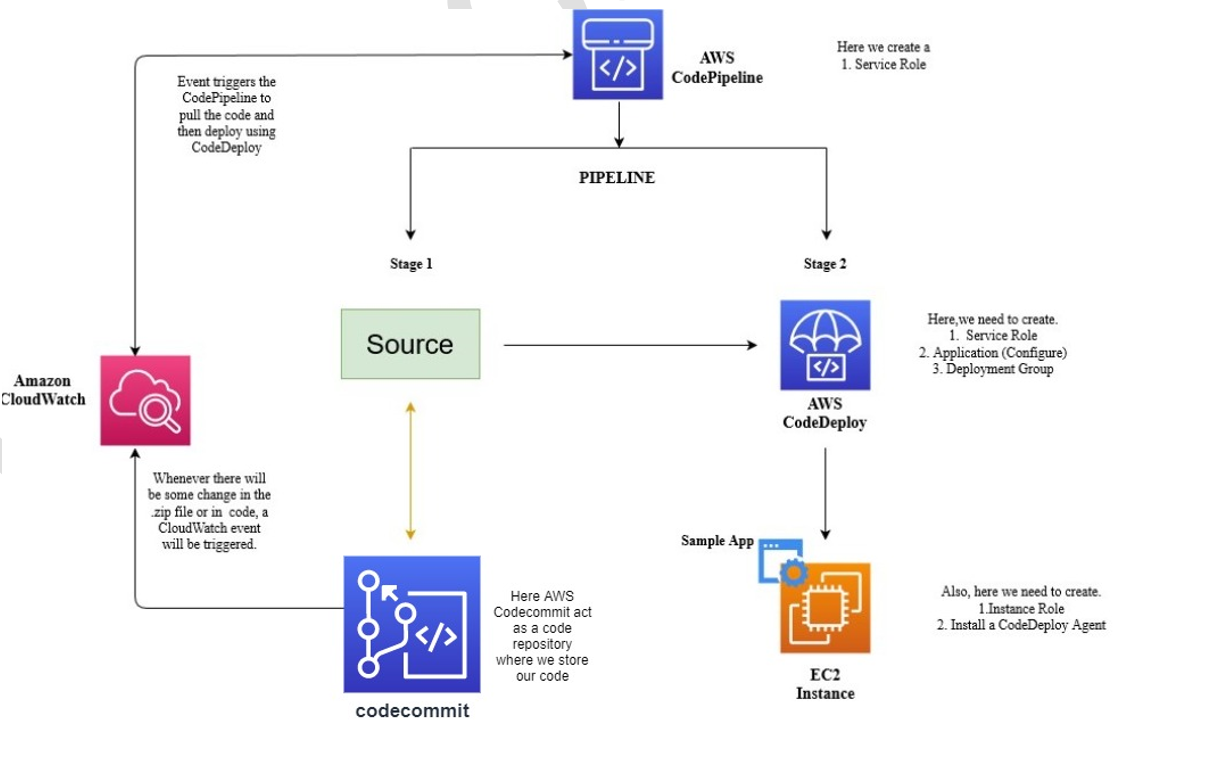
For this scenario, we will use CodePipeline to deploy code maintained in a CodeCommit repository to a single Amazon EC2 instance. Your pipeline is triggered when you push a change to the CodeCommit repository. The pipeline deploys your changes to an Amazon EC2 instance using CodeDeploy as the deployment service.
The pipeline has two stages:
- A source stage (Source) for your CodeCommit source action.
- A deployment stage (Deploy) for your CodeDeploy deployment action.
Steps To Deploy AWS CodePipeline Using AWS Developer Tools
- If you don’t have a FREE AWS account, then create one from here Step by Step AWS FREE Tier Account
- Use the region US East Ohio (us-east-2) for this
- Download the HTTPS Git credentials for AWS CodeCommit using the IAM console
- Create a CodeCommit Repository
- Add Sample Code to your CodeCommit Repository
- Create Amazon EC2 Windows instances and install the CodeDeploy agent
- Create an application in CodeDeploy
- Create your first pipeline in CodePipeline
- Modify Code in your CodeCommit Repository
- Verify your Pipeline Ran Successfully
Step 1: Download the HTTPS Git credentials for AWS CodeCommit using the IAM console
1) Click on users from the left menu and click on your user then click on security credentials Scroll down to HTTPS Git credentials for AWS CodeCommit and click on Generate Credential

.
Step 2: Create a CodeCommit Repository
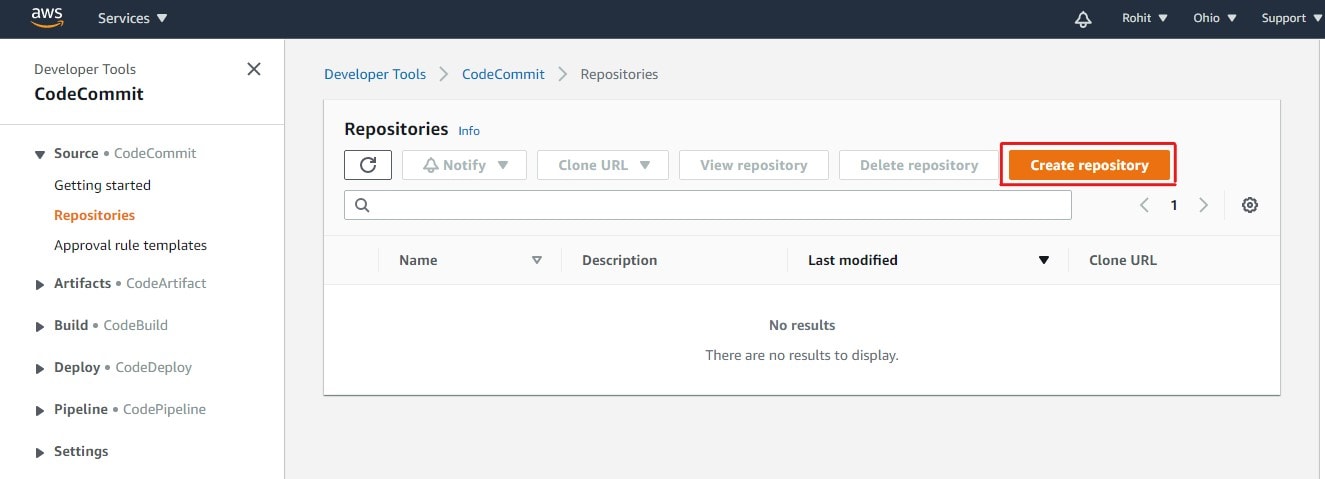
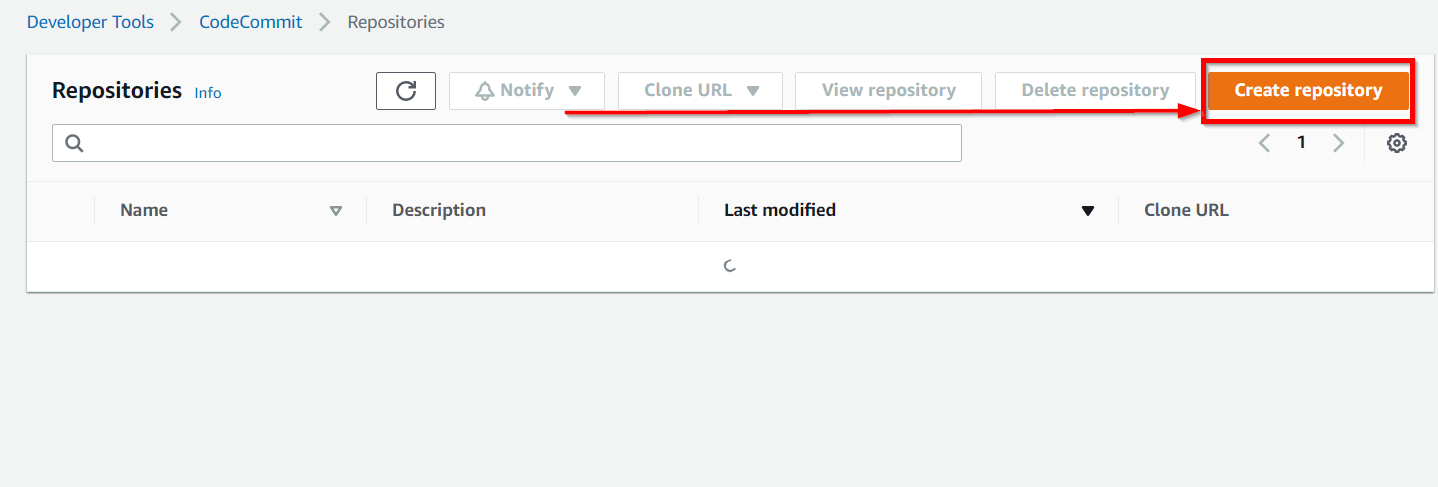
1) Open the Amazon Codecommit console and choose to Create repository.
2) On the Create repository page, in Repository name, enter a name for your repository (for example, K21repo). Then Choose Create.

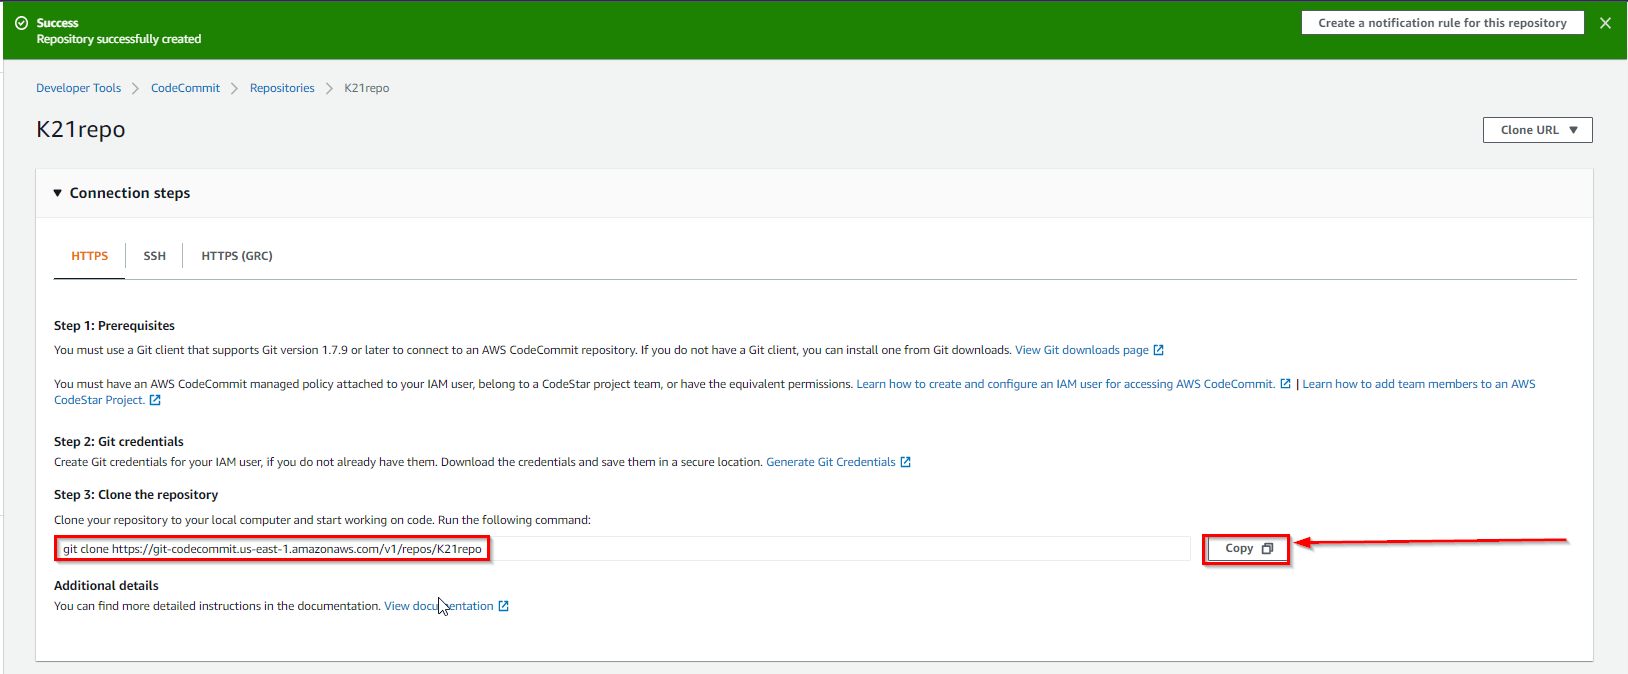
3) On the next screen, click on Copy next to Step3: Clone the Repository (We’ll use this to clone this blank repository in the next step).
Step:3 Add Sample Code to your CodeCommit Repository
1) Run the following command to clone the repository, replacing the GIT Clone Address with the one you copied in the earlier step.
git clone <GIT Clone Address> then enter the username and password for IAM users HTTPS Git Credentials that we already downloaded
 After that, it will show you a warning message that you cloned an empty repository but it’s ok
2) Next, download the sample code and save it in which we created our local repository. Unzip the files from SampleApp_Linux.zip into the local directory you created earlier (for example, /tmp/MyDemoRepo).
–> Deploy to Amazon Linux instances using CodeDeploy, download the sample application here: SampleApp_Linux.zip.
3) Open Command Prompt and make sure you are in the SampleApp_Linux folder
Run the following commands to stage all your files at once and commit the files with a commit message:
git add -A
git commit -m “Add sample application files”
git push

4) The files you downloaded and added to your local repo have now been added to the master branch in your CodeCommit K21Repo repository and are ready to be included in a pipeline.

Step 4: Create Amazon EC2 Windows instances and install the CodeDeploy agent
1) Create an IAM role that will be required to grant permission to the EC2 instance. Select the policy named AmazonEC2RoleforAWSCodeDeploy to create.
 2) Launch the instance on which our code will be deployed. To know more about how to launch an EC2 instance check our Blog on EC2 Instance. Just remember to add the IAM role that we have created and In Auto-assign Public IP, choose Enable.
Expand Advanced Details, and in User data, As text selected, enter the following:
#!/bin/bash
yum -y update
yum install -y ruby
yum install -y aws-cli
cd /home/ec2-user
aws s3 cp s3://aws-codedeploy-us-east-2/latest/install . –region us-east-2
chmod +x ./install
./install auto
4)On Configure Security Group page, do the following:
• Next to Assign a security group, choose to create a new security group.
• In the row for SSH, under Source, choose Anywhere.
• Choose Add Rule, choose HTTP, and then under Source, choose Anywhere.

Leave rest settings default and click on Launch
Step 5: Create an application in CodeDeploy
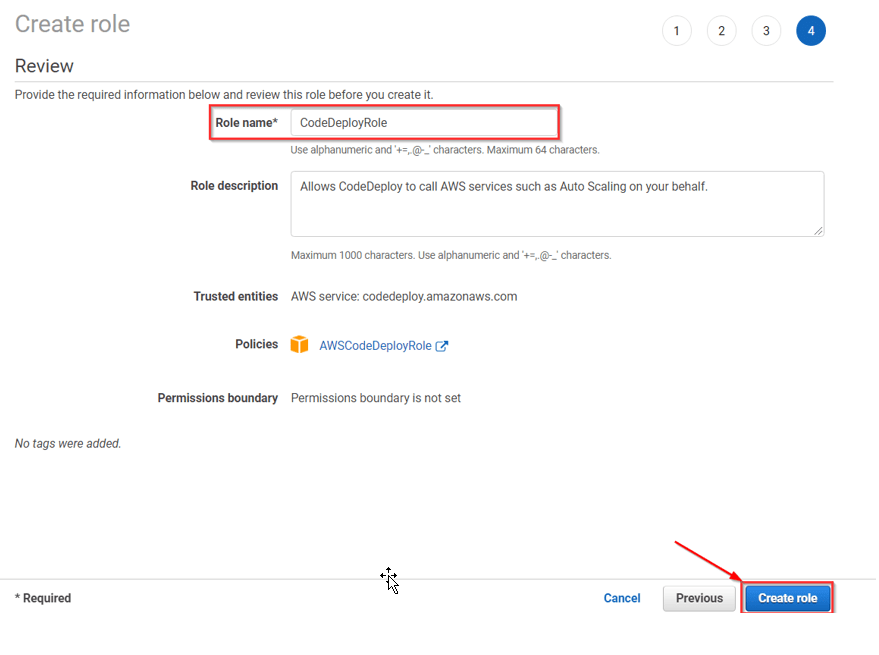
1) Create an AWSCodeDeployRole that allows CodeDeploy to perform deployments
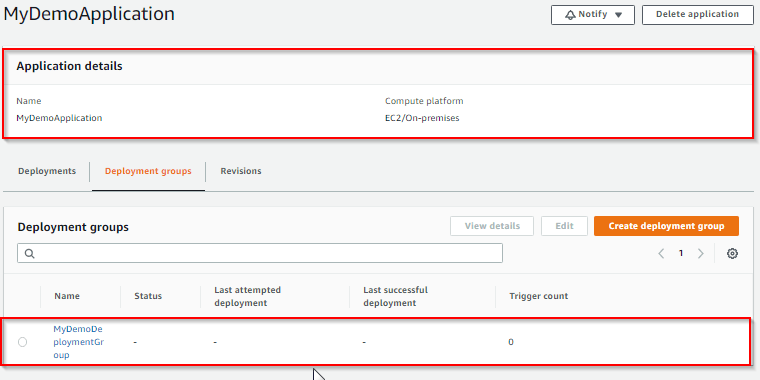
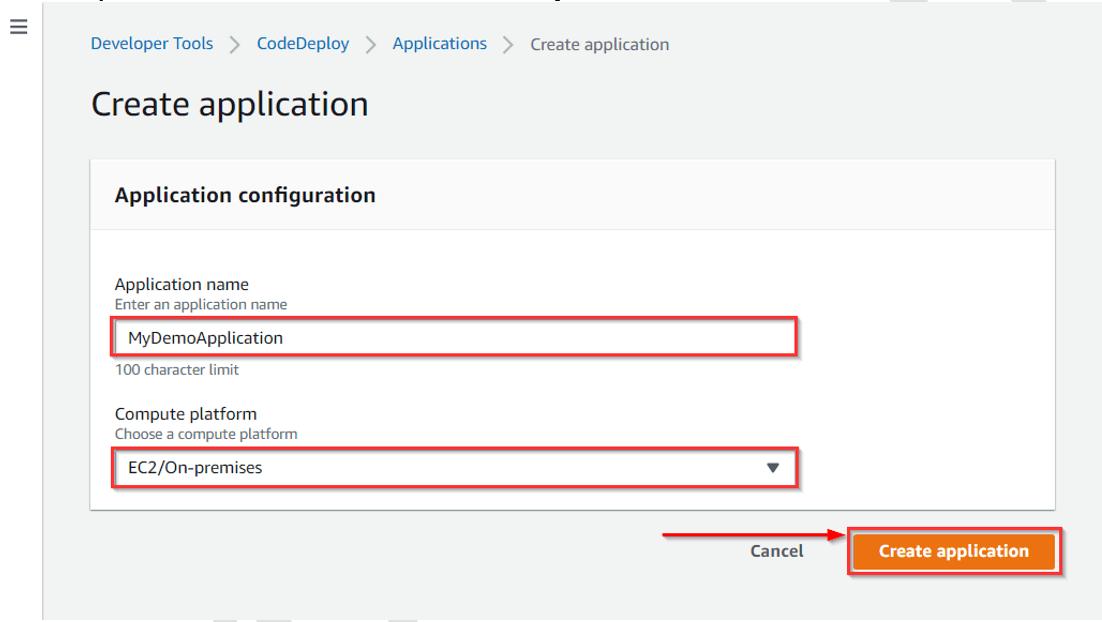
2) Initially click on create an application in CodeDeploy, and In Compute Platform, choose EC2/On-premises.Choose to Create application.
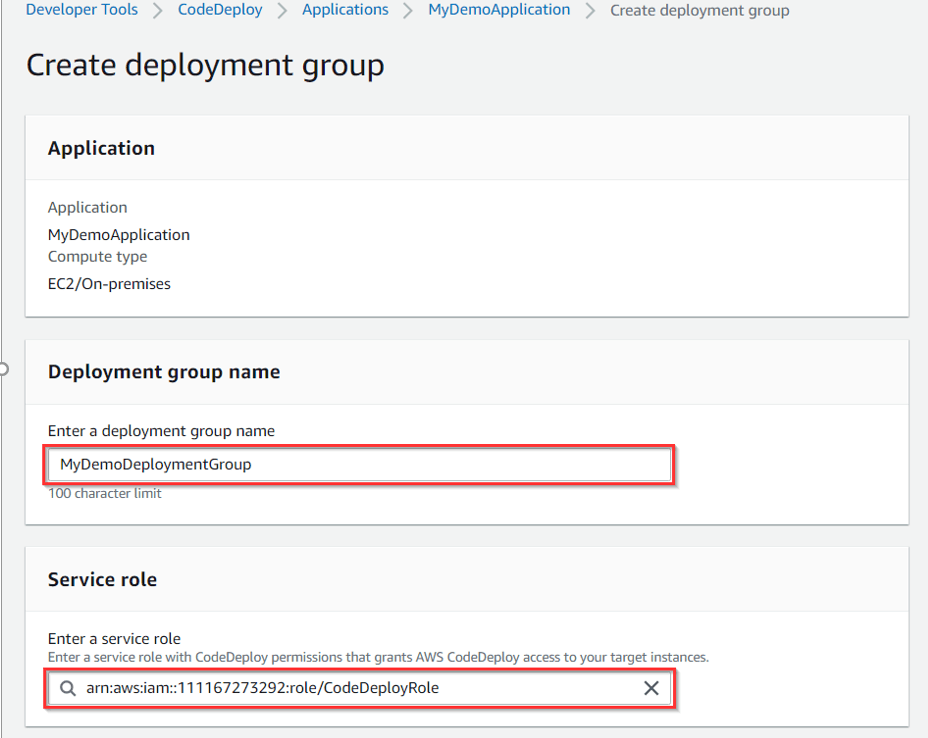
3) On the page that displays your application, choose to Create a deployment group. In service, role creates an IAM role under code deploy category.
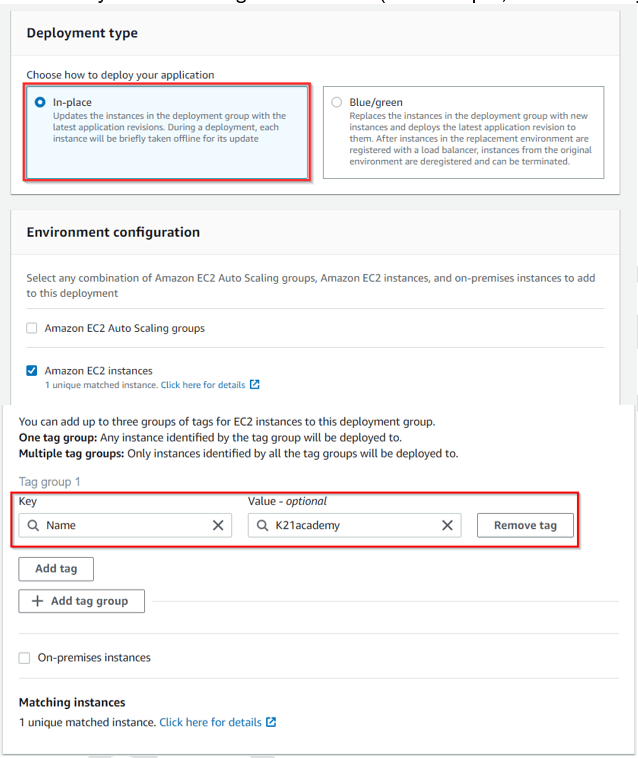
4) Under Deployment type, choose In-place. Under the Environment configuration, choose Amazon EC2 Instances.
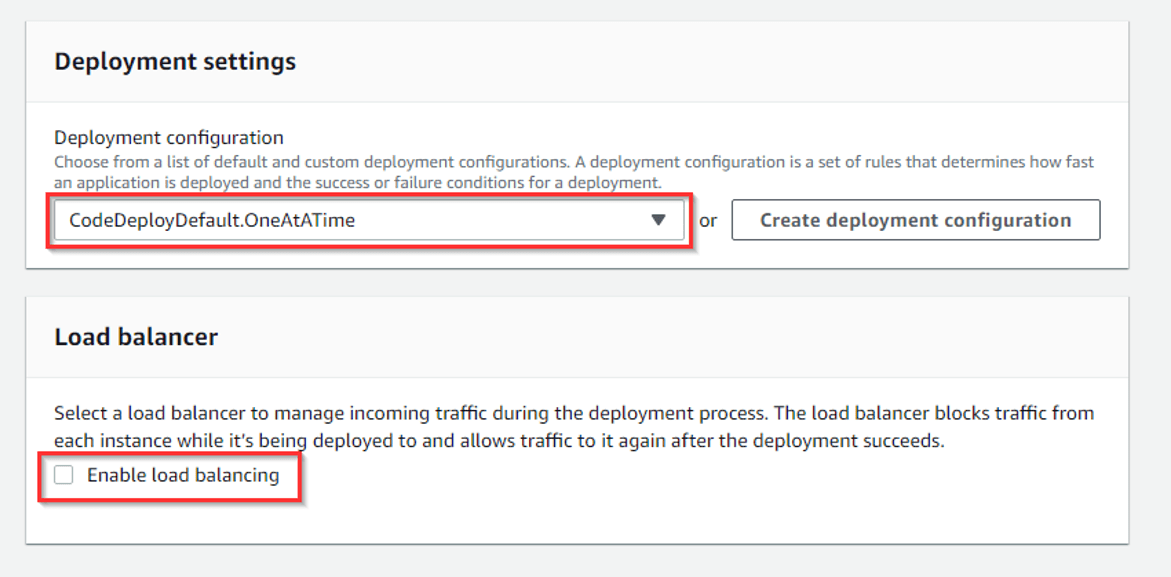
5) Under Deployment configuration, choose CodeDeployDefault.OneAtaTime. Under Load Balancer, clear Enable load balancing, leave the defaults then choose to Create a deployment group.
Step 6: Create your first pipeline in CodePipeline
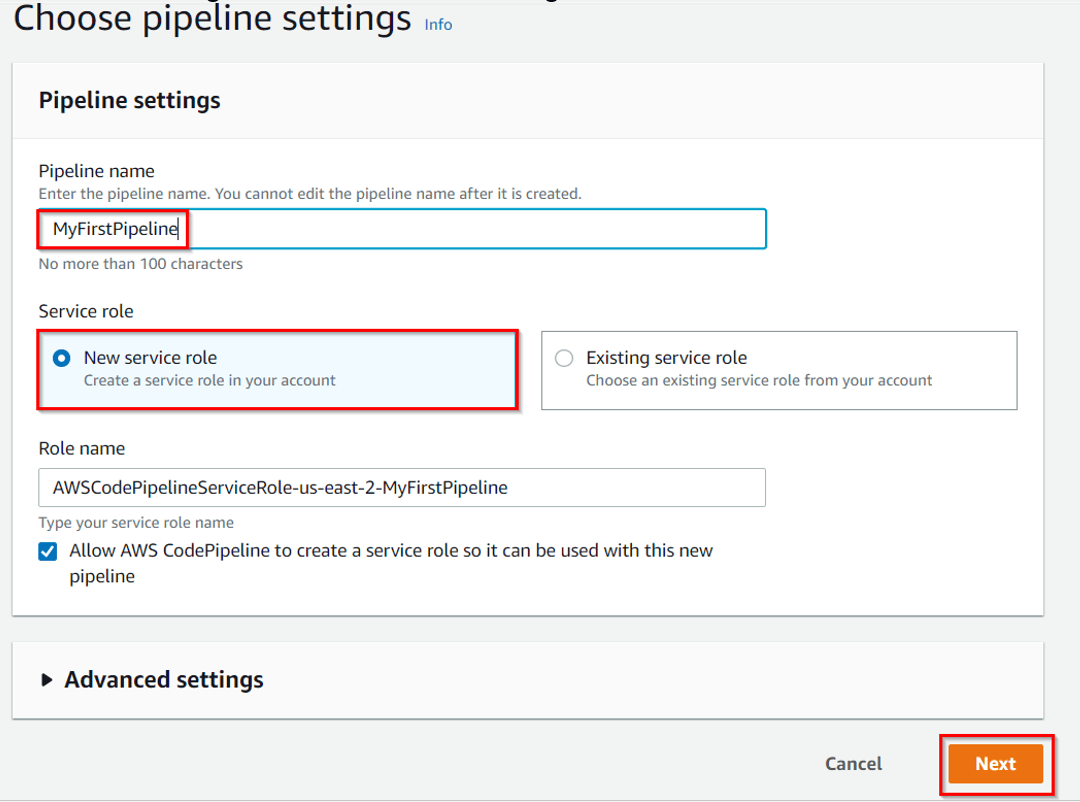
1) Open the CodePipeline console. Choose pipeline settings, Enter your desired name and in the Service role, Choose New service role to allow CodePipeline to create a new service role in IAM. To know more about AWS IAM refer to our blog on AWS Identity And Access Management (IAM).
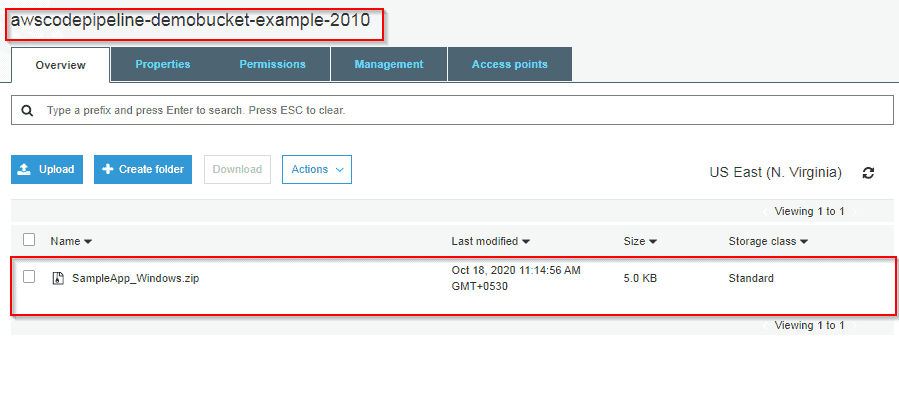
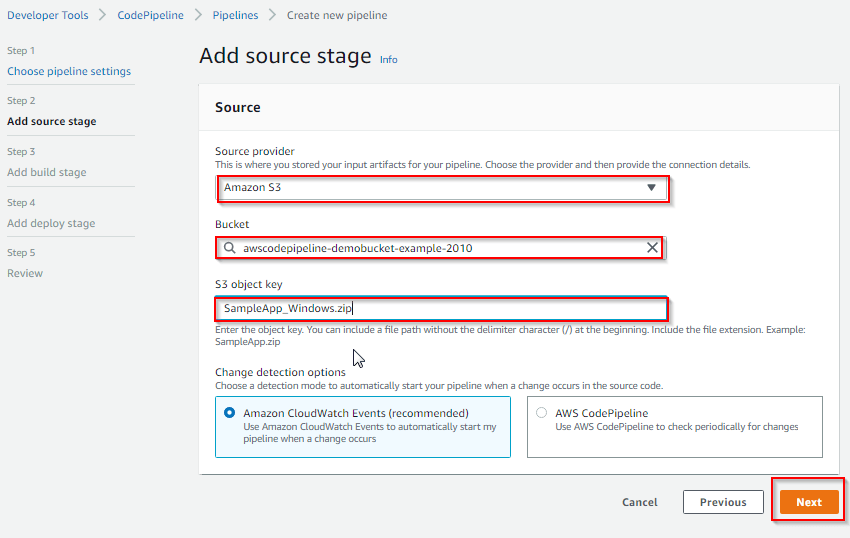
2) In the Add source stage, select Source provider, choose Amazon S3. Under the S3 object key, enter the object key with or without a file path, and remember to include the file extension.
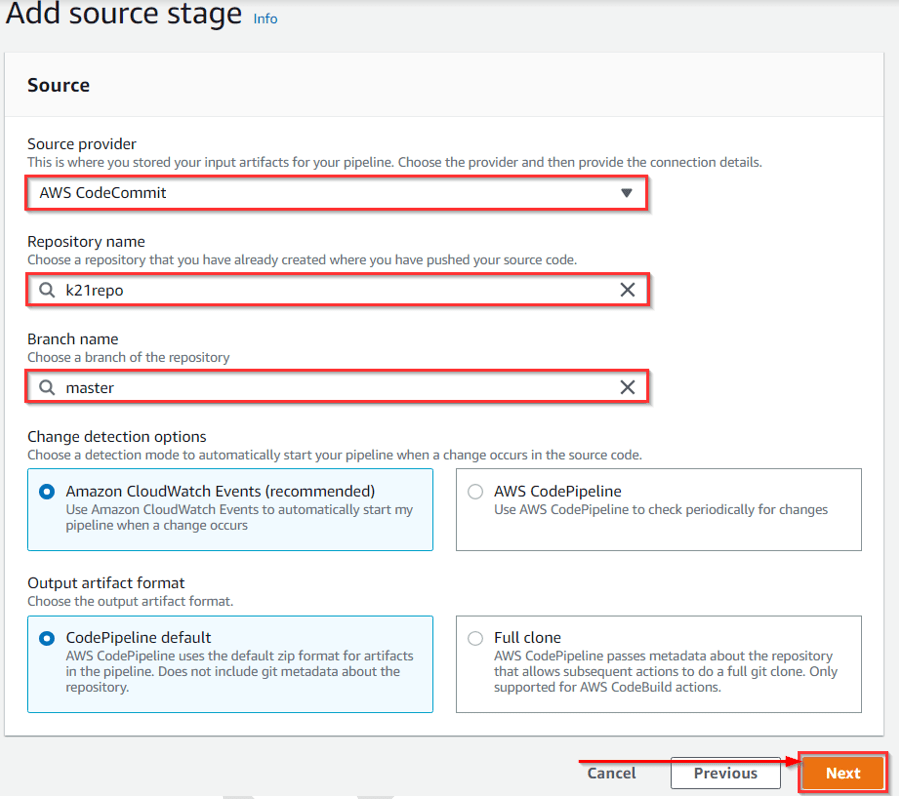
3) In the Add build stage, choose to Skip build stage, and then accept the warning message by choosing Skip again. Choose Next.
4) In the Add deploy stage, in Deploy provider, choose AWS CodeDeploy.Then enter your application name or choose the application name from the list. In the Deployment group, enter MyDemoDeploymentGroup, or choose it from the list, and then choose Next.
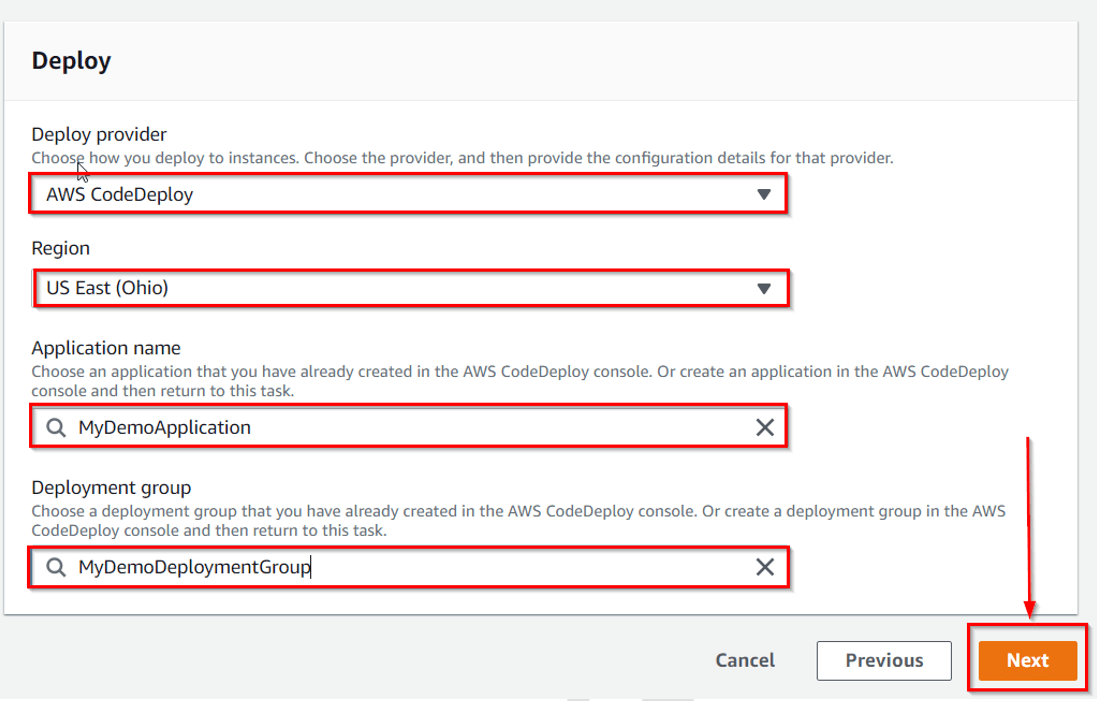
5) In Step 5: Review, review the information, and then choose Create pipeline. The pipeline starts running after it is created. It downloads the code from your CodeCommit repository and creates a CodeDeploy deployment to your EC2 instance.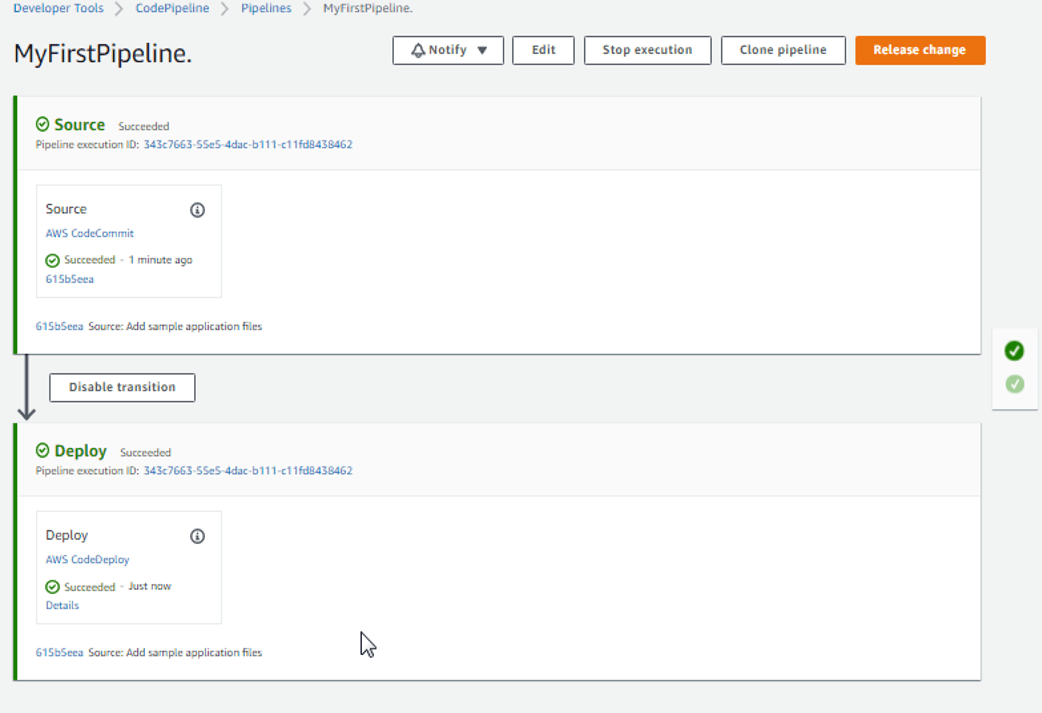
Congratulations! You just created a simple pipeline in CodePipeline.
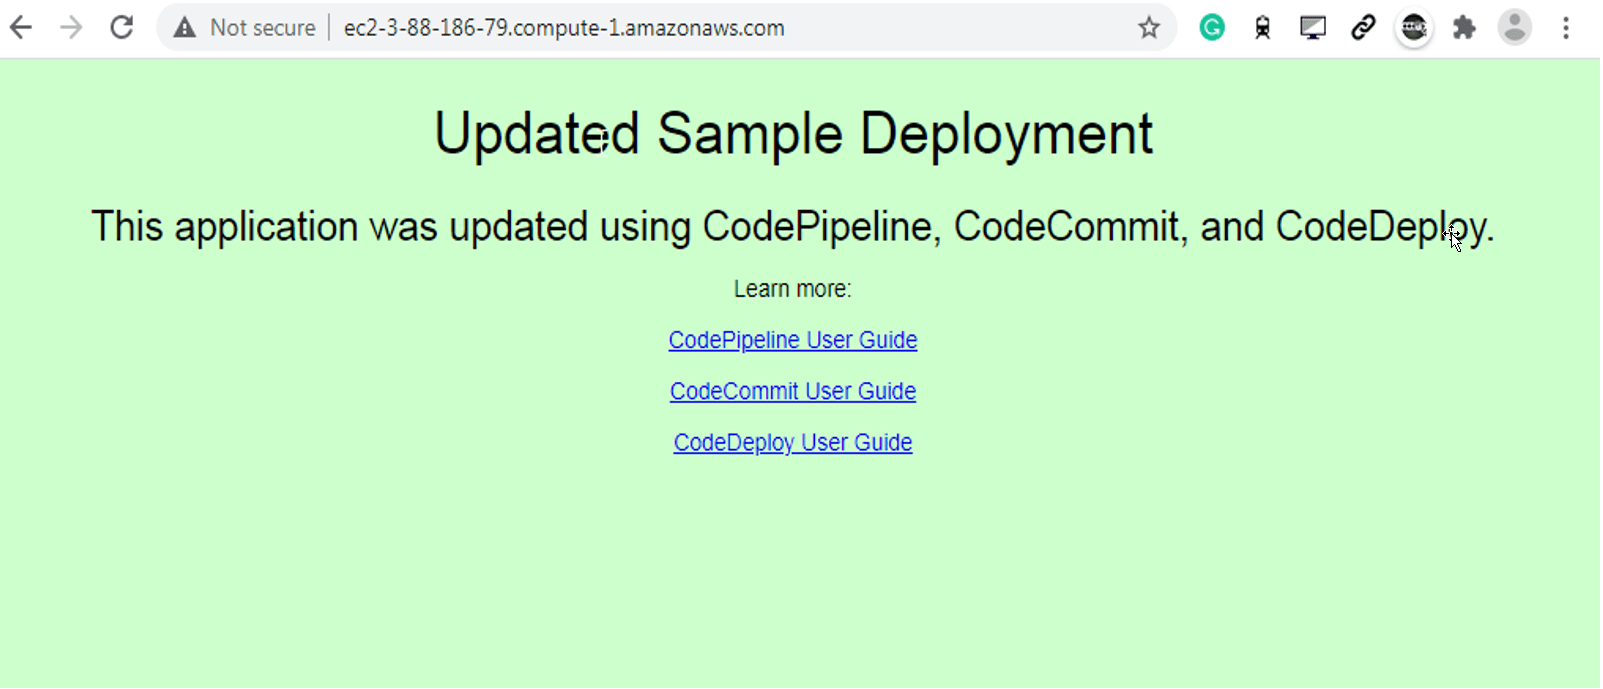
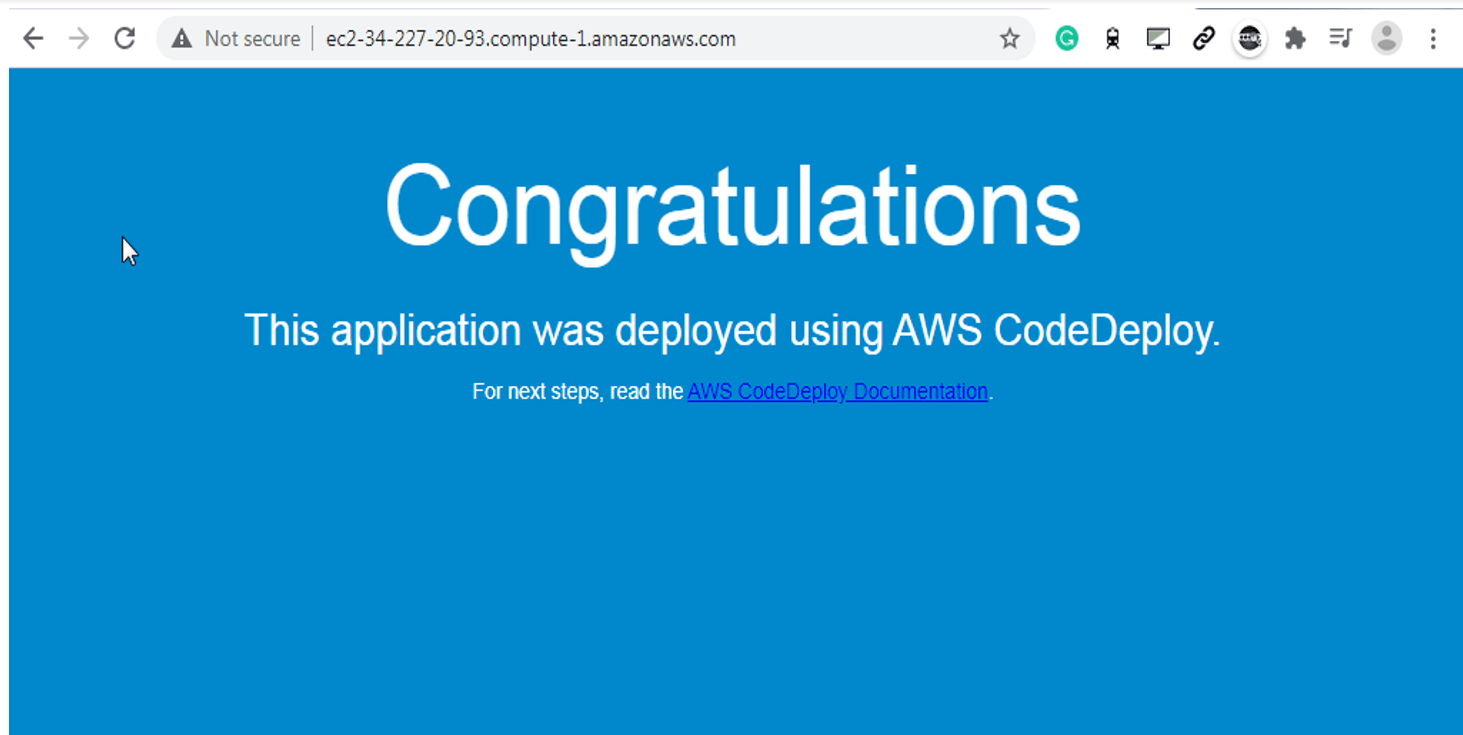
you can verify that by coping EC2 Public DNS address and then past it into the address bar of your web browser
Step 7: Modify Code in your CodeCommit Repository
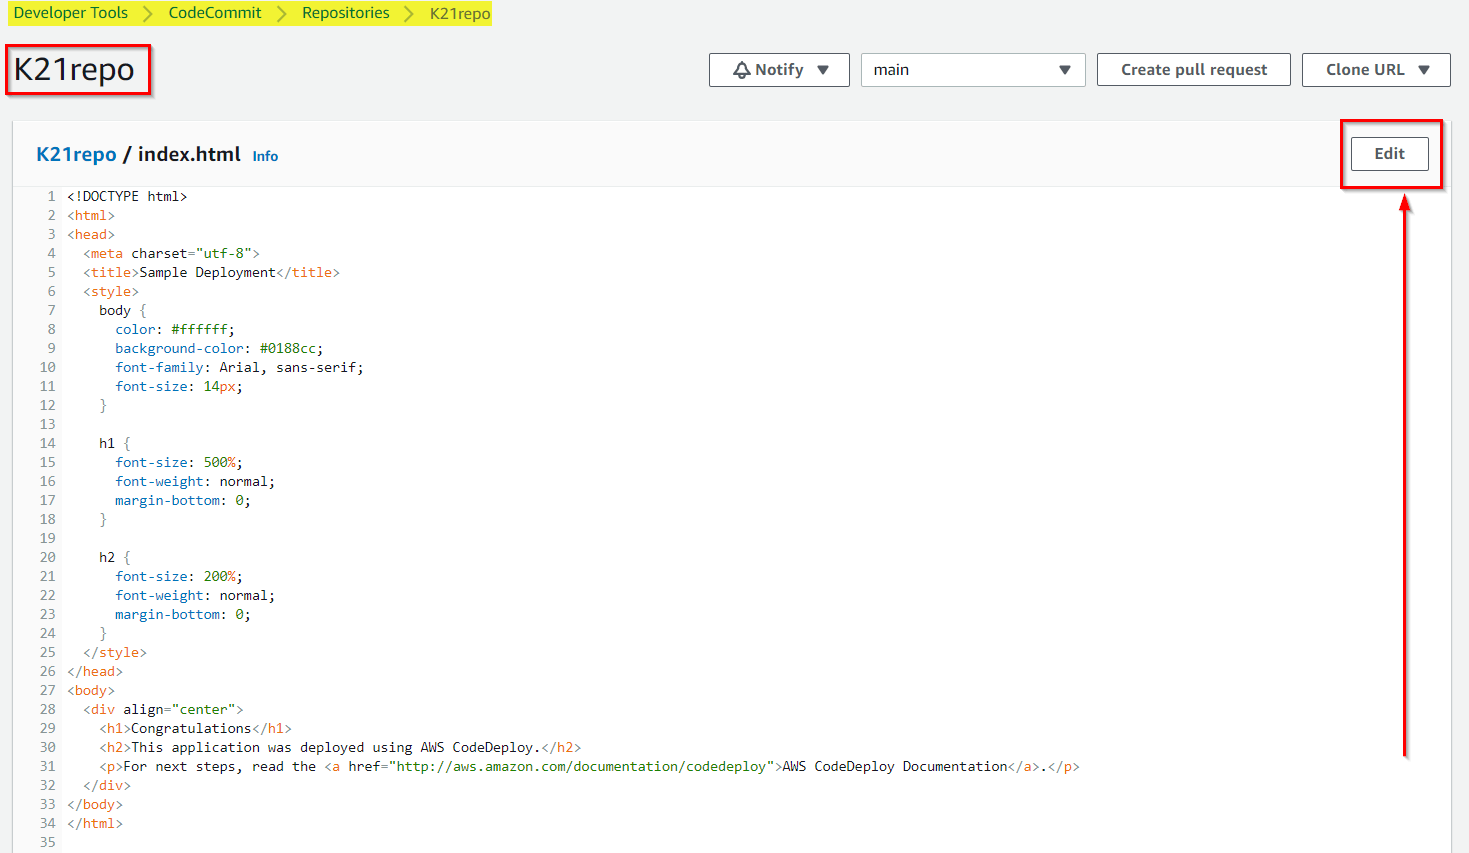
1) In your CodeCommit repository revise the contents of the index.html file to change the background color and some of the text on the webpage, by clicking on edit
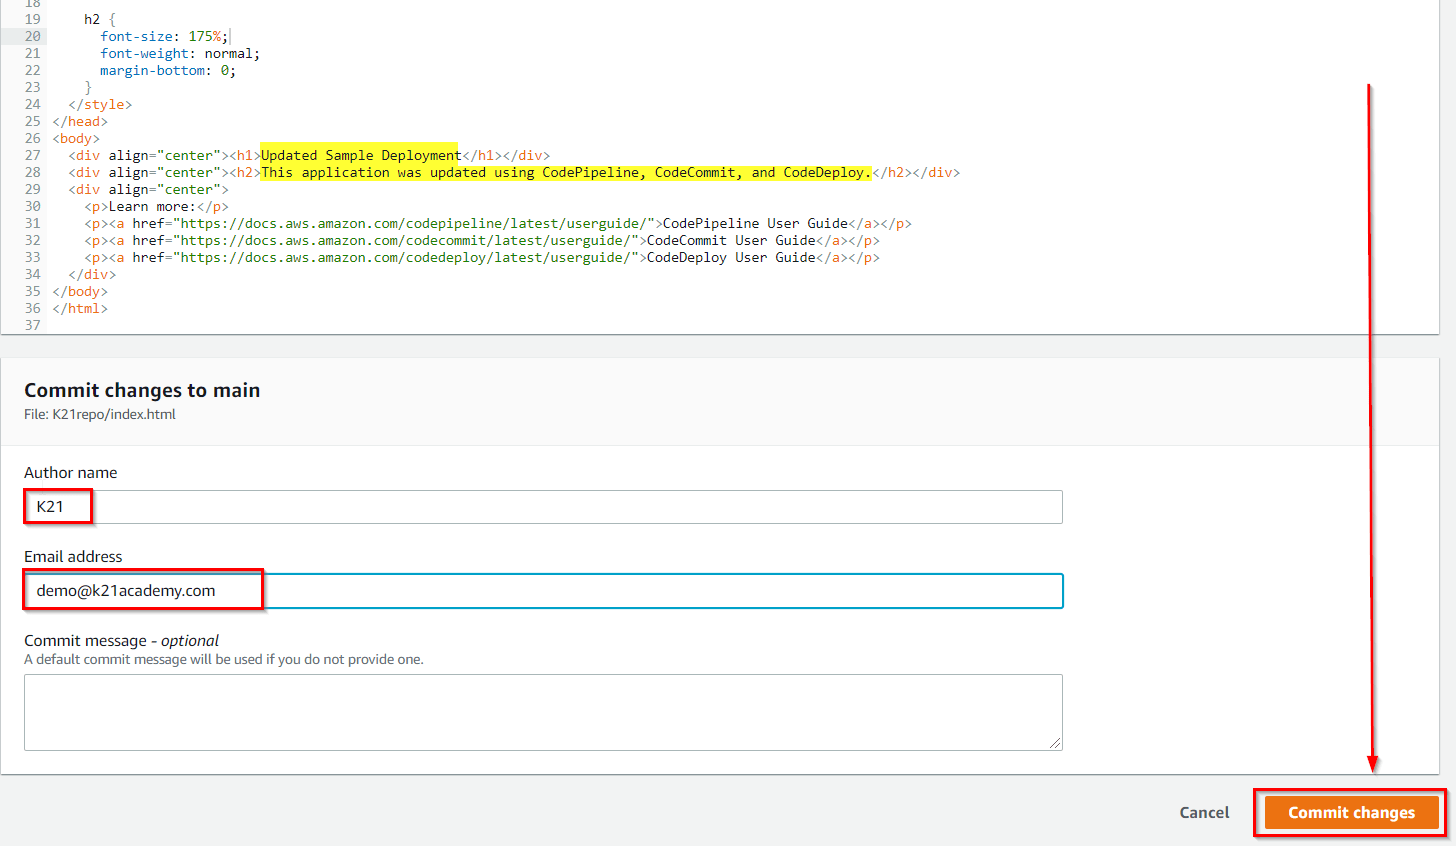
2) Under Author name enter K21, then enter Email Address, Click on Commit changes
Step 8: Verify your Pipeline Ran Successfully
1) View the initial progress of the pipeline. The status of each stage changes from No executions yet to In Progress, and then to Succeeded. The running of the pipeline should be complete within a few minutes.
2) After Succeeded is displayed for the action status, refresh the demo page you accessed earlier in your browser.
