Tuesday, 11 September 2018

Remote Management

Remote Management Service is one of the most important part pertaining to administration of Windows Server 2016. Administration of servers is performed through Windows Management Instrumentation. WMI instructions can be sent over network WinRM “Remote Management”.
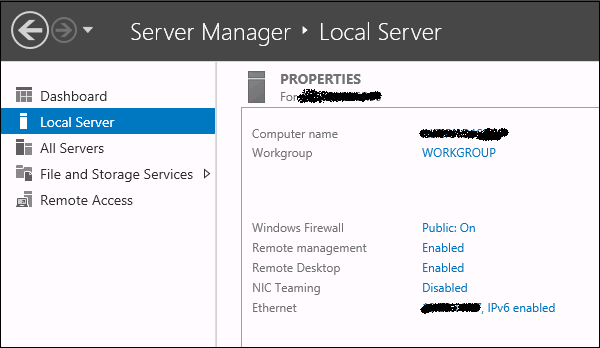
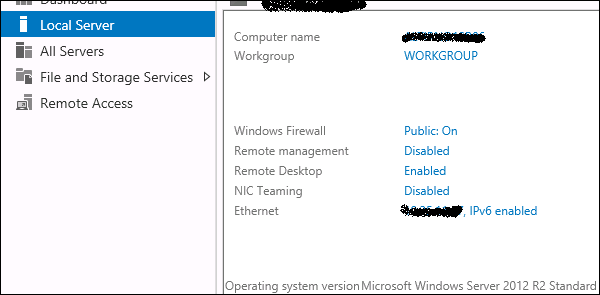
By default this utility is enabled, you can check it by going to Server Manager → then click on Local Server as shown in the following screenshot.
Local Server
If in case it is disabled, you can enable it by Opening PowerShell and then typing EnablePSRemoting as shown in the screenshot given below.
Enable PSRemoting
There is another way to enable it – Click on “Server Manager” → Local Server, then ENABLE Remote management.
Enable Remote Management

Adding a Server for Remote Management

To add other servers for remote management, follow the steps given below −
Step 1 − Server Manager → Dashboard → Add other servers to manage.
Dashboard
Step 2 − If the servers are joined to the domain, you add the select option “Active Directory“, in my case they are not joined, so I selected the second option “DNS” → In the search Box, I added the IP of the server that has to be managed → click on a small arrow → OK.
DNS
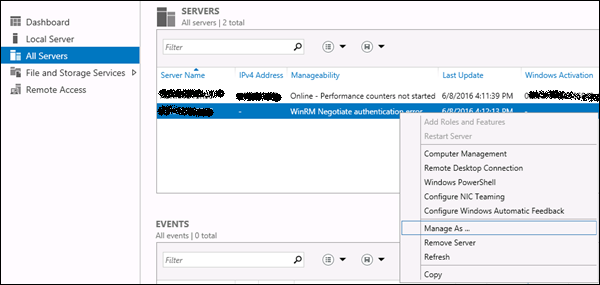
Step 3 − Go to Server Manager → All Servers, you will see the server that you have added. As my server is in the Work Group, I have to right click and click on – “Manage As” as shown in the following screenshot.
Manage As
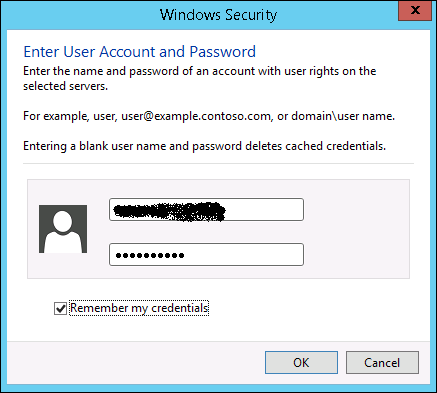
Step 4 − Enter the credentials of the remote server as follows and then → OK.
Windows Security
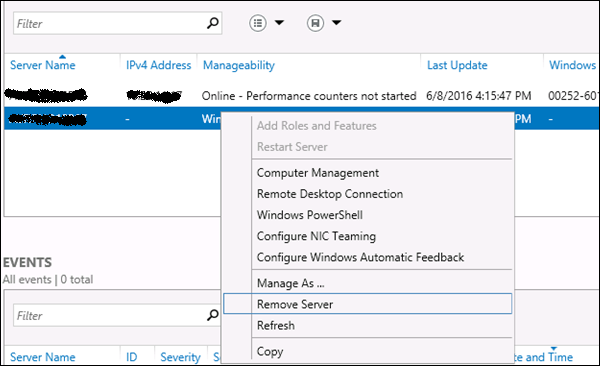
To remove a managed server, Right Click on server → Remove Server.
Remove Server

Windows Server 2016 - PowerShell

Windows PowerShell is a command-line shell and scripting languagedesigned especially for system administration. It’s analogue in Linux is called as Bash Scripting. Built on the .NET Framework, Windows PowerShell helps IT professionals to control and automate the administration of the Windows operating system and applications that run on Windows Server environment.
Windows PowerShell commands, called cmdlets, let you manage the computers from the command line. Windows PowerShell providers let you access data stores, such as the Registry and Certificate Store, as easily as you access the file system.
In addition, Windows PowerShell has a rich expression parser and a fully developed scripting language. So in simple words you can complete all the tasks that you do with GUI and much more.
PowerShell Icon can be found in the task bar and in the start menu. Just by clicking on the icon, it will open.
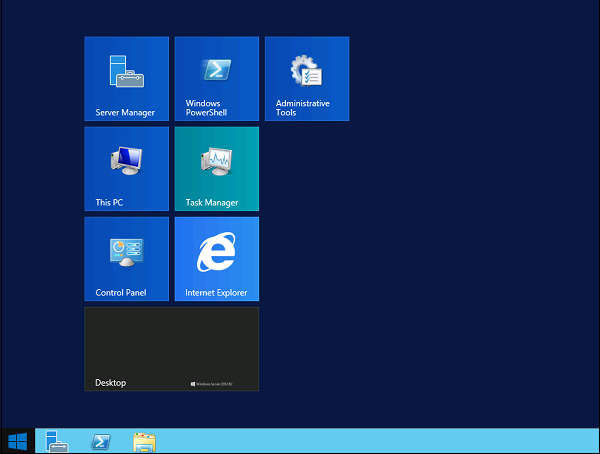
PowerShell Icon
To open it, just click on the icon and then the following screen will open and it means that PowerShell is ready for you to work on.
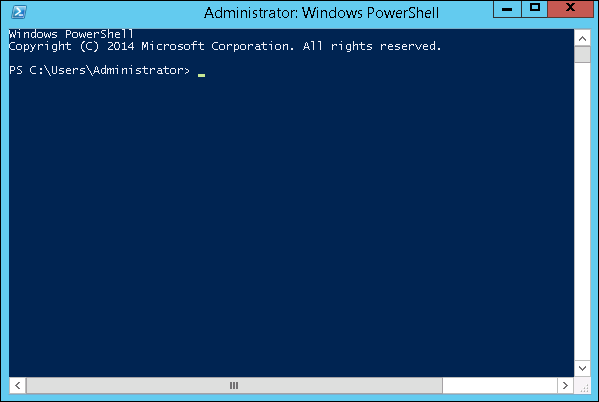
PowerShell Ready
The latest version of PowerShell is 5.0 and to check what is installed in our server we type the following command – :$PSVersionTable as shown in the following screenshot and from the screen we also know that we have PSVersion 4.0
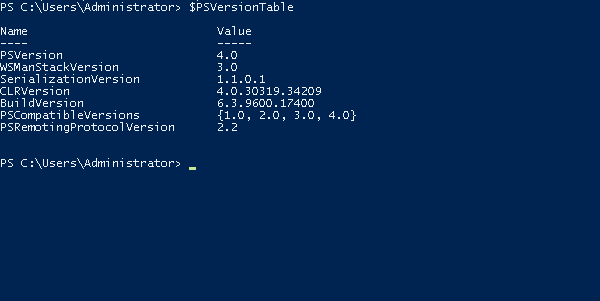
PSVersionTable
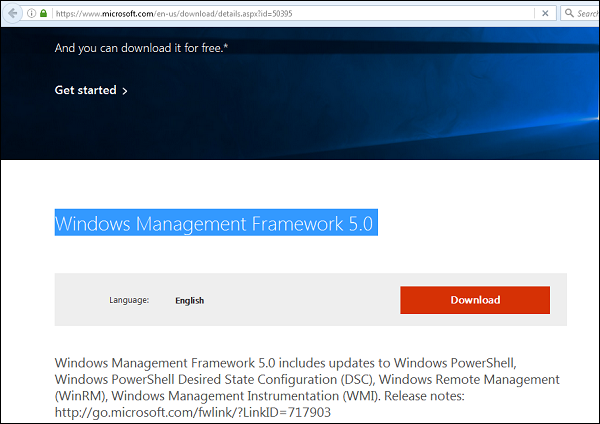
To update with the latest version where it has more Cmdlets we have to download Windows Management Framework 5.0 from the following link − https://www.microsoft.com/en-us/download/details.aspx?id=50395 and install it.
Windows Management Framework

PowerShell ISE

The Windows PowerShell Integrated Scripting Environment (ISE) is a host application for Windows PowerShell. In Windows PowerShell ISE, you can run commands and write, test, and debug scripts in a single Windows-based graphic user interface with multiline editing, tab completion, syntax coloring, selective execution, context-sensitive help, and support for right-to-left languages.
You can use menu items and keyboard shortcuts to perform many of the same tasks that you would perform in the Windows PowerShell console. For example, when you debug a script in the Windows PowerShell ISE, to set a line breakpoint in a script, right-click the line of code, and then click Toggle Breakpoint.
To open it you just go to Start – Search and then Type – PowerShell as shown in the following screenshot.
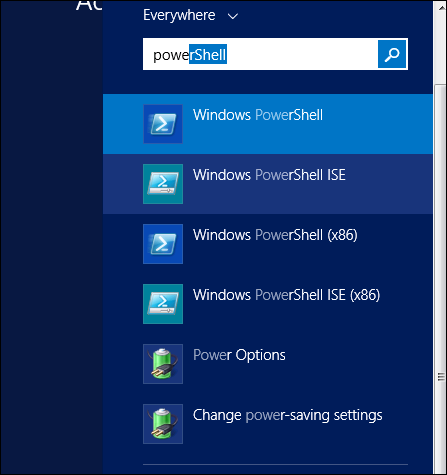
Search PowerShell
Then click on Windows PowerShell ISE. Or click on the downward Arrow as shown in the following screenshot.
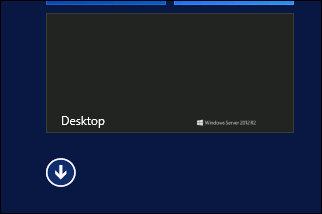
PowerShell ISE
It will list all the applications installed on the server and then click on Windows PowerShell ISE.
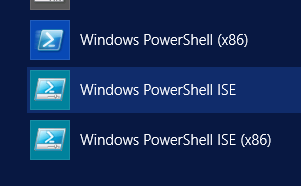
Windows PowerShell ISE
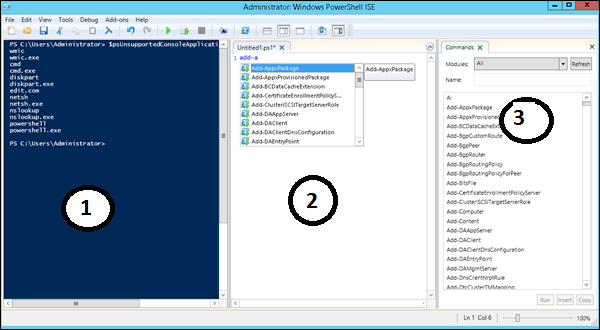
The following table will be open −
Following Table
It has three sections, which include – The PowerShell Console with number 1, then Scripting File number 2 and the third is the Command Modulewhere you can find the module.
While creating the script you can run directly and see the result like the following example −
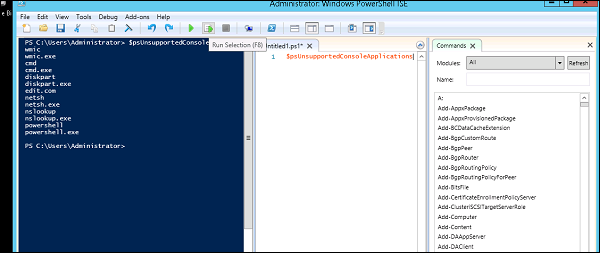
Creating Script

PowerShell Basic Commands

There are a lot of PowerShell commands and it is very difficult to put in all these commands in this tutorial, we will focus on some of the most important as well as basic commands of PowerShell.
The first step is to go to the Get-Help command which gives you an explanation about how to give a command and its parameter.
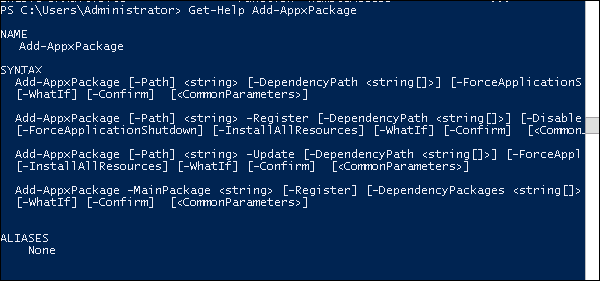
Get Help Command
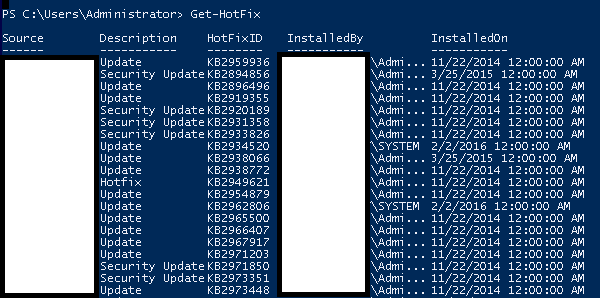
To get the list of Updates −
  • Get-HotFix and to install a hot fix as follows
  • Get-HotFix -id kb2741530
Updates

Windows Server 2016 - Server Roles

Like the previous version, Windows Server 2016 has the following roles which can be used and in the subsequent chapter, we will see how to install and configure the most important ones.
The following picture shows all the roles. A small reminder! - Roles and Features are the tools that you need to install or activate in order to complete your IT Administration duties, without their installation you cannot do anything.
Server Roles
To add a role in the server we should adhere to the following steps −
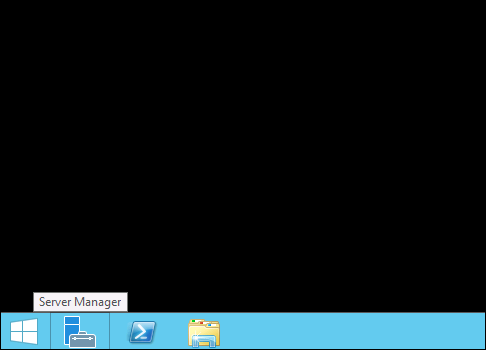
Step 1 − Click with the mouse on Server Manager which is found in the task bar as shown in the following screenshot.
Server Manager
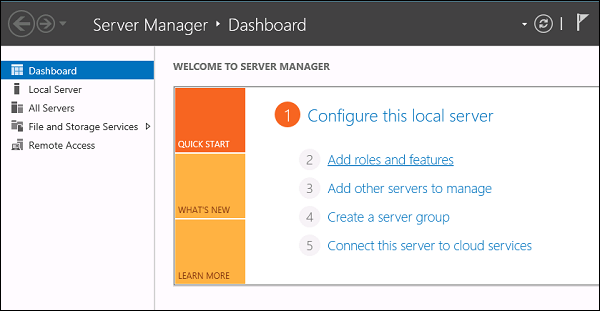
Step 2 − After opening the “Server Manager”, click on the second option “Add roles and features”.
Opening Server Manager
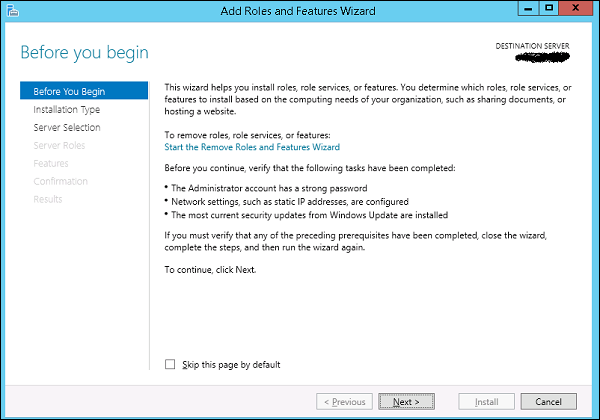
Step 3 − The following screen will appear, then you can Click on the Next button.
Click Next
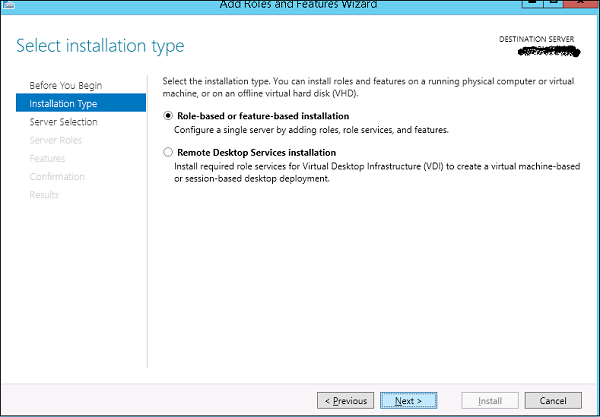
Step 4 − Select the Role-based or feature-based installation and then click on the Next button.
Role-based
In the next screen that appears, you will have the following two options −
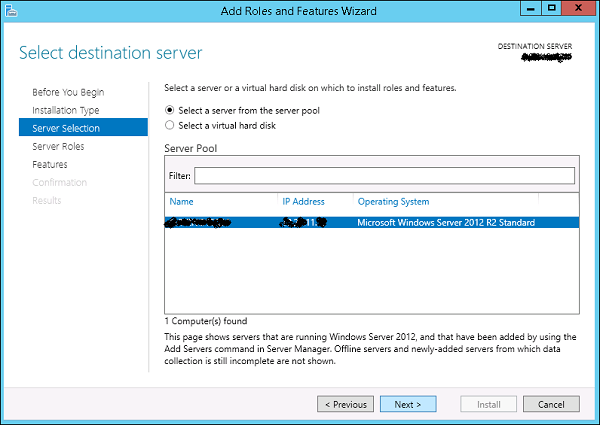
Option 1 − Select a server from the server pool. This option is – if you want to install the services in the physical server like being done in the following screenshot.
Server Selection
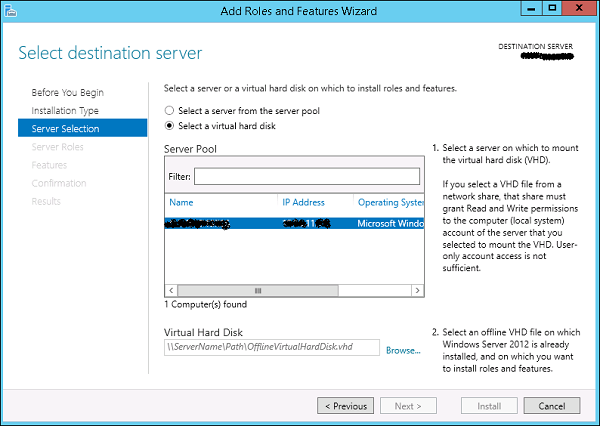
Option 2 − Select a virtual Hard disk if you want to install the services in a virtual disk that can be somewhere in the network storage. Take a look at the following screenshot for better understanding.
Select Virtual Hard Disk
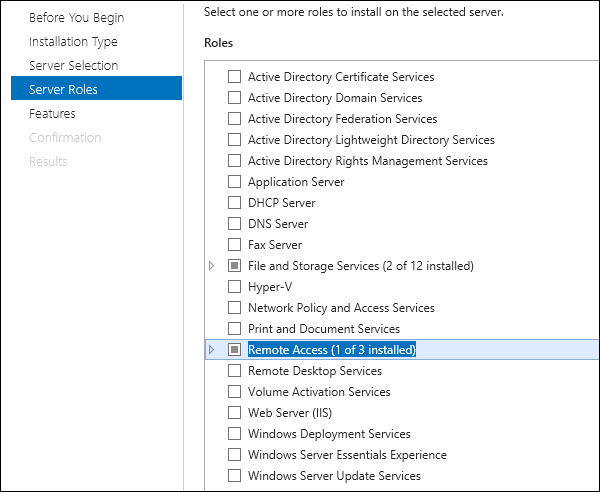
Step 5 − The last step will be to check the service that you want to install, but in the upcoming chapters we will continue this setup for each and every important services.
Important Services

Windows Server 2016 - Installation

In this chapter, we will discuss regarding the requirements and prerequisites of the Windows Server 2016.

System Requirements

Although most of the servers nowadays probably have the necessary requirements for Windows Server 2016. It will certainly be useful to know them in case you want to upgrade from an older system.
The main requirements are −
  • CPU socket minimum 1.4 GHz (64-bit processor) or faster for single core and Microsoft recommends is 3.1 GHz (64-bit processor) or faster multi-core.
  • RAM memory minimum is 2GB, but Microsoft recommends 8GB.
  • 160 GB hard disk with a 60 GB system partition space in your hard disk.
One important thing to note here is that the installation process itself will verify your computer hardware and let you know if it qualifies for a Windows Server 2012 installation. If not, then you will need to upgrade your hardware.

Installation

The following steps are to be adhered for the installation of Windows Server 2012.
Step 1 − We can download the evaluation ISO of Windows Server 2012 R2 from the following link − https://www.microsoft.com/en-us/evalcenter/evaluate-windows-server-2012-r2
But you will need to sign in first with a Microsoft account like Hotmail for example in order to complete the download and the good thing is that the evaluation period will last for 180 days, so you will have enough time to know if it will be the right product for you or not.
Evaluation ISO
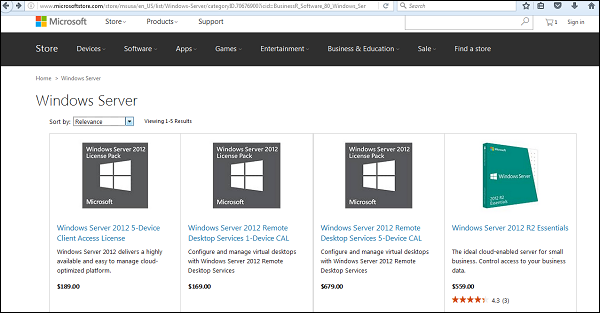
At the end, if you decide to buy the license of your Windows server 2012 R2. You can purchase it online via a Microsoft online store found in − http://www.microsoftstore.com/store/msusa/en_US/list/Windows-Server/categoryID.70676900?icid=BusinessR_Software_80_Windows_Server_112315
For the Enterprise solution, I would recommend to purchase it via a Microsoft partner that is found in your country.
Enterprise Solution
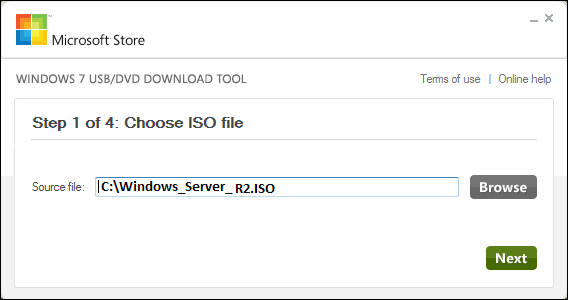
Step 2 − After downloading the ISO of Microsoft, create a boot USB driver which can be created with the Microsoft tool called Windows USB/DVD Download Tool and can be downloaded from the following link − https://www.microsoft.com/en-us/download/windows-usb-dvd-download-tool
After downloading the EXE file, open it and select the ISO file location and then click next like in the following screenshot, and wait up to the end when the Boot USB is created.
ISO file location
Step 3 − After completing the above given steps, plug-in the USB to the server and wait for a while till it loads the files. This will continue for about a couple of minutes as shown in the following screenshot.
Plug-in USB
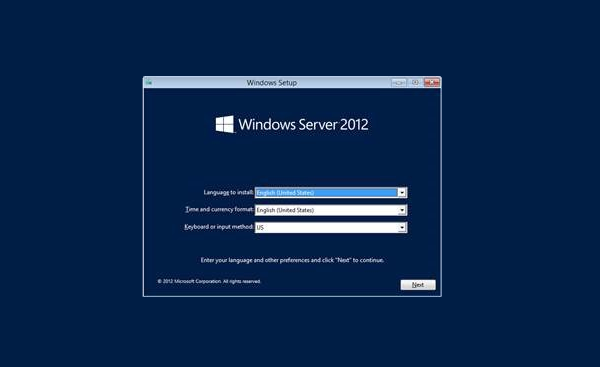
Step 4 − After the files are loaded, you will see the screen of language settings of installation, keyboard, time and currency format. Generally, all the default ones are also good enough to start with. Click Next.
Settings of Installation
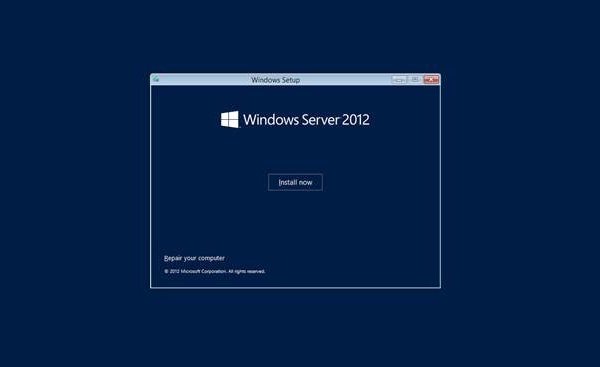
Step 5 − Click “Install now”.
Install Now
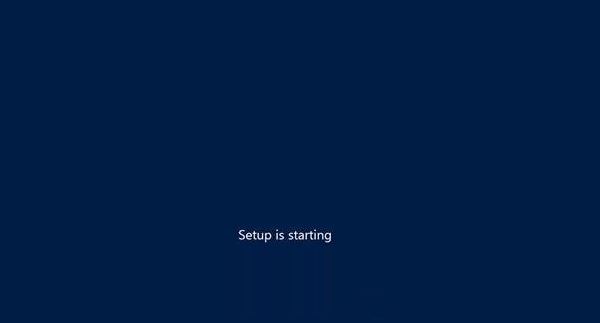
Step 6 − Once you have clicked on Install Now, the setup will start and it will load all the files and the screen will look as shown in the following screenshot.
Setup Starting
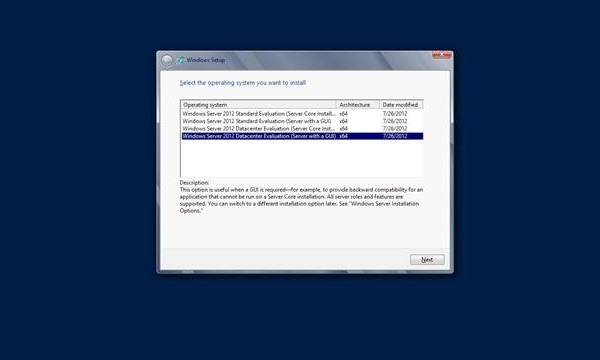
Step 7 − Wait until the files are loaded and then you will see the following screen. Let’s select Windows Server 2012 DataCenter Evaluation (Server with GUI) and click Next.
Sever with GUI
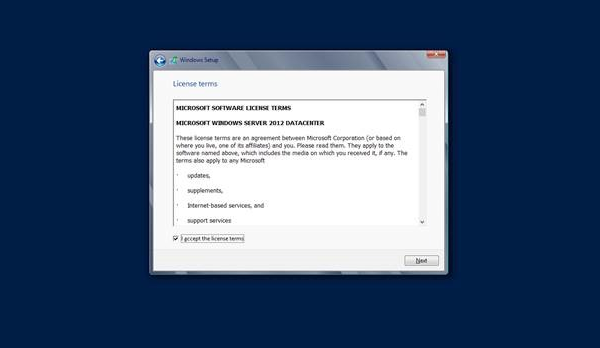
Step 8 − Click “I accept the license terms” and then click on the Next button as shown in the following screenshot.
Click Accept
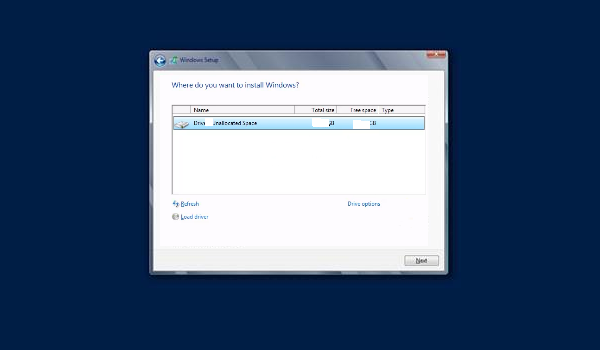
Step 9 − The following screen will appear. In “Driver Options” you can create a new partition, delete or format the Hard disk. After you have done this process then you can select the partition where the Windows server 2012 R2 will be installed in our case we have one partition. Once all this is done, then click on Next.
Driver Options
Step 10 − Let’s wait until this process finishes during this time and then the server will reboot.
Server will Reboot
Step 11 − Once the reboot is done the following screen will appear. Set the password for the server and then click on “Finish”.
Finish
Step 12 − It will take some minutes until the setup finishes completely.
Finish Completely
Step 13 − Once all this is done, you have completed the installation process and the following screen will appear.
Congratulations!!!
Congratulations

Windows Server 2012 - Overview

Windows Server 2016 codenamed Windows Server 8 is the most recent version of the operating system from Microsoft regarding server management. But it is not the last one, as the last one is Windows Server 2016. Officially it was released on August 1st, 2016 and is being sold as a commercial version only.
Server 2012

Improvements in Windows Server 2016

The major Improvements on this version are as follows −
  • It is ready to be integrated with cloud systems and it still can maintain the classic features of local datacenters as a result Hyper-V Virtualization has new features Hyper-v replicas, it allows you to create virtual machines replications between clusters and storage systems.
  • The Storage migration virtual disks can be moved to different physical storages, Virtual machine snapshots, virtual machines can be deleted from the Hyper-v and also from the virtual disks and it can be used directly without the need to shut down the virtual machine.
  • The Core server installation easily switches to GUI installation without the need of reinstallation.
  • The file server and storage service improvement is that it eliminates identical copies in the same volumes as such and saves space.
  • The Storage pools and storage spaces allows you to group the hard disks to one or more storage pools then it allows to create virtual disks. It can add other disks to the storage pools and make available to the users without impacting them.
  • The iSCSI Target Server can offer block storage to other servers and applications on the network using the iSCSI standard.
  • Active Directory cloning can deploy additional domain controllers by cloning an existing virtual domain controller.
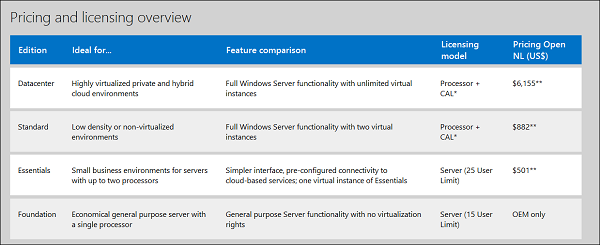
The Windows Server 2012 has four editions: Foundation, Essentials, Standard and Datacenter. Each one of them has their own limitation accept the Datacenter version which is also the most expensive one.
The following table will show what is the right one for your business needs −
Table
For finding out the cost of licensing you can click on the following link − https://www.microsoft.com/en-us/server-cloud/products/windows-server-2016-r2/purchasing.aspx
Licensing Overview

Windows Server 2016

Windows Server 2016 codenamed Windows Server 8 is the most recent version of the operating system from Microsoft regarding server management, but not the last one which is Windows Server 2016. Officially it was released on August 1, 2015 and is just a commercial version as of now. Windows Server 2016 has four editions: Foundation, Essentials, Standard and Datacenter. Each one of them has their own limitations except the Datacenter version, which is also the most expensive one. This is an introductory tutorial that explains all the fundamentals of Windows Server 2016.

Audience

This tutorial has been designed for all those readers who want to learn the features of Windows Server 2016. It is especially going to be useful for all those professionals who are required to install and use this operating system to perform various duties in their respective organizations.

Prerequisites

We assume the readers of this tutorial have a practical experience of handling a Windowsbased Servers. In addition, it is going to help if the readers have a basic knowledge of how to install and use an operating system.

Wednesday, 5 September 2018

Microsoft Azure - Application Deployment

Microsoft Azure - Application Deployment


In this chapter, we will discuss different ways of deploying an application on Windows Azure. When we say application, it can be a web application or a mobile application. Earlier web apps were called websites, but now everywhere they are referred as web applications. We will be discussing how to deploy applications from Visual Studio and management portal in the chapter ‘Websites’.

Deploying a Web App from PowerShell

To get started with the PowerShell, refer to ‘PowerShell’ chapter in the tutorial. In order to deploy a website from PowerShell you will need the deployment package. You can get this from your website developers or you if you are into web deployment you would know about creating a deployment package. In the following sections, first you will learn how to create a deployment package in Visual Studio and then using PowerShell cmdlets, you will deploy the package on Azure.

Create a Deployment Package

Step 1 − Go to your website in Visual Studio.
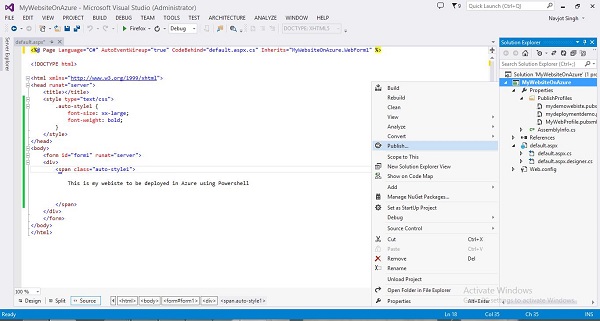
Step 2 − Right-click on the name of the application in the solution explorer. Select ‘Publish’.
Create Deployment Package
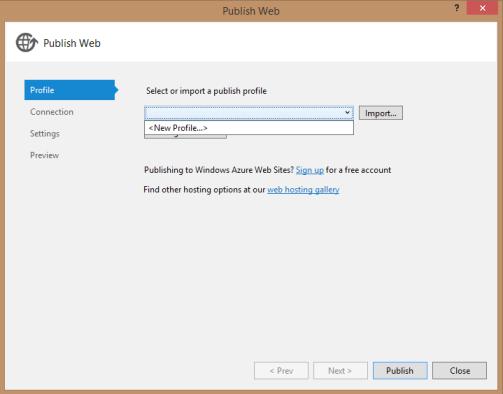
Step 3 − Create a new profile by selecting ‘New Profile’ from the dropdown. Enter the name of the profile. There might be different options in dropdown depending on if the websites are published before from the same computer.
New Profile
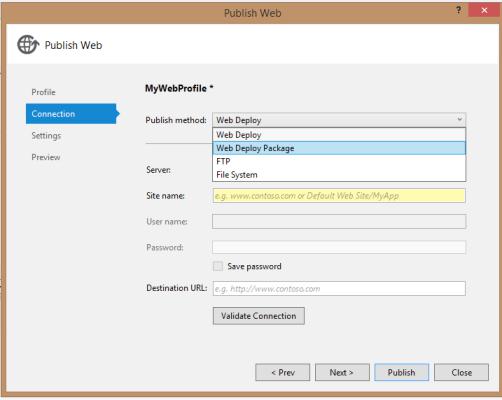
Step 4 − On the next screen, choose ‘Web Deploy Package’ in Publish Method.
Web Deploy Package
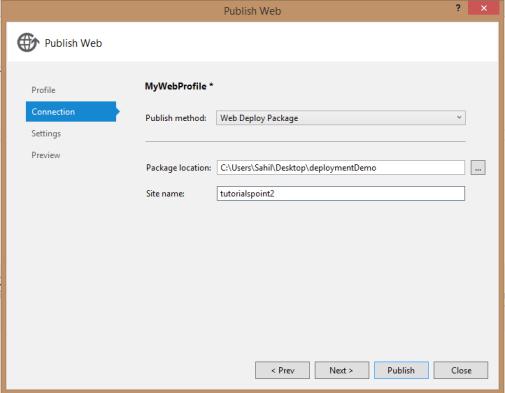
Step 5 − Choose a path to store the deployment package. Enter the name of site and click Next.
MyWebProfile
Step 6 − On the next screen, leave the defaults on and select ‘publish’.
After it’s done, inside the folder in your chosen location, you will find a zip file which is what you need during deployment.

Create a Website in Azure using PowerShell

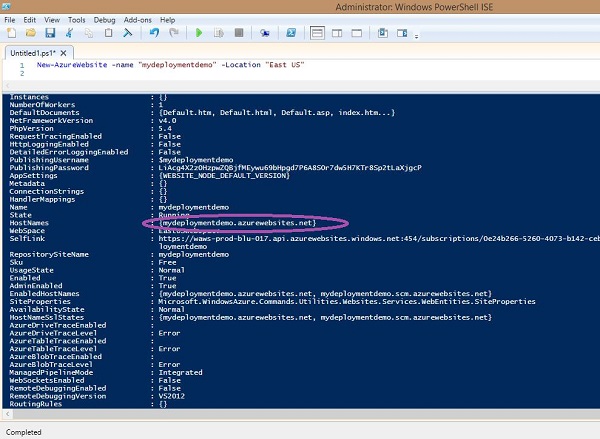
Step 1 − Enter the following cmdlets to create a website. Replace the highlighted part. This command is going to create a website in free subscription. You can change the subscription after the website is created.
New-AzureWebsite -name "mydeploymentdemo" -location "East US" 
Create Website PowerShell
If cmdlet is successful, you will see all the information as shown in the above image. You can see the URL of your website as in this example it is mydeploymentdemo.azurewebsites.net.
Step 2 − You can visit the URL to make sure everything has gone right.

Deploy Website using Deployment Package

Once the website is created in Azure, you just need to copy your website’s code. Create the zip folder (deployment package) in your local computer.
Step 1 − Enter the following cmdlets to deploy your website.
Publish-AzureWebsiteProject -name "mydeploymentdemo" -package 
"C:\Users\Sahil\Desktop\deploymentDemo\MyWebsiteOnAzure.zip" 
Here in above commandlet, the name of the website just created is given and the path of the zip file on the computer.
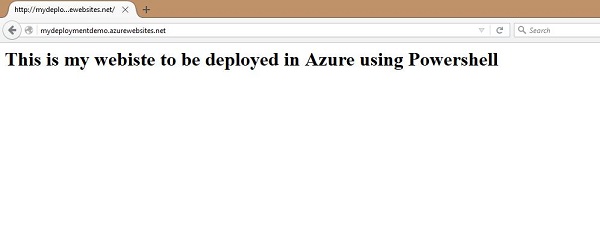
Step 2 − Go to your website’s URL. You can see the website as shown in the following image.
Create Website URL