- This tutorial assumes you’ve already logged in to cPanel, and are starting on the home screen.
- Now let’s learn how to manage a database with phpMyAdmin.
- Click the "phpMyAdmin" icon.
- This is the phpMyAdmin main page. It is from here that you can manage all MySQL databases that exist in your hosting account.
- In the top left corner, you’ll see an entry with your account user name. Click the "plus sign" to its left.
- You’ll now see a list of databases in your account. Click the one you want to manage.
- You can now start managing your database. You can manage tables, add or delete entries, and perform queries among other things.
Tuesday, 29 May 2018
Managing a MySQL database in PHPMyAdmin
Creating a database in cPanel using the MySQL Database Wizard
Creating a database in cPanel using the MySQL Database Wizard
- Log into your cPanel.
- Click the MySQL Database Wizard under the Databases heading.

- Next to New Database enter a name for your database and click Next Step.

- Next to Username enter a username.Enter a password next to Password, enter it again for Password (Again) and then click Create User.

- On the next page, you'll assign privileges for the user to the database. Check the box next to All Privilegesand then click Next Step.

Congratulations, now you know how to successfully create a database!
How to add a new subdomain and change its settings
How to add a new subdomain and change its settings
SubdomainThe subdomain is an extension of the primary domain that the user can create independently through his control panel (cPanel). The subdomain is used if you want to set up a new, independent web site on the same hosting, but you don’t need a different domain from the primary one. If the main domain is domain.mk, you will recognize the subdomains as a supplement to the main domain, for example: subdomain1. domain.mk, subdomain2.domain.mk, etc. You can access the subdomain through subdomain.domain.mk or domain.mk/sudomain. Additionally, for each created addon domain a new subdomain is automatically created.Instructions for creating a subdomainStep 1: Log in to your cPanel account (domain_name/cpanel) with the appropriate username and password.Step 2: In the Domains section, click on Subdomains.
Step 3:- In the newly opened window in the Subdomain section, enter the name of the subdomain you want to create.
- If you have more active domains on your hosting, from the Domain drop-down menu, select the domain you will use to create the subdomain.
- In the Document Root section, set the path where you want to create the folder on the subdomain, where your web site will be set up. The example given in the image, the folder on the subdomain proba.mkhost.com.mk is placed in the public_html folder. If you do not fill the Document root field, it will automatically be filled and the subdomain folder will be in the home directory (/).
- Click on the Create buttonBy doing this, the procedure for creating a subdomain is completed.
Have in mind that, after creating a specific subdomain, you should wait to refresh DNS zones (sometimes it may not be available immediately online). Our suggestion is to create the subdomain first (without first accessing it in a browser), wait 5 minutes after creation, and then access it.Setting certain changes to a created subdomainCertain changes can be made to an existing subdomain. To change the path, first find the subdomain in the Subdomains -> Modify a Subdomain section, and in the Document Root section, click on the edit icon..
In the newly opened window, enter the new path. Then, click the Change button.
If you want to redirect the subdomain to another domain, click the Manage Redirection button and enter the link to which you want the subdomain to be redirected, then click on the Save button.
Creating FTP Accounts and linking
To create a new additional FTP account:
- Go to Home > FTP Accounts.
- On the FTP Accounts tab, click Create FTP Account.
- Specify the FTP account name in the appropriate field.
- Specify the Home directory by clicking and select the directory required. Alternatively, you can specify the path in the input field.
- Type the new password into the New password and Confirm password boxes.
- Specify what FTP user can do with files and folders, and how much disk space on the server he or she can occupy:
- To limit the amount of disk space, clear the Unlimited check box next to the Hard disk quota box, and type the amount of disk space in megabytes.
- To allow the FTP user to view the contents of the home directory and download files from it, select the Read permission check box.
- To allow the FTP user to create, view, rename and delete directories in the home directory, select the Write permission check box.If
you do not grant any permissions, a connection to the FTP account will
be made, but the contents of the home directory will not be shown to the
user.
- Click OK. A new FTP account will be added
Installing your cPanel SSL Certificate
How to manage SSL hosts and the shared certificate in WHM
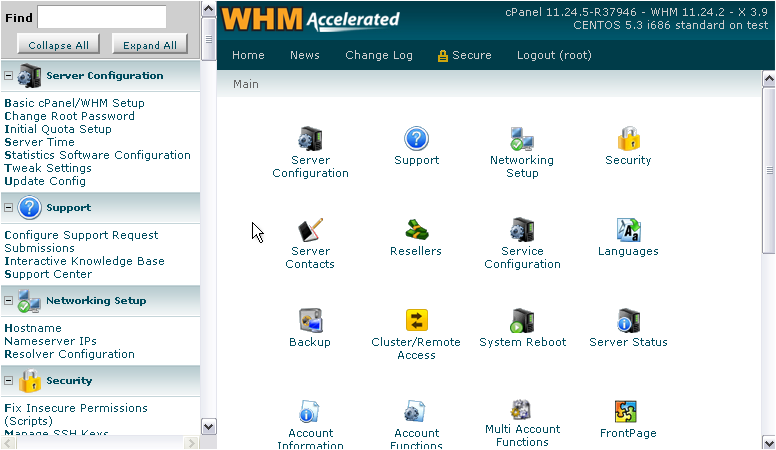
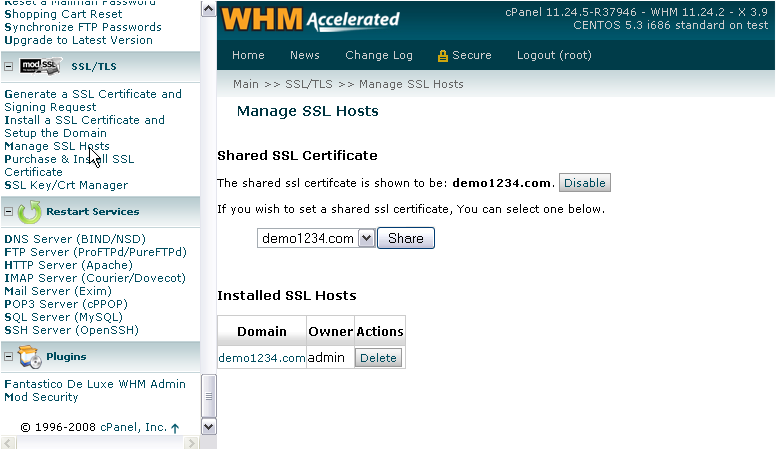
1) Go to SSL/TLS in the menu.

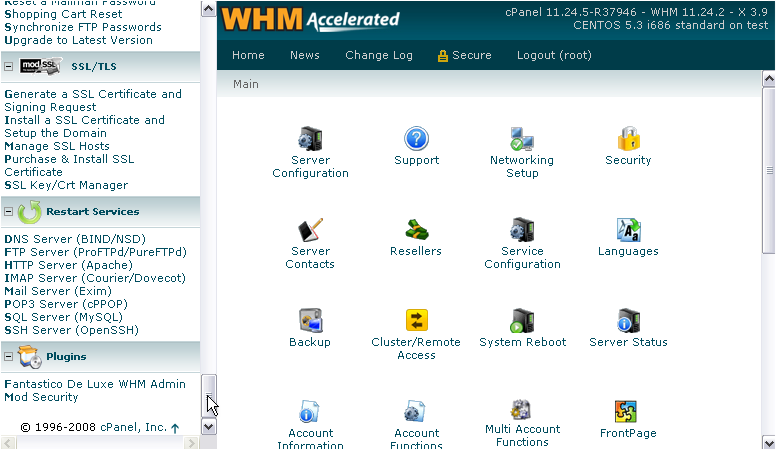
2) Click Manage SSL Hosts.

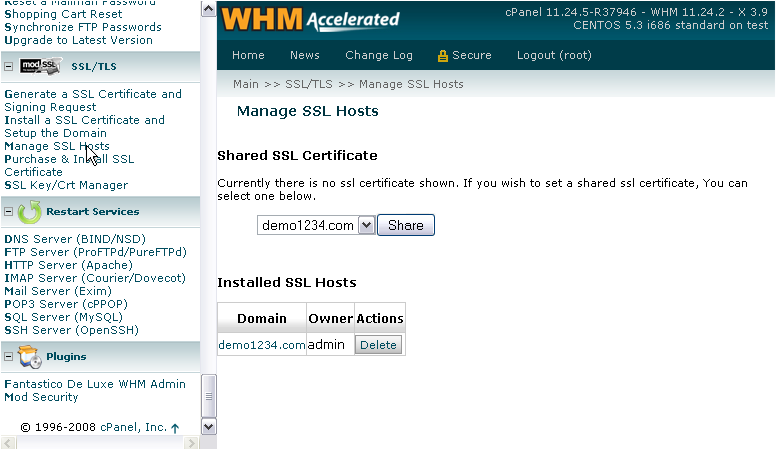
3) If you have any Installed SSL Hosts or certificates, you can delete each one using its Delete button. Or, you can share an SSL host's certificate by selecting it in the menu, then pressing Share.

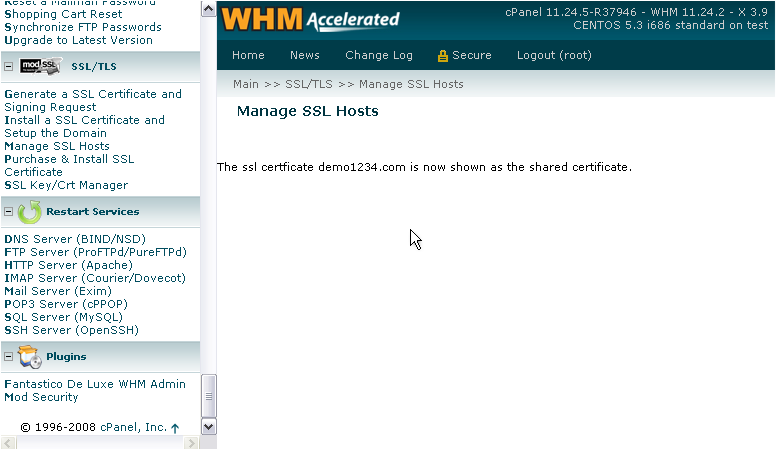
The SSL certificate we chose has now been set as the shared certificate. Now, any user on the server can access their account through that domain. For example, the user mysite3's account could be accessed through the shared SSL host as such:https://www.demo123.com/~mysite3/

4) Return to the previous page.
5) To disable the Shared Certificate, click Disable.

The SSL certificate is no longer shared.
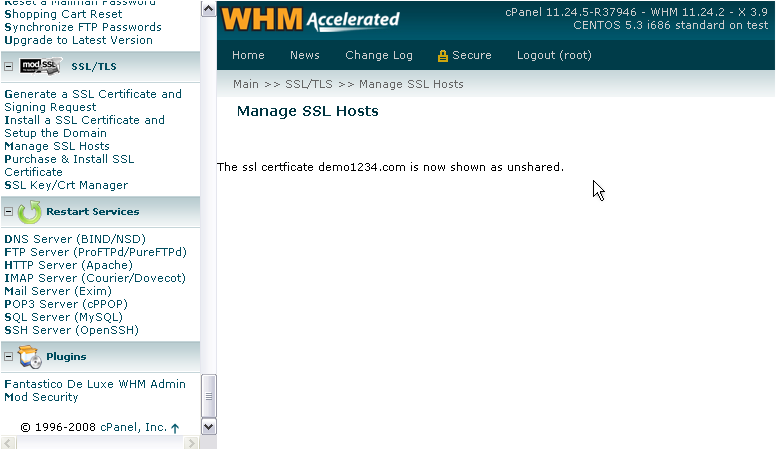

T
Resetting a cPanel password
Resetting a cPanel password
- Log into your WHM interface.
 Click on the Account Functions option in the left hand menu.
 Click on the Password Modification tool. This can be done either from the left menu or the main panel.
 Select the account you wish to change the password for by highlighting it in the list.
 Enter the new password in the Password field. Optionally, you can have the WHM generate a random password using the Password Generator button.NOTE: Be sure to write down the password as you will not be able to see it after leaving this page.
 Click on the Change Password button to save the new password.
Now the cPanel user can use the new password to access their cPanel. WHM does not automatically notify anyone of the new password so you will need to let the cPanel manager know the new password if it is someone other than yourself.
Subscribe to:
Comments (Atom)


