Tuesday, 29 May 2018

How to view Bandwidth Usage

How to view Bandwidth Usage


To view bandwidth usage for each of your cPanel accounts:
click-view-bandwidth-usage
  1. Log into your WHM
  2. Click "View Bandwidth Usage", which is under the "Account Information" heading in the left menu
  3. A list of your accounts will be listed, and the bandwidth usage for the current month can be seen under "Xfer (in Megs)". You can also view usage for other months by clicking the "Last Month" and "Next Month" links.

UNInstall FrontPage Extensions via WHM

o remove FrontPage extensions, complete the following steps. 
  1. Login To WHM
  2. In the search bar located in the top left, search for 'FrontPage'


  3. Click on 'Uninstall FrontPage Extensions'
  4. At the bottom of the page, ensure there is a tick in the 'Uninstall Microsoft® FrontPage Extensions.' option

  5. Click the blue 'Uninstall' button
  6. You will receive confirmation that FrontPage has been uninstalled

  7. Once it has been removed, it will no longer show up in WHM


  8. You will now be able to update WHM, and it is highly recommended that you do so, to update search for 'Upgrade' in the search bar


  9. To update the server ensure the 'Force a reinstall even if the system is up to date' box is ticked, then click on 'Click to Upgrade'

The server will now be updated, with Frontpage extensions removed.

How to install FrontPage Extensions on an account in WHM

Now let's learn how to manage FrontPage extensions.
FrontPage extensions should only be installed in accounts where FrontPage will be the program used to create the website. If FrontPage will not be used, do not install the FrontPage extensions.

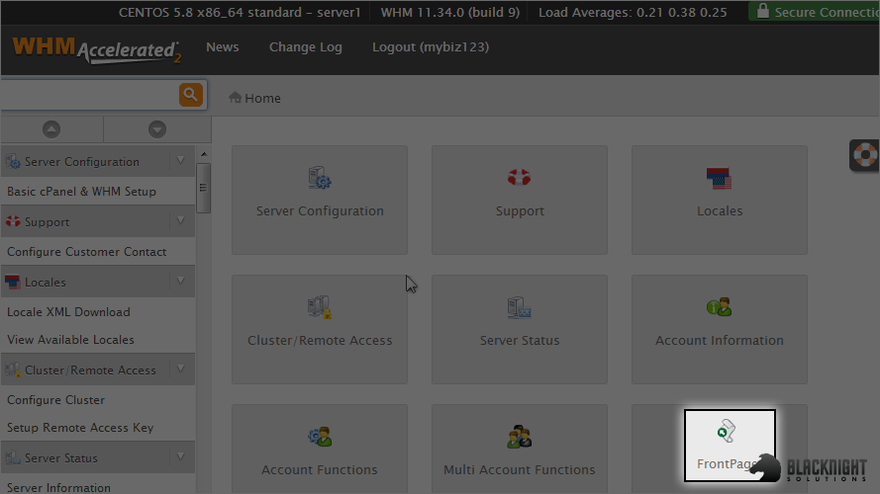
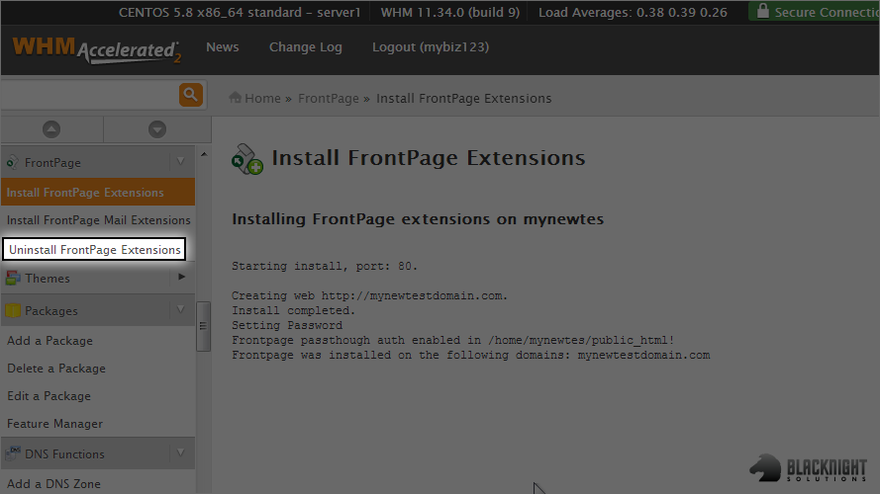
1) Click FrontPage here.
scene02_1.png

From here you can install (or uninstall) FrontPage extensions into any account in your reseller plan.
Also be aware that your customers can do this with their own accounts themselvesfrom their cPanel control panel.

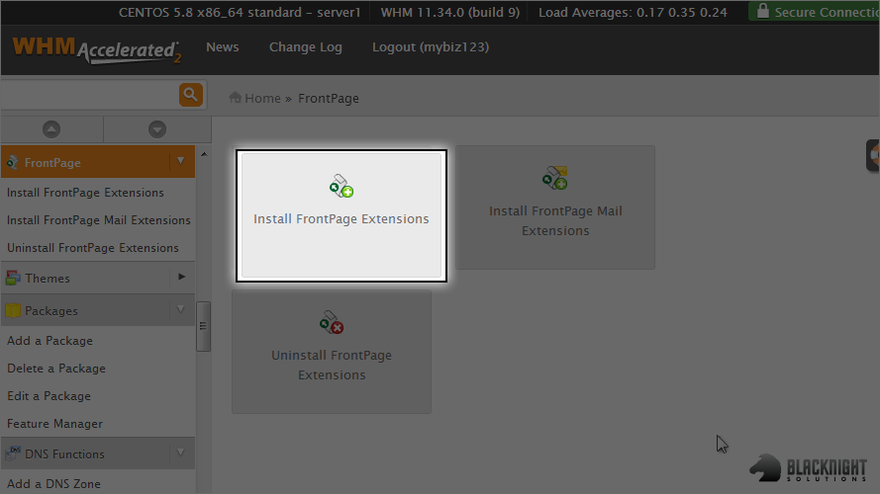
2) Click the install FrontPage extensions link.
scene03_1.png

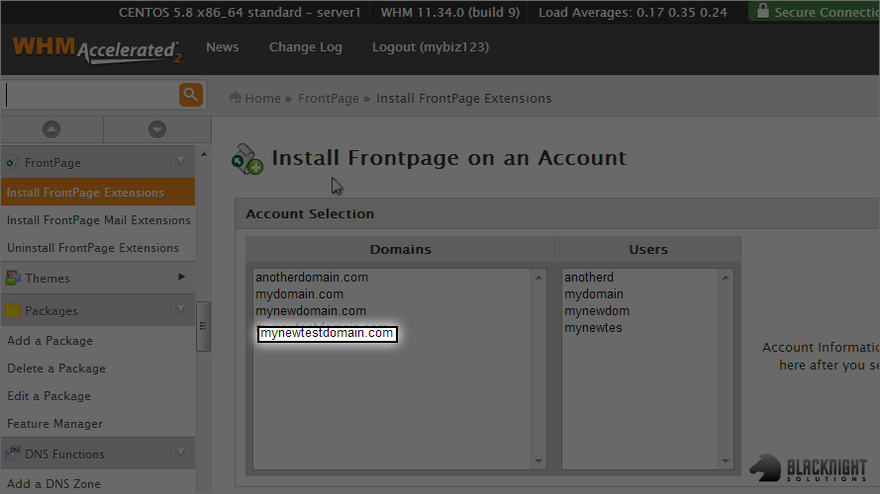
3) Select mynewtestdomain.com as the account for which we want to install the FrontPage extensions.
scene04_1.png

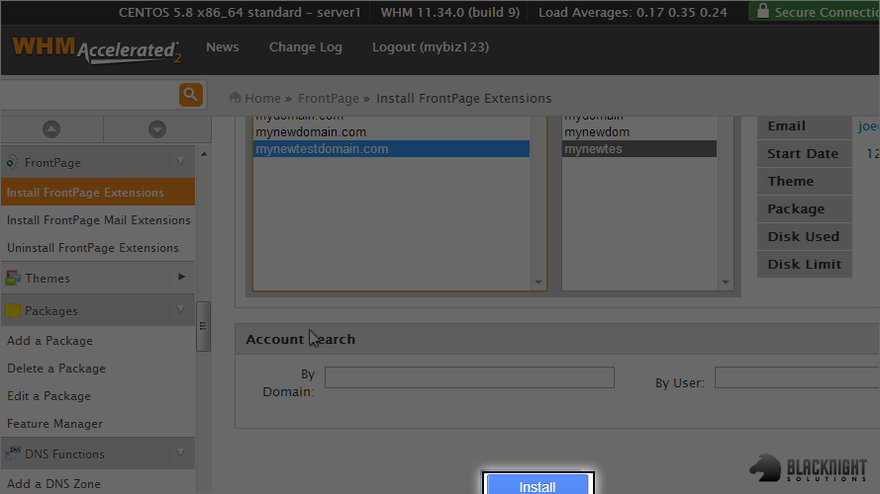
4) Then click install.
scene07_1.png

That's it! FrontPage extensions have been installed in the mynewtestdomain.com account.

Remember that once FrontPage extensions are installed, files should only be uploaded to that account using FrontPage and the HTTP uploading method. Using the FTP method may damage the extensions, and might require you to re-install them.

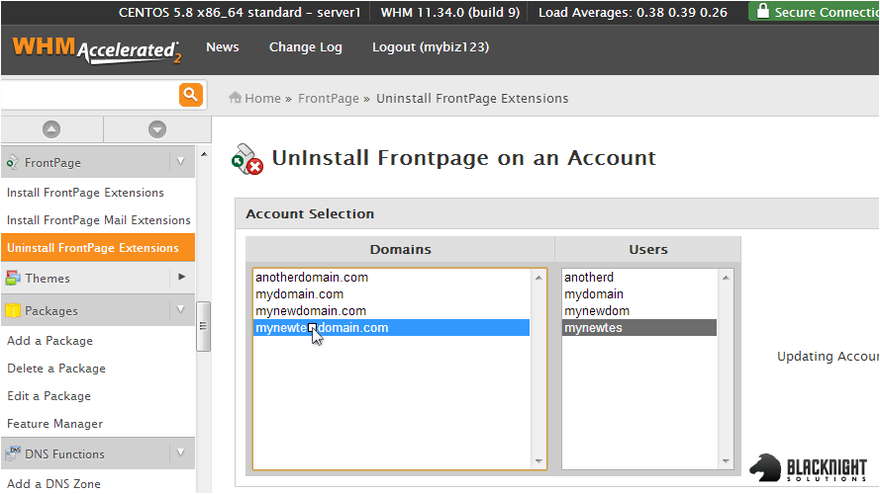
5) Click the uninstall FrontPage extensions link.
scene08_1.png

6) Select mynewtestdomain.com, then scroll down and click uninstall.
scene10_1.png

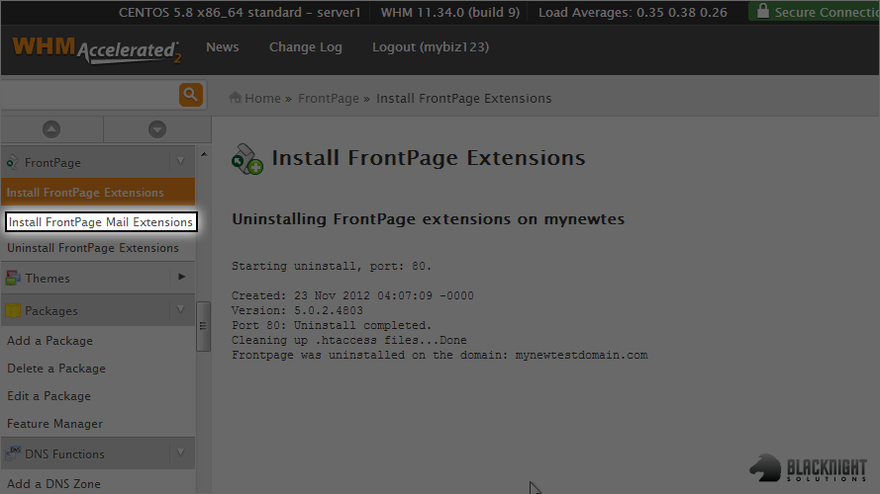
The FrontPage extensions have now been removed from this account.

7) Click the install FrontPage mail extensions link.
scene13_1.png

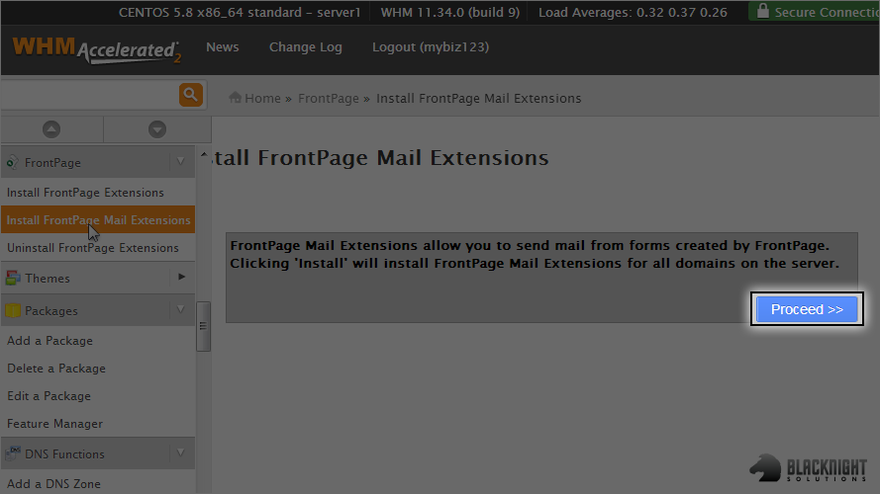
8) Click proceed.
scene14_1.png

We just installed the FrontPage mail extensions in any account that needed them.

Changing your cPanel account password

Changing your cPanel account password

To change your cPanel password, please follow these steps:
  1. Login to your cPanel account here
  2. Click on the avatar icon in the top-right corner of the page
  3. Click on "Password & Security"
  4. Enter the information needed
  5. Click the "Change your password now!" button

Checking the space usage of the account

Step 1 — Checking the short summary of Disk Space Usage

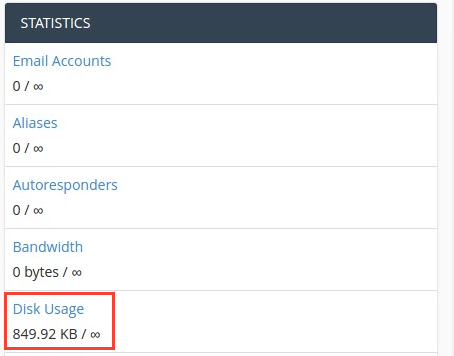
Login to your cPanel and on the right hand side, you will see a short summary of your Disk Space Usage.
Disk Usage Statistics

Step 2 — Checking Disk Space Usage statistics

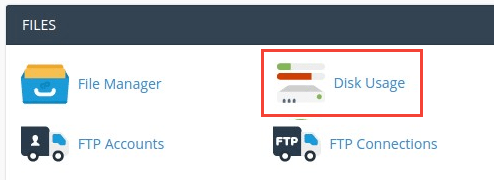
Full details of your Disk Space Usage can be found by clicking on Disk Usage button under Files section of your cPanel.
Disk Usage Statistics Full
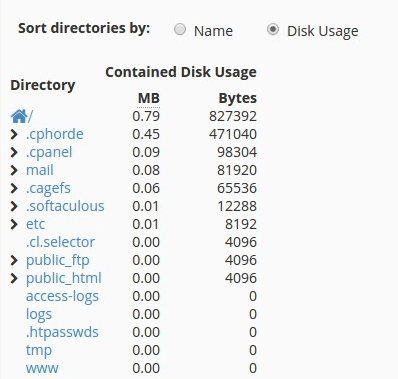
Scroll down the page, then expand the folders with the > sign to the left of each folder. This will show exactly where your disk space is being used.
Disk Usage cPanel
In order to remove unwanted files, click on the desired folder and File Manager will be opened in your browser.

Quota Modification for an account via WHM

This article will guide you on how to modify the disk quota of a domain from WHM. You can easily increase or decrease the disk quota for a domain created from WHM by following the below steps.
1. Login to WHM
2. Select the List Accounts option from Account Information under the WHM home.
3. Search for the domain for which you are planning to change the disk quota, click on the “+” right next to the domain.
4. Click on the Change Quota options under Actions section
5. You can edit the quota from the Quota Modification page, you can either set the quota to unlimited or set the value which you wish to set.

Terminate an Account via WHM

  1. Once you are logged into WHM, you can search for the list of accounts in the search bar on the right-hand side of the page.
    delete-cpanel-pt1
  2. Search for a list of your accounts, by starting to type “List Accounts.” WHM will automatically bring that choice up for you to select and go to the Accounts page.
    delete-cpanel-pt2
  3. You will see a listing of the cPanel accounts on the List Accountspage.
    delete-cpanel-pt3
  4. Select the domain/url you want to delete by clicking the [+] next to the domain name.
    delete-cpanel-pt4
  5. Once the account is open, you will see many options for managing the account, including termination.
    delete-cpanel-pt5
  6. To delete the account, click Terminate Account.
    Termination is final and irreversible. Please take a backup of your files, email and any other information you wish to save to your local drive. For information on how to backup your cPanel account, please see our article Creating a Backup for a Site in cPanel.
    delete-cpanel-pt6
  7. An Account Selection page will open to confirm the domain and the users you are deleting.
    When an account is deleted, the DNS Zone is also deleted. If you are moving the site to a different server, click Keep DNS Zone so that it is not deleted.
    delete-cpanel-pt7
  8. A pop-up will appear to confirm that you want to delete the account. Click Proceed to begin the process.
    delete-cpanel-pt8
  9. The details of the deletion will show on the WHM page.
    delete-cpanel-pt9
  10. Once the account deletion is complete, you will receive an email to confirm that the account was deleted. It will also be deleted from your List Account page.
    delete-cpanel-pt10