Tuesday, 29 May 2018

How to install FrontPage Extensions on an account in WHM

Now let's learn how to manage FrontPage extensions.
FrontPage extensions should only be installed in accounts where FrontPage will be the program used to create the website. If FrontPage will not be used, do not install the FrontPage extensions.

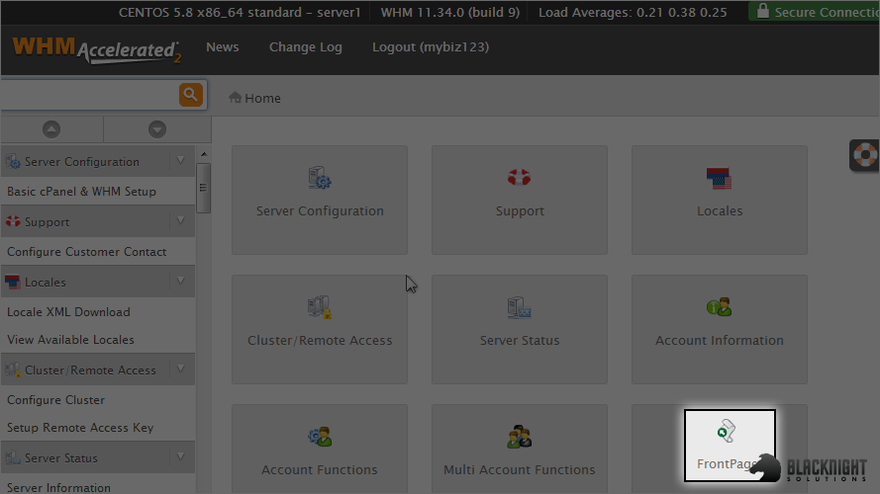
1) Click FrontPage here.
scene02_1.png

From here you can install (or uninstall) FrontPage extensions into any account in your reseller plan.
Also be aware that your customers can do this with their own accounts themselvesfrom their cPanel control panel.

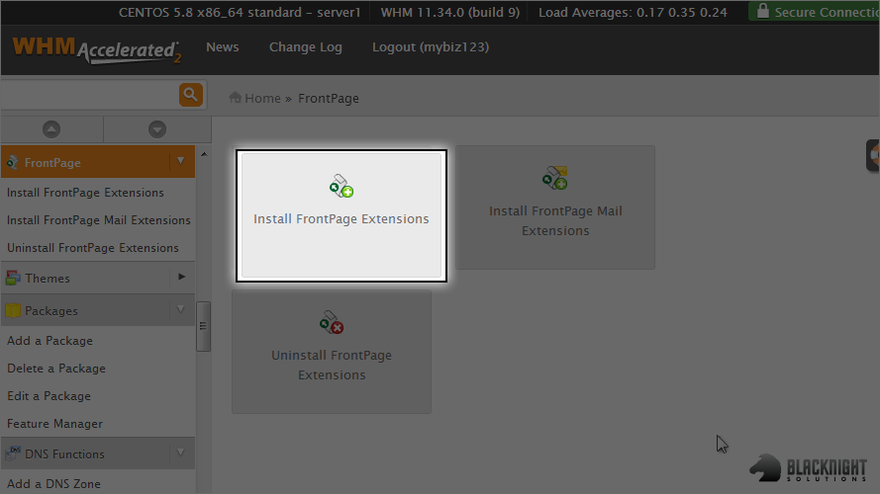
2) Click the install FrontPage extensions link.
scene03_1.png

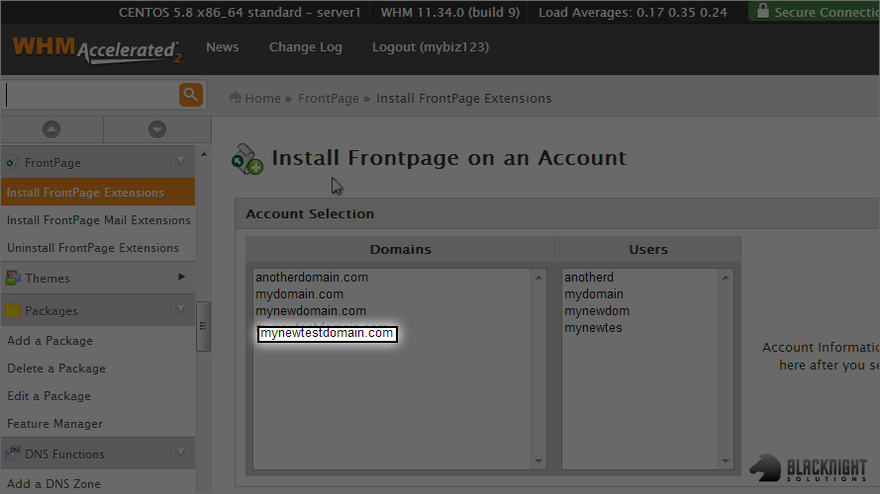
3) Select mynewtestdomain.com as the account for which we want to install the FrontPage extensions.
scene04_1.png

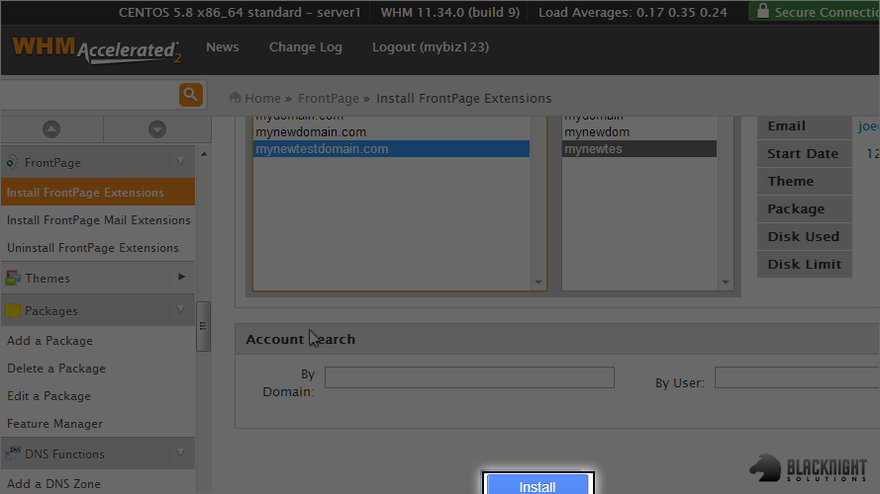
4) Then click install.
scene07_1.png

That's it! FrontPage extensions have been installed in the mynewtestdomain.com account.

Remember that once FrontPage extensions are installed, files should only be uploaded to that account using FrontPage and the HTTP uploading method. Using the FTP method may damage the extensions, and might require you to re-install them.

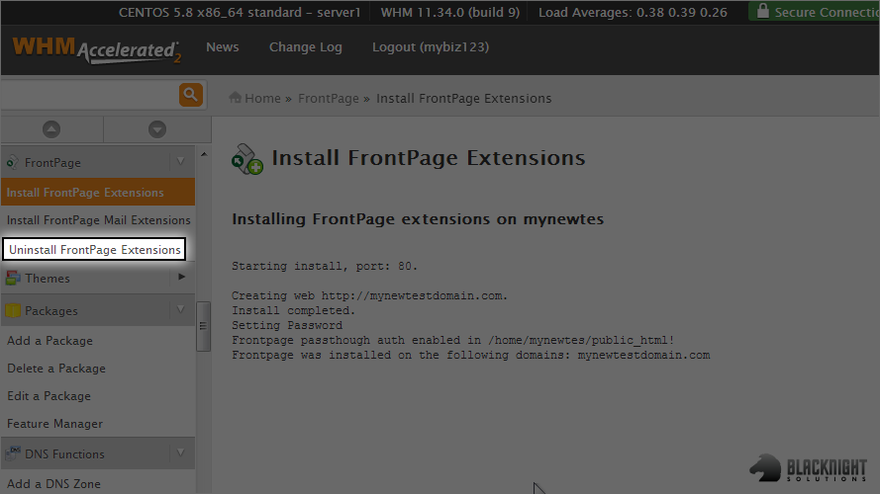
5) Click the uninstall FrontPage extensions link.
scene08_1.png

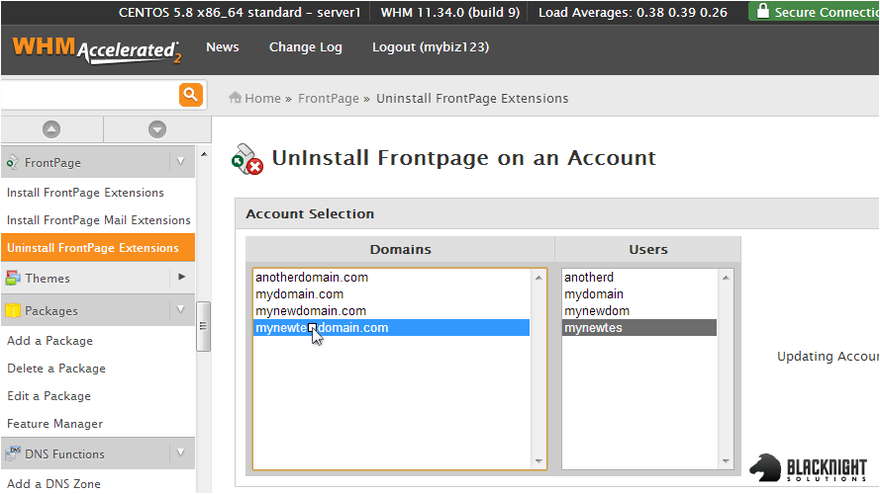
6) Select mynewtestdomain.com, then scroll down and click uninstall.
scene10_1.png

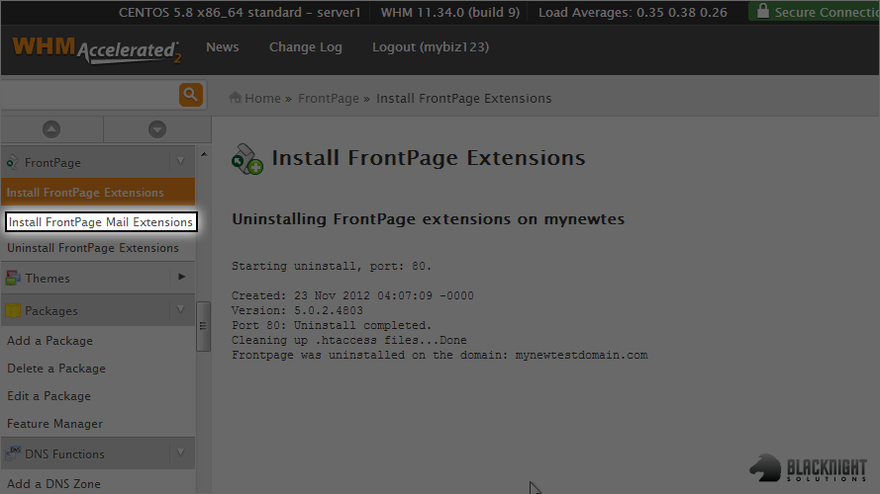
The FrontPage extensions have now been removed from this account.

7) Click the install FrontPage mail extensions link.
scene13_1.png

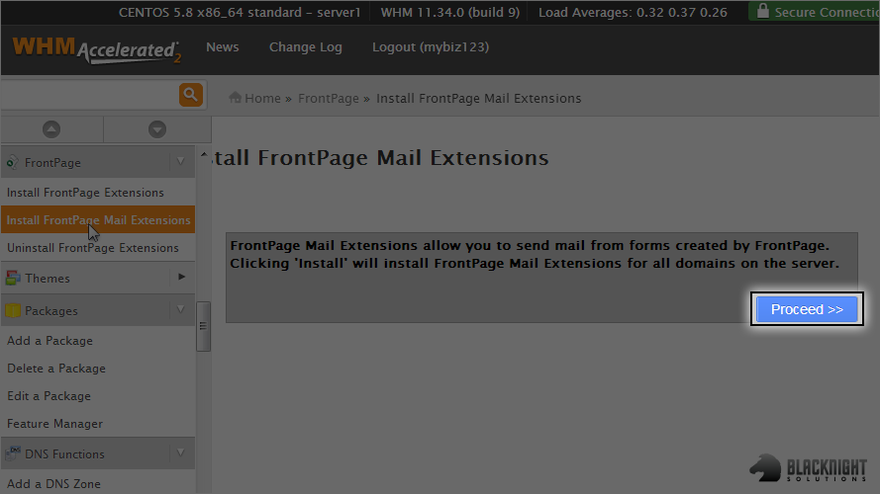
8) Click proceed.
scene14_1.png

We just installed the FrontPage mail extensions in any account that needed them.

Changing your cPanel account password

Changing your cPanel account password

To change your cPanel password, please follow these steps:
  1. Login to your cPanel account here
  2. Click on the avatar icon in the top-right corner of the page
  3. Click on "Password & Security"
  4. Enter the information needed
  5. Click the "Change your password now!" button

Checking the space usage of the account

Step 1 — Checking the short summary of Disk Space Usage

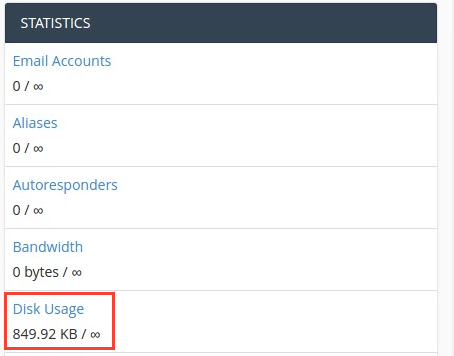
Login to your cPanel and on the right hand side, you will see a short summary of your Disk Space Usage.
Disk Usage Statistics

Step 2 — Checking Disk Space Usage statistics

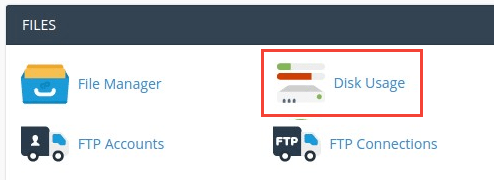
Full details of your Disk Space Usage can be found by clicking on Disk Usage button under Files section of your cPanel.
Disk Usage Statistics Full
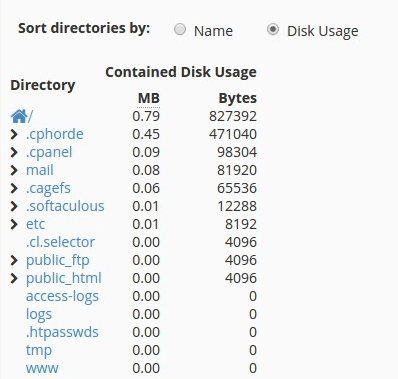
Scroll down the page, then expand the folders with the > sign to the left of each folder. This will show exactly where your disk space is being used.
Disk Usage cPanel
In order to remove unwanted files, click on the desired folder and File Manager will be opened in your browser.

Quota Modification for an account via WHM

This article will guide you on how to modify the disk quota of a domain from WHM. You can easily increase or decrease the disk quota for a domain created from WHM by following the below steps.
1. Login to WHM
2. Select the List Accounts option from Account Information under the WHM home.
3. Search for the domain for which you are planning to change the disk quota, click on the “+” right next to the domain.
4. Click on the Change Quota options under Actions section
5. You can edit the quota from the Quota Modification page, you can either set the quota to unlimited or set the value which you wish to set.

Terminate an Account via WHM

  1. Once you are logged into WHM, you can search for the list of accounts in the search bar on the right-hand side of the page.
    delete-cpanel-pt1
  2. Search for a list of your accounts, by starting to type “List Accounts.” WHM will automatically bring that choice up for you to select and go to the Accounts page.
    delete-cpanel-pt2
  3. You will see a listing of the cPanel accounts on the List Accountspage.
    delete-cpanel-pt3
  4. Select the domain/url you want to delete by clicking the [+] next to the domain name.
    delete-cpanel-pt4
  5. Once the account is open, you will see many options for managing the account, including termination.
    delete-cpanel-pt5
  6. To delete the account, click Terminate Account.
    Termination is final and irreversible. Please take a backup of your files, email and any other information you wish to save to your local drive. For information on how to backup your cPanel account, please see our article Creating a Backup for a Site in cPanel.
    delete-cpanel-pt6
  7. An Account Selection page will open to confirm the domain and the users you are deleting.
    When an account is deleted, the DNS Zone is also deleted. If you are moving the site to a different server, click Keep DNS Zone so that it is not deleted.
    delete-cpanel-pt7
  8. A pop-up will appear to confirm that you want to delete the account. Click Proceed to begin the process.
    delete-cpanel-pt8
  9. The details of the deletion will show on the WHM page.
    delete-cpanel-pt9
  10. Once the account deletion is complete, you will receive an email to confirm that the account was deleted. It will also be deleted from your List Account page.
    delete-cpanel-pt10

Command line option to list suspended accounts/domains – cPanel

How to suspend/unsuspend an account via WHM panel?

From the WHM control panel the server admin can simply manage the account suspension and re-activation. Here is the steps for suspending an account via WHM.
Step I : Login to WHM panel.
Step II : Go to:
Home >> Account Functions >> Manage Account Suspension
From there you can select the account and suspend it simply. There is an option to add your note for suspension reason and also you can prevent re-sellers from un-suspending the account from their WHM panel. See the image below for more details.
suspend1
You can also un-suspend an account from here.

How to suspend/unsuspend an account via command-line?

Back-end scripts are available to do the same in a WHM/cPanel server. We can simply suspend and un-suspend accounts via command-line using those cPanel scripts. Here I am listing those scripts for suspending and un-suspending cpanel accounts.
To suspend an account:
/scripts/suspendacct user-name
To unsuspend an account:
/scripts/unsuspendacct user-name

How to list suspended accounts from the WHM panel?

At the section where you managing the suspention of an account, you can see that already suspended account is shaded with red color. In WHM there is a direct option to list all suspended accounts. Do follow the below pasted steps for that.
Step I : Login to WHM panel.
Step II : Go to:
Home >> Account Functions >> List Suspended Accounts 
If you want, you can unsunpend accounts from there directly.

How to list suspended accounts from comman-line?

Here we goes to our topic “command line option to list suspended accounts/domains“. Yes, from the back-end we can simply list suspended accounts by accessing the directory “/var/cpanel/suspended/“. All suspended accounts will be listed there.
Example:
# ll /var/cpanel/suspended
total 72
drwxr-xr-x   2 root root  4096 Jul 24 13:03 ./
drwxr-xr-x. 86 root root 12288 Jul 24 13:09 ../
-rw-r--r--   1 root root    54 May  6 18:30 user1
-rw-r--r--   1 root root     0 Mar 22 23:01 user2
-rw-r--r--   1 root root    54 May  6 18:30 user3
-rw-r--r--   1 root root    54 May  6 18:30 user4
-rw-r--r--   1 root root    54 May  6 18:30 user5
-rw-r--r--   1 root root   152 Jul 24 13:03 user6
-rw-r--r--   1 root root     0 Jun 11 10:04 user7
-rw-r--r--   1 root root    54 May  6 18:30 user8
-rw-r--r--   1 root root    54 May  6 18:30 user9

Monday, 21 May 2018

Apache Virtual Hosting

This tutorial shows how to setup Apache Virtual Hosts in CentOS 6 . This is useful if you want to host more than one website on a single CentOS web server. For instructions on how to setup Apache, PHP, and SQL database on CentOS 7,

Setup folder structure for your websites

We are going to create 2 folders for each website. The first will hold HTML and other content, second - log files.
/var/www/sites/domain1/html
/var/log/httpd/domain1
/var/www/sites/domain2/html
/var/log/httpd/domain2
/var/www/sites/domain3/html
/var/log/httpd/domain3
Log files will be stored in var/log/httpd/... subfolders, which is the default place to store log files in Linux. People often store Apache log files in /var/www/ subfolders, but in CentOS with SELinux enabled this can cause access denied errors. This can be fixed with chcon command, but I prefer to store all my log files in /var/logs... 
You can also place index.html files with some sample text in each html directory which we'll use later for testing.

Create folder structure for virtual host files

Create folders:
/etc/httpd/sites-available
/etc/httpd/sites-enabled
sites-available will hold virtual host config files for websites that are configured, but not necessary enabled. These files are actually ignored when Apache starts, but this system allows to easily disable and enable websites without having to delete or create new virtual host files every time we want to take a site offline and put it back online.
sites-enabled will hold symbolic links to virtual host files inside sites-available that are enabled. They will be loaded when Apache starts.

Add sites-enabled to Apache config

Open file /etc/httpd/conf/httpd.conf and at the very end of the file add following text:
IncludeOptional sites-enabled/*.conf
This will tell Apache to look for virtual host files with extension .conf in sites-enabled directory.

Create Virtual Host files

In directory /etc/httpd/sites-available create config files for each website (domain1.conf, domain2.conf, etc.) with following content:
<VirtualHost *:80>
ServerName www.domain1.com
ServerAlias domain1.com
DocumentRoot /var/www/sites/domain1/html
ErrorLog /var/log/httpd/domain1/error.log
CustomLog /var/log/httpd/domain1/access.log combined
</VirtualHost>
Change domain1 to match your domain names and directories you created previously.
If Apache can't match the requested domain to any of the virtual hosts, the first (alphabetically) virtual host site will be loaded. If you want to have more control over this, you can create a dedicated virtual host (i.e. 00_default) that will be loaded only when no matching virtual host exist. ServerName and ServerAlias should not match any of your domains (i.e.example.com) The name starts with 00 so that it is always the first virtual hosts alphabetically. The site linked to this default virtual host could show an error message, redirect to another domain, etc.

Edit httpd.conf

Edit the main Apache configuration file /etc/httpd/conf/httpd.conf according to your requirements.
In my particular case, I made following changes:
Set webmaster email address:
ServerAdmin administrator@domain.com
Set main document root:
DocumentRoot "/var/www/sites"
Configure main document root:
<Directory "/var/www/sites">
AllowOverride All
Options FollowSymLinks
</Directory>
AllowOverride All - is required if you intend to use .htaccess files for directory level configuration. By default, this is set to None, in which case .htaccess overrides would be ignored.
Options -Indexes - prevents directory listing.

Enable Virtual Hosts

To enable websites, we need to create symbolic links in /etc/httpd/sites-enabled pointing to appropriate config files in sites-available. To do this, run:
ln -s /etc/httpd/sites-available/domain1.conf /etc/httpd/sites-enabled/domain1.conf
For changes to take effect we need to restart Apache:
service  httpd restart
To disable a particular website, simply delete relevant symbolic link (or change the extension) and restart Apache.
Before going live, you can test if everything is working locally. To do this, edit the hosts file on your client machine to point domains configured inside virtual hosts to the CentOS web server's IP address. If everything was setup properly, pointing your web browser to one of the domains should load index.html file from an appropriate /var/www/sites/... directory