Secure your virtual hub using Azure Firewall Manager
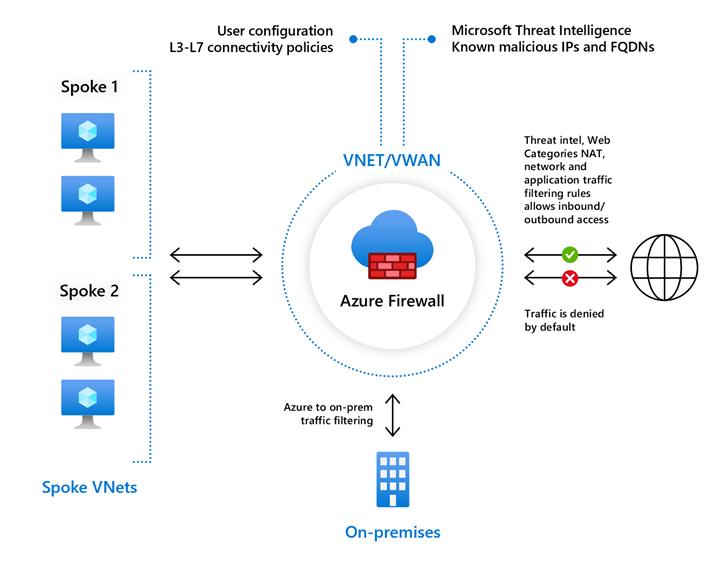
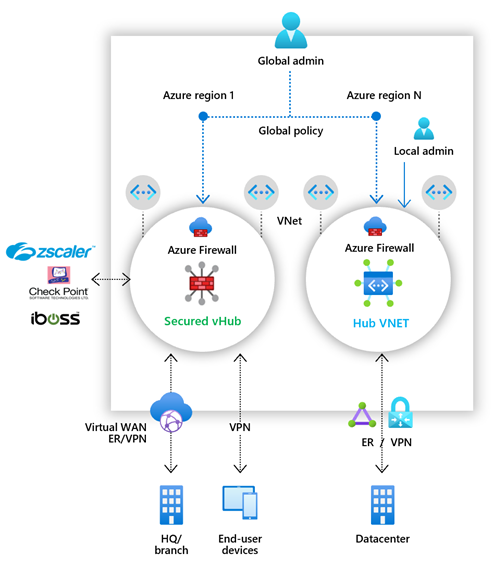
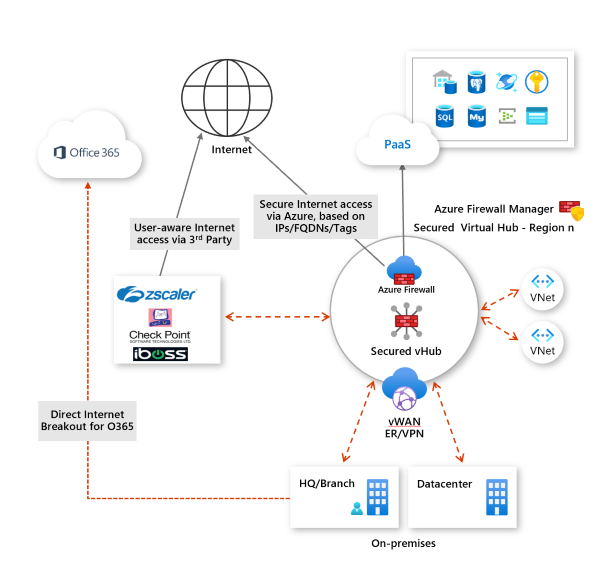
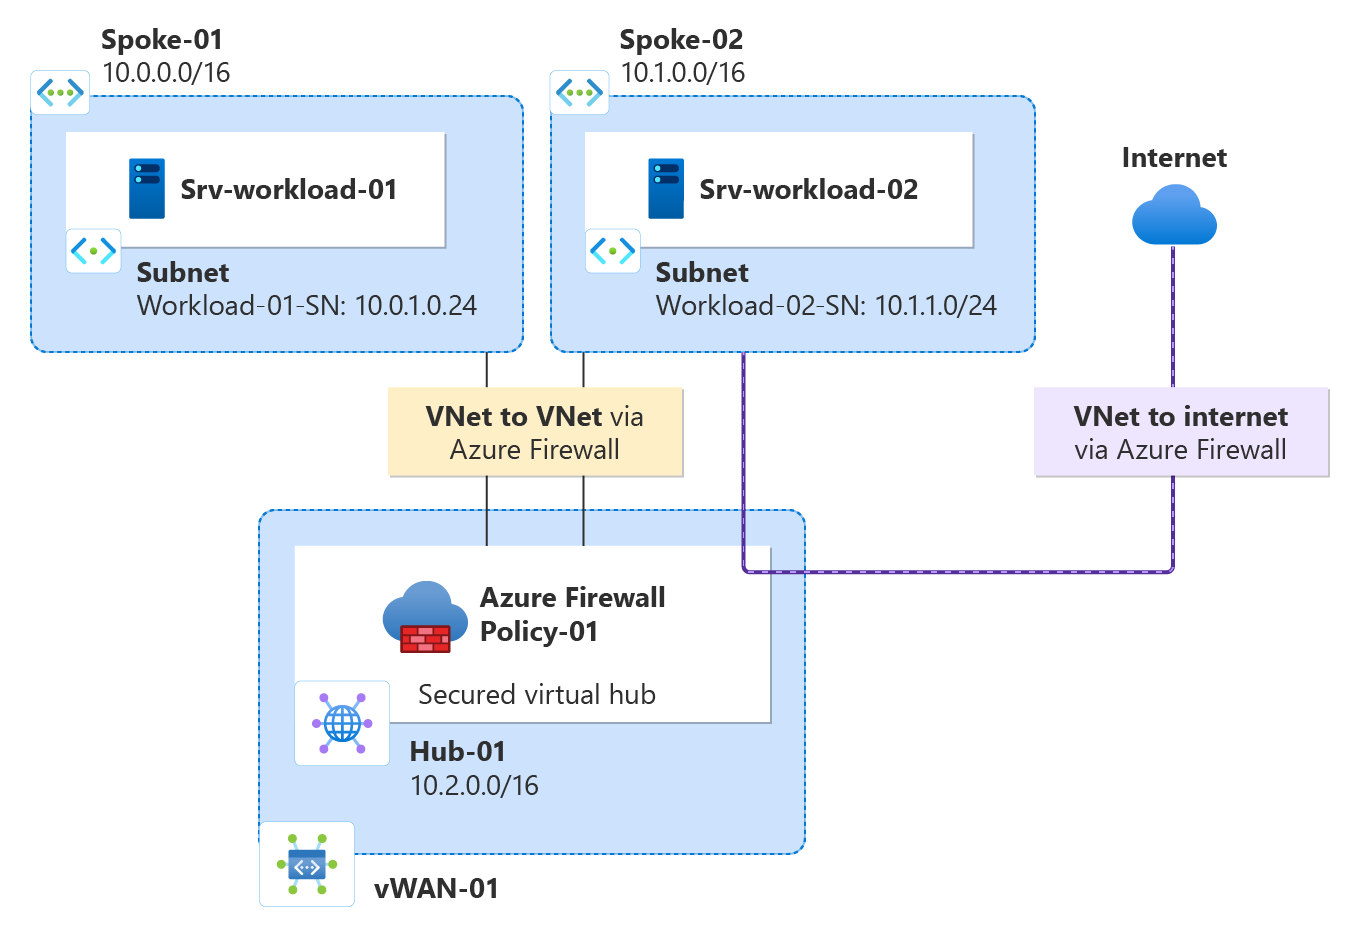
Using Azure Firewall Manager, you can create secured virtual hubs to secure your cloud network traffic destined to private IP addresses, Azure PaaS, and the Internet. Traffic routing to the firewall is automated, so there's no need to create user-defined routes (UDRs).
Firewall Manager also supports a hub virtual network architecture. For a comparison of the secured virtual hub and hub virtual network architecture types, see What are the Azure Firewall Manager architecture options?
In this tutorial, you learn how to:
- Create the spoke virtual network
- Create a secured virtual hub
- Connect the hub and spoke virtual networks
- Route traffic to your hub
- Deploy the servers
- Create a firewall policy and secure your hub
- Test the firewall
Important
The procedure in this tutorial uses Azure Firewall Manager to create a new Azure Virtual WAN secured hub. You can use Firewall Manager to upgrade an existing hub, but you can't configure Azure Availability Zones for Azure Firewall. It is also possible to convert an existing hub to a secured hub using the Azure portal, as described in Configure Azure Firewall in a Virtual WAN hub. But like Azure Firewall Manager, you can't configure Availability Zones. To upgrade an existing hub and specify Availability Zones for Azure Firewall (recommended) you must follow the upgrade procedure in Tutorial: Secure your virtual hub using Azure PowerShell.
If you don't have an Azure subscription, create a free account before you begin.
Create a hub and spoke architecture
First, create spoke virtual networks where you can place your servers.
Create two spoke virtual networks and subnets
The two virtual networks each have a workload server in them and are protected by the firewall.
- From the Azure portal home page, select Create a resource.
- Search for Virtual network, select it, and select Create.
- For Subscription, select your subscription.
- For Resource group, select Create new, and type fw-manager-rg for the name and select OK.
- For Virtual network name, type Spoke-01.
- For Region, select East US.
- Select Next.
- On the Security page, select Next.
- Under Add IPv4 address space, accept the default 10.0.0.0/16.
- Under Subnets, select default.
- For Name, type Workload-01-SN.
- For Starting address, type 10.0.1.0/24.
- Select Save.
- Select Review + create.
- Select Create.
Repeat this procedure to create another similar virtual network in the fw-manager-rg resource group:
Name: Spoke-02
Address space: 10.1.0.0/16
Subnet name: Workload-02-SN
Starting address: 10.1.1.0/24
Create the secured virtual hub
Create your secured virtual hub using Firewall Manager.
From the Azure portal home page, select All services.
In the search box, type Firewall Manager and select Firewall Manager.
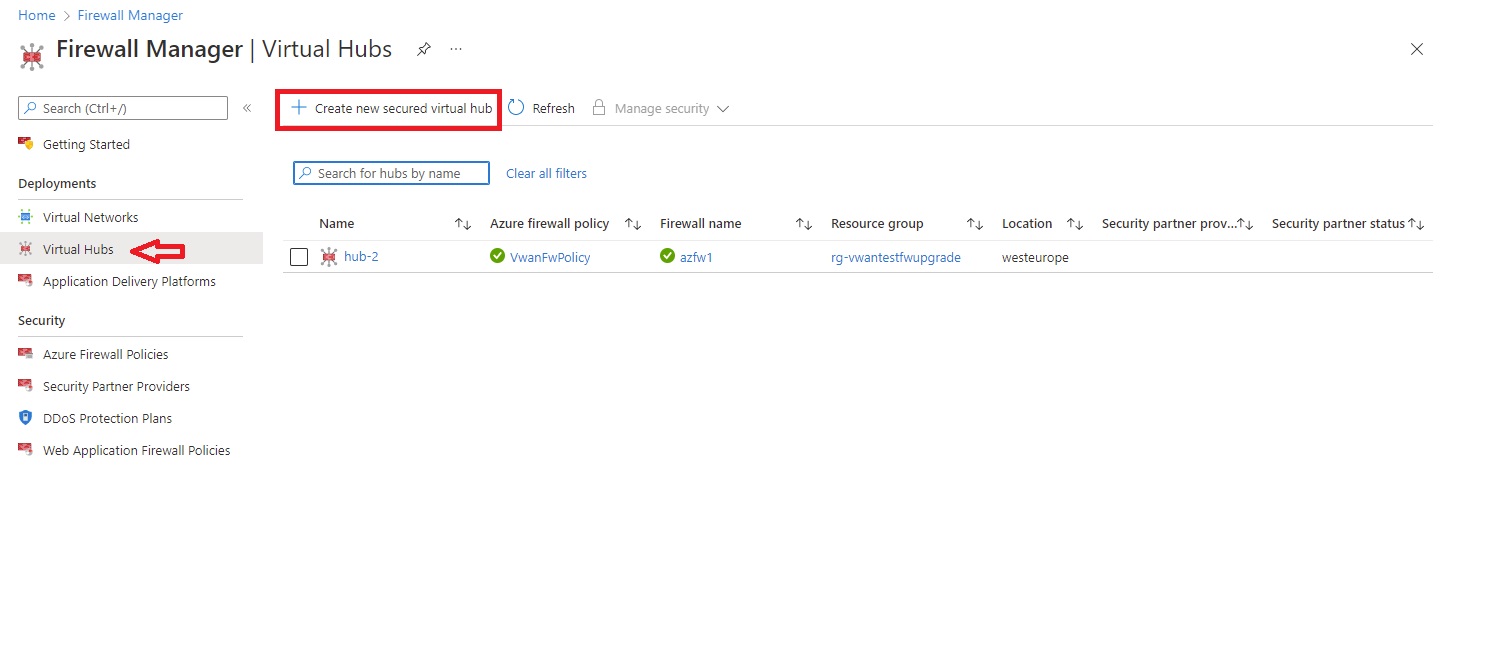
On the Firewall Manager page under Deployments, select Virtual hubs.
On the Firewall Manager | Virtual hubs page, select Create new secured virtual hub.
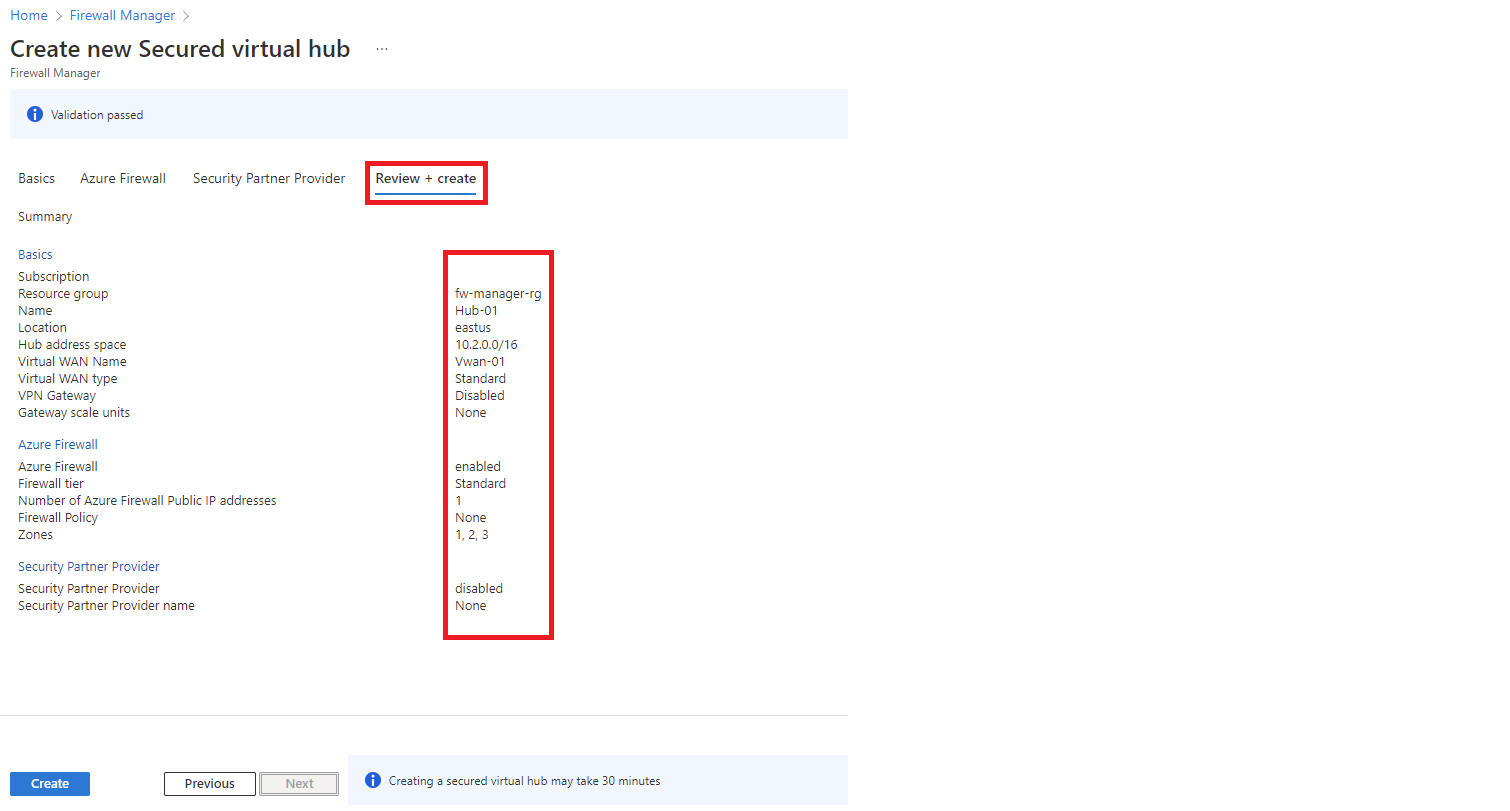
Select your Subscription.
For Resource group, select fw-manager-rg.
For Region, select East US.
For the Secured virtual hub name, type Hub-01.
For Hub address space, type 10.2.0.0/16.
Select New vWAN.
For the new virtual WAN name, type Vwan-01.
For Type Select Standard.
Leave the Include VPN gateway to enable Trusted Security Partners check box cleared.
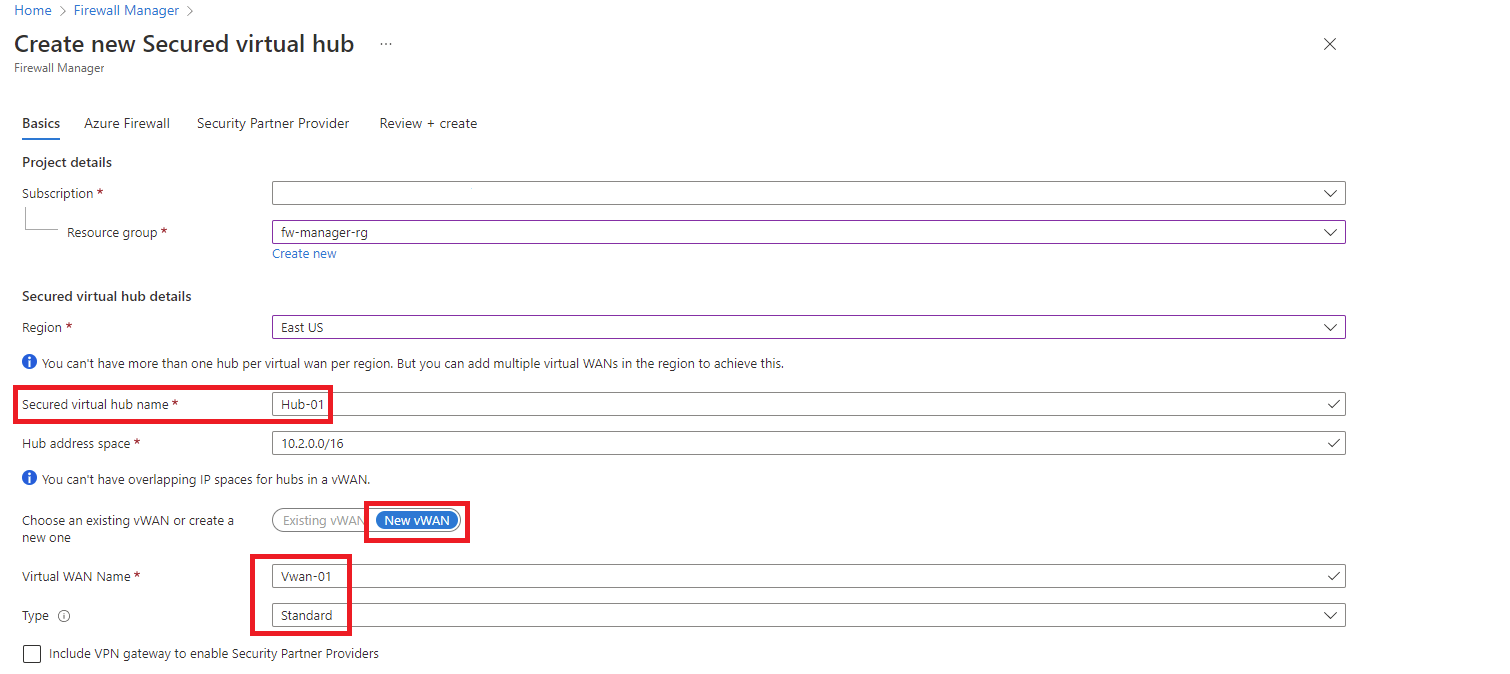
Select Next: Azure Firewall.
Accept the default Azure Firewall Enabled setting.
For Azure Firewall tier, select Standard.
Select the desired combination of Availability Zones.
Important
A Virtual WAN is a collection of hubs and services made available inside the hub. You can deploy as many Virtual WANs that you need. In a Virtual WAN hub, there are multiple services like VPN, ExpressRoute, and so on. Each of these services is automatically deployed across Availability Zones except Azure Firewall, if the region supports Availability Zones. To align with Azure Virtual WAN resiliency, you should select all available Availability Zones.
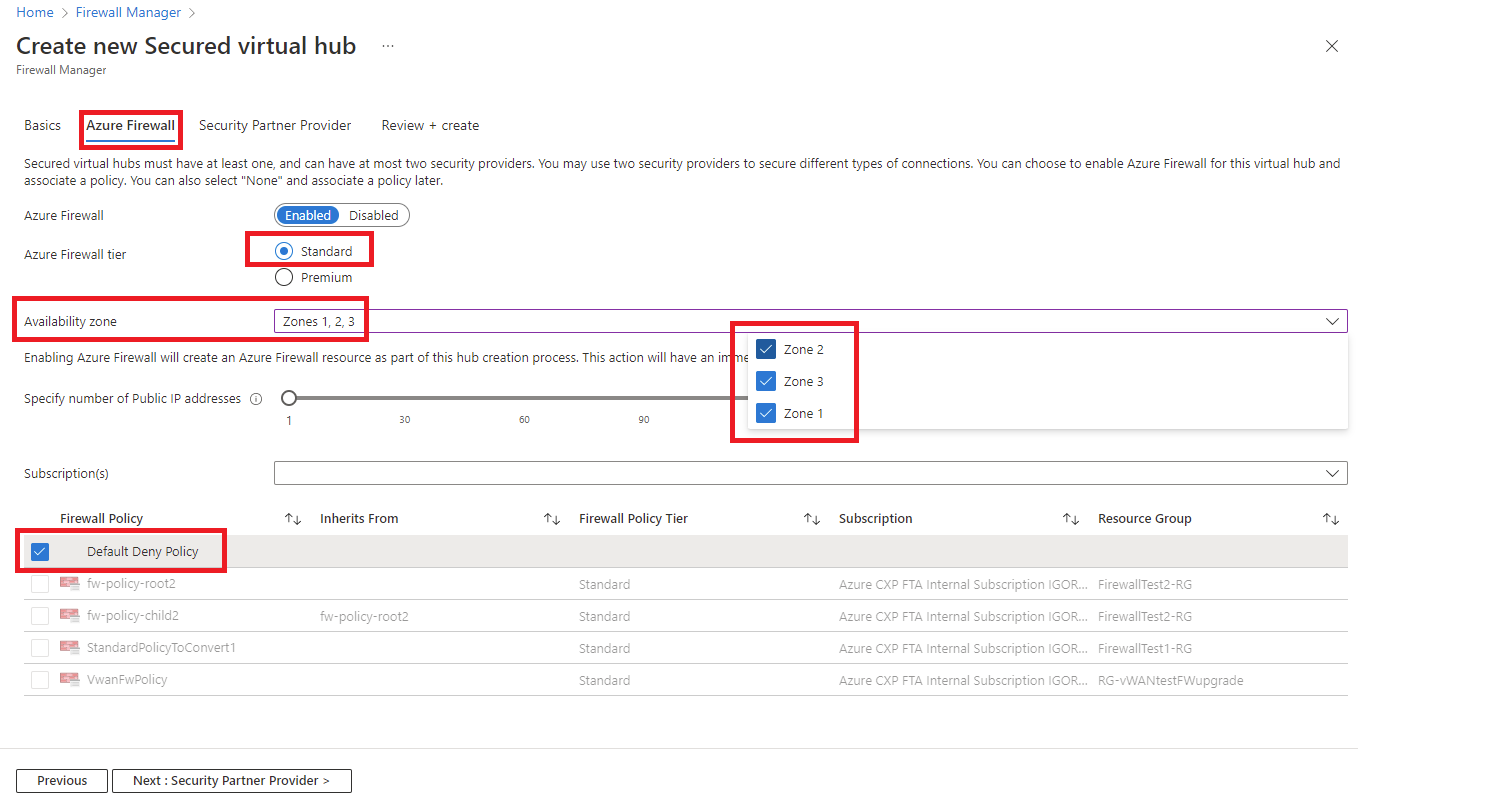
Type 1 in the Specify number of Public IP addressees text box.
Under Firewall Policy ensure the Default Deny Policy is selected. You refine your settings later in this article.
Select Next: Security Partner Provider.
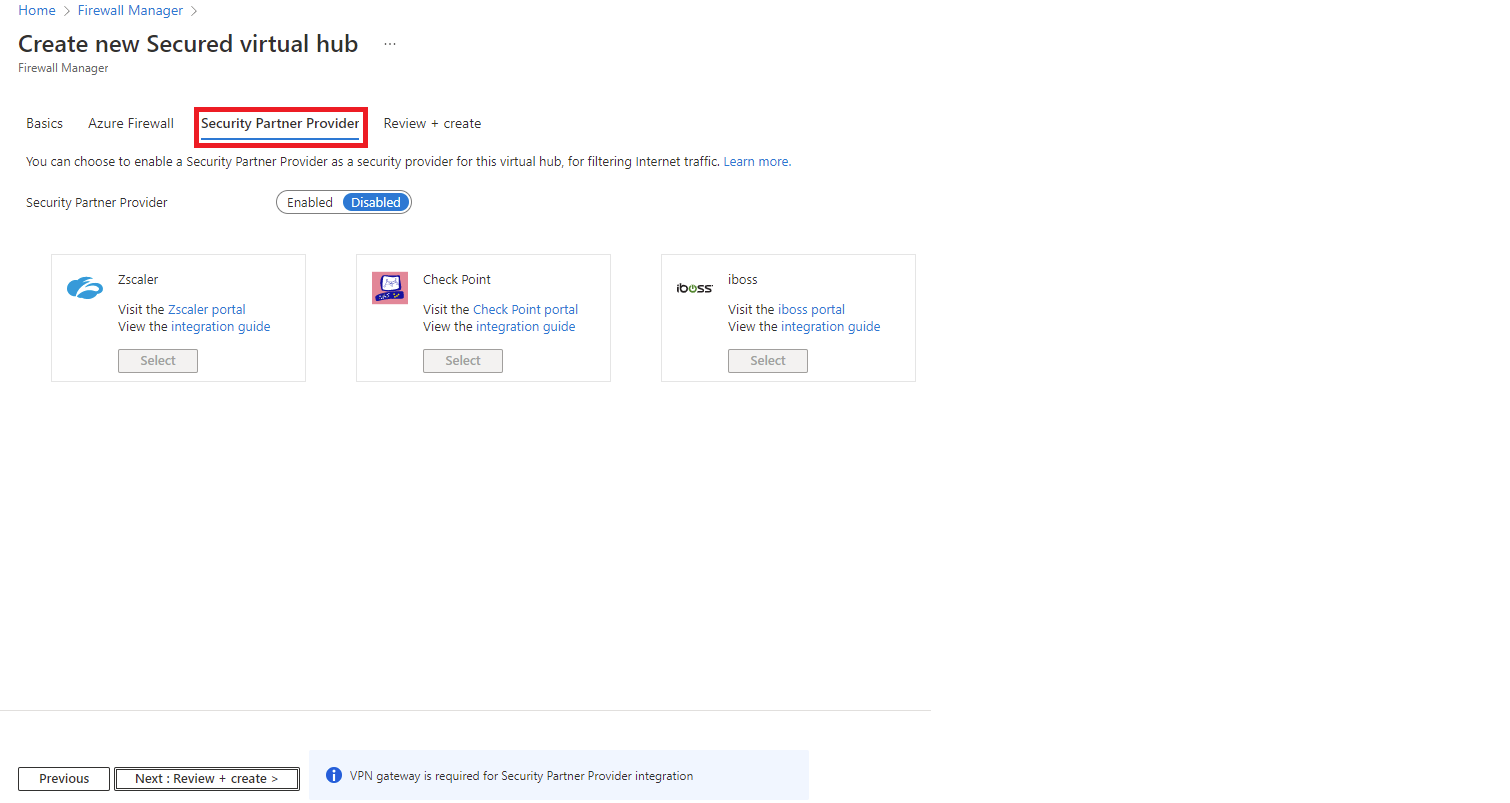
Accept the default Trusted Security Partner Disabled setting, and select Next: Review + create.
Select Create.
Connect the hub and spoke virtual networks
Now you can peer the hub and spoke virtual networks.
Select the fw-manager-rg resource group, then select the Vwan-01 virtual WAN.
Under Connectivity, select Virtual network connections.
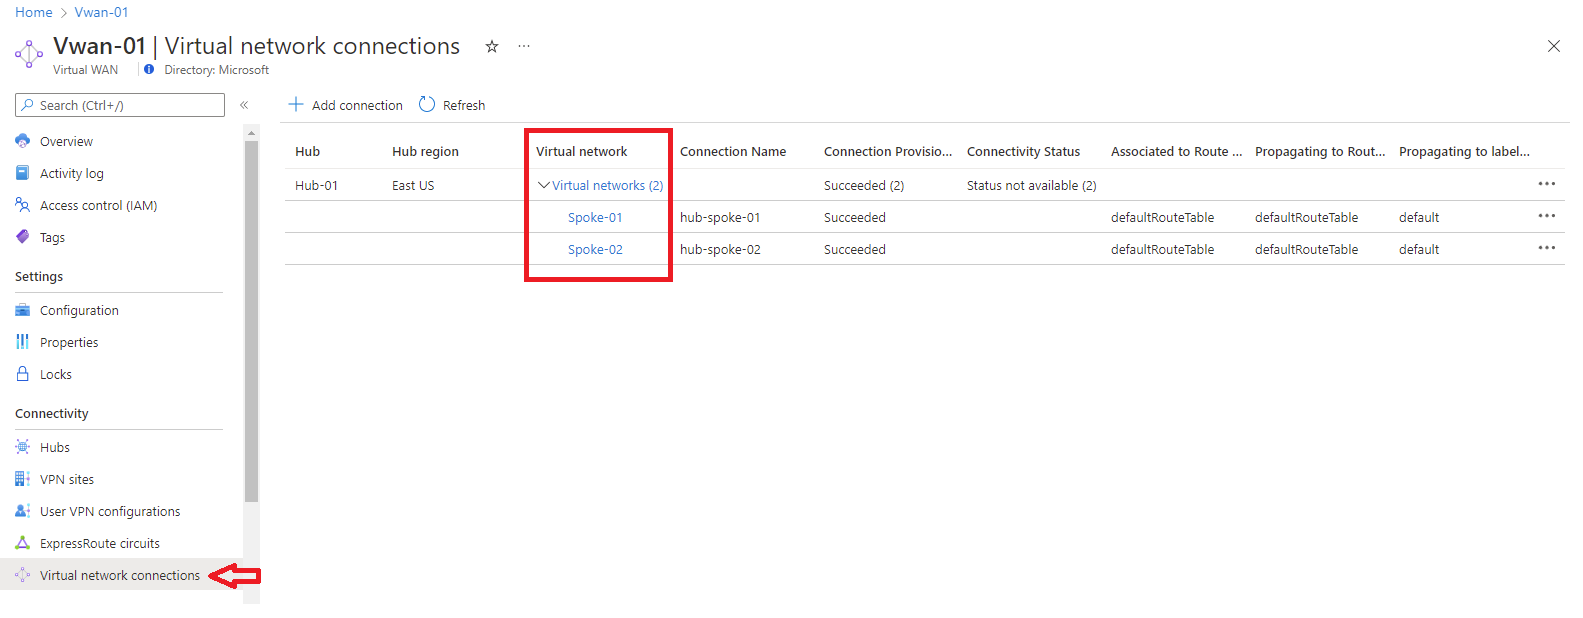
Select Add connection.
For Connection name, type hub-spoke-01.
For Hubs, select Hub-01.
For Resource group, select fw-manager-rg.
For Virtual network, select Spoke-01.
Select Create.
Repeat to connect the Spoke-02 virtual network: connection name - hub-spoke-02.
On the Azure portal, select Create a resource.
Select Windows Server 2019 Datacenter in the Popular list.
Enter these values for the virtual machine:
| Setting | Value |
|---|
| Resource group | fw-manager-rg |
| Virtual machine name | Srv-workload-01 |
| Region | (US) East US) |
| Administrator user name | type a user name |
| Password | type a password |
Under Inbound port rules, for Public inbound ports, select None.
Accept the other defaults and select Next: Disks.
Accept the disk defaults and select Next: Networking.
Select Spoke-01 for the virtual network and select Workload-01-SN for the subnet.
For Public IP, select None.
Accept the other defaults and select Next: Management.
Select Next:Monitoring.
Select Disable to disable boot diagnostics. Accept the other defaults and select Review + create.
Review the settings on the summary page, and then select Create.
Use the information in the following table to configure another virtual machine named Srv-Workload-02. The rest of the configuration is the same as the Srv-workload-01 virtual machine.
| Setting | Value |
|---|
| Virtual network | Spoke-02 |
| Subnet | Workload-02-SN |
After the servers are deployed, select a server resource, and in Networking note the private IP address for each server.
Create a firewall policy and secure your hub
A firewall policy defines collections of rules to direct traffic on one or more Secured virtual hubs. You create your firewall policy and then secure your hub.
From Firewall Manager, select Azure Firewall policies.
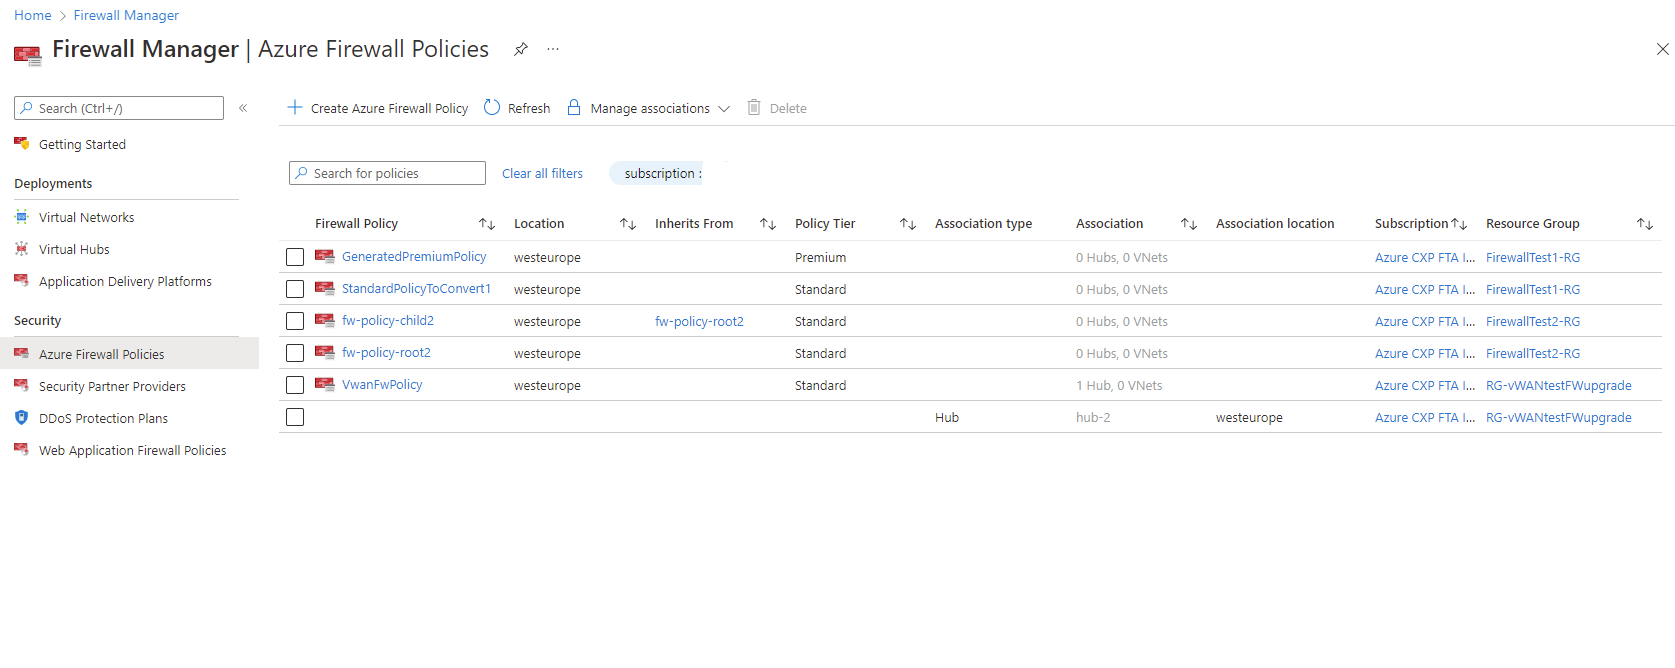
Select Create Azure Firewall Policy.

For Resource group, select fw-manager-rg.
Under Policy details, for the Name type Policy-01 and for Region select East US.
For Policy tier, select Standard.
Select Next: DNS Settings.

Select Next: TLS Inspection.
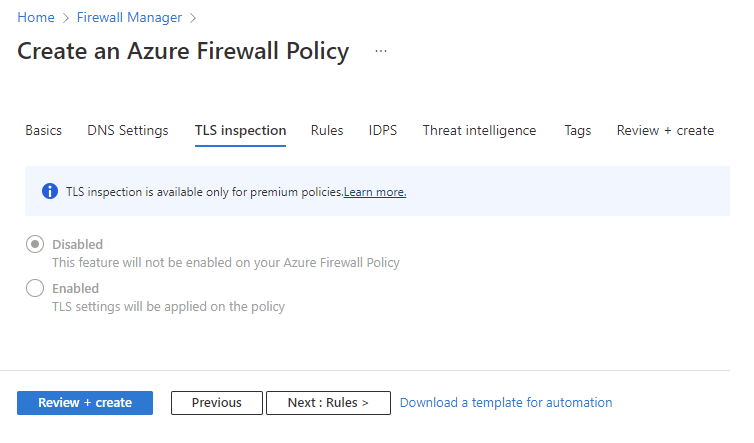
Select Next : Rules.
On the Rules tab, select Add a rule collection.

On the Add a rule collection page, type App-RC-01 for the Name.
For Rule collection type, select Application.
For Priority, type 100.
Ensure Rule collection action is Allow.
For the rule Name, type Allow-msft.
For the Source type, select IP address.
For Source, type *.
For Protocol, type http,https.
Ensure Destination type is FQDN.
For Destination, type *.microsoft.com.
Select Add.
Add a DNAT rule so you can connect a remote desktop to the Srv-Workload-01 virtual machine.
- Select Add a rule collection.
- For Name, type dnat-rdp.
- For Rule collection type, select DNAT.
- For Priority, type 100.
- For the rule Name, type Allow-rdp.
- For the Source type, select IP address.
- For Source, type *.
- For Protocol, select TCP.
- For Destination Ports, type 3389.
- For Destination, type the firewall public IP address that you noted previously.
- For Translated type, select IP Address.
- For Translated address, type the private IP address for Srv-Workload-01 that you noted previously.
- For Translated port, type 3389.
- Select Add.
Add a Network rule so you can connect a remote desktop from Srv-Workload-01 to Srv-Workload-02.
- Select Add a rule collection.
- For Name, type vnet-rdp.
- For Rule collection type, select Network.
- For Priority, type 100.
- For Rule collection action, select Allow.
- For the rule Name type Allow-vnet.
- For the Source type, select IP address.
- For Source, type *.
- For Protocol, select TCP.
- For Destination Ports, type 3389.
- For Destination Type, select IP Address.
- For Destination, type the Srv-Workload-02 private IP address that you noted previously.
- Select Add.
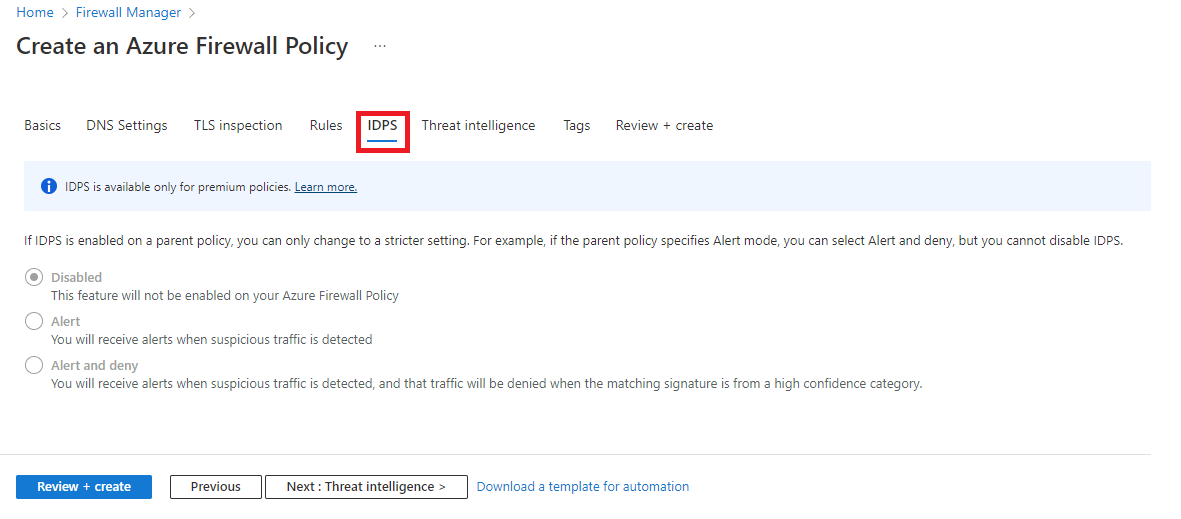
Select Next: IDPS.
On the IDPS page, select Next: Threat Intelligence
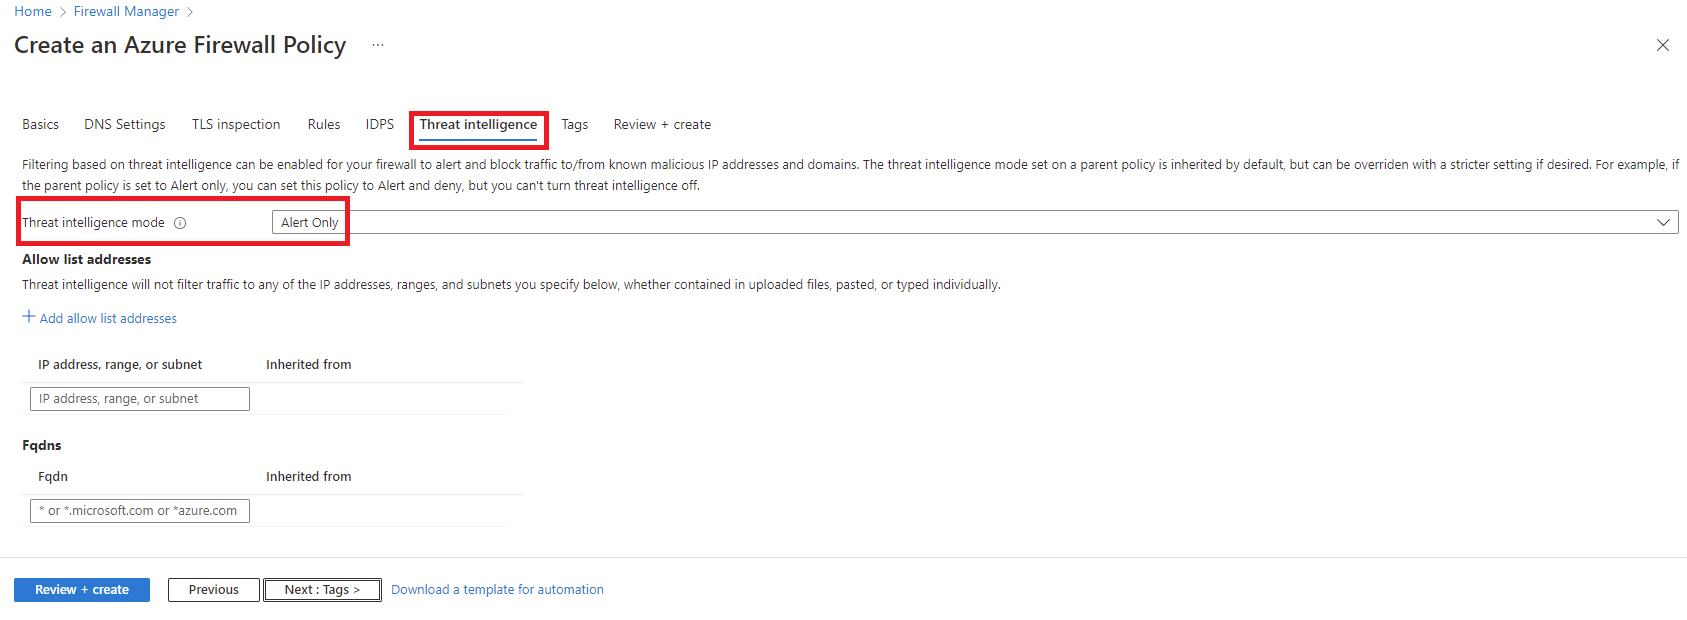
In the Threat Intelligence page, accept defaults and select Review and Create:
Review to confirm your selection and then select Create.
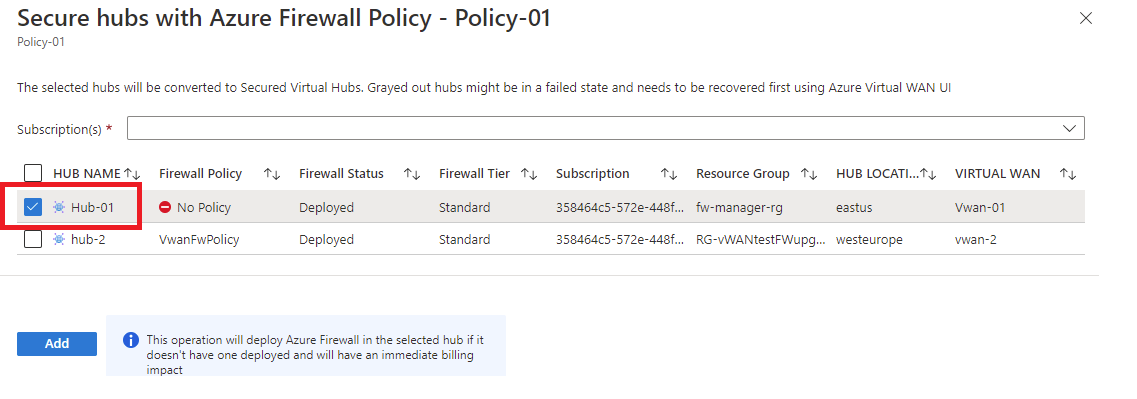
Associate the firewall policy with the hub.
From Firewall Manager, select Azure Firewall Policies.
Select the check box for Policy-01.
Select Manage associations, Associate hubs.

Select hub-01.
Select Add.
Route traffic to your hub
Now you must ensure that network traffic gets routed through your firewall.
From Firewall Manager, select Virtual hubs.
Select Hub-01.
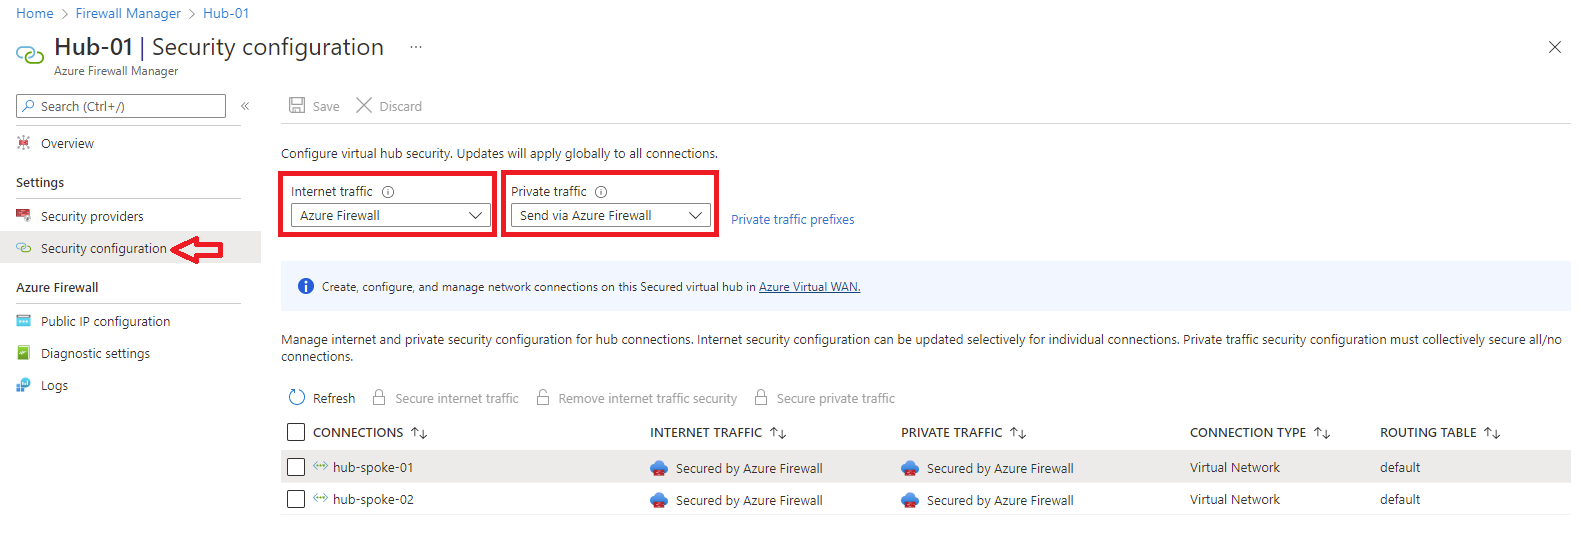
Under Settings, select Security configuration.
Under Internet traffic, select Azure Firewall.
Under Private traffic, select Send via Azure Firewall.
Under Inter-hub, select Enabled to enable the Virtual WAN routing intent feature. Routing intent is the mechanism through which you can configure Virtual WAN to route branch-to-branch (on-premises to on-premises) traffic via Azure Firewall deployed in the Virtual WAN Hub. For more information regarding prerequisites and considerations associated with the routing intent feature, see Routing Intent documentation.
Select Save.
Select OK on the Warning dialog.

Select OK on the Migrate to use inter-hub dialog.
Verify that the two connections show Azure Firewall secures both Internet and private traffic.
